Introduction
In this tutorial, we'll build a complete SAP RESTful Application Programming (RAP) transactional application from scratch using ODATA v2. We'll create a fully functional employee management system with Create, Read, Update, and Delete (CRUD) operations.
What We're Building
A transactional employee data application that allows users to:
- View a list of all employees with search functionality
- Create new employee records with complete information
- Update existing employee details
- Delete employee records from the system
Architecture Overview
We'll follow SAP's recommended three-layer architecture:
- Database Layer - Transparent table for persistent data storage
- Business Logic Layer - CDS interface view with behavior definitions
- Presentation Layer - CDS consumption view with UI annotations and service binding
This managed scenario approach automatically handles most of the CRUD operations, allowing us to focus on business logic rather than low-level implementation.
Step 1: Create a New Package
First, we need to organize our development objects in a dedicated package to keep our code modular and maintainable.
Steps:
- Open the ABAP Development Tools (ADT)
- Right-click in the project explorer and select New → ABAP Package
- Provide a name (e.g.,
ZEP_EMPLOYEE_MGMT) and description - Click Finish

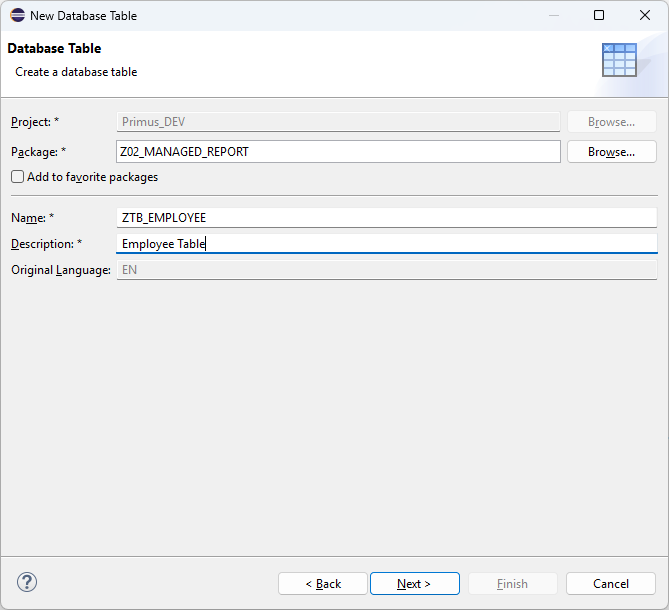
Step 2: Create the Base Database Table
The foundation of any application is a well-designed database table. This table will store all employee information persistently.
Steps:
- Right-click on your package → New → ABAP Table (Dictionary)
- Name it
ZTAB_EMPLOYEE - Define the table structure as shown below
Key Design Points:
- Client field: Required for multi-tenancy support in SAP
- Employee ID: Primary key field (numeric, 10 digits)
- Personal Information: First name, last name, full name, gender, DOB
- Contact Details: Email and phone number
- Employment Info: Department, designation, joining date, salary
- Audit Fields: Track who created/modified records and when
@EndUserText.label : 'Employee Table'
@AbapCatalog.enhancement.category : #NOT_EXTENSIBLE
@AbapCatalog.tableCategory : #TRANSPARENT
@AbapCatalog.deliveryClass : #A
@AbapCatalog.dataMaintenance : #ALLOWED
define table ztab_employee {

  key client      : abap.clnt not null;
  key employee_id : abap.numc(10) not null;
  first_name      : abap.char(40);
  last_name       : abap.char(40);
  full_name       : abap.char(80);
  gender          : abap.char(1);
  date_of_birth   : abap.dats;
  email           : abap.char(100);
  phone_number    : abap.char(15);
  department      : abap.char(40);
  designation     : abap.char(40);
  joining_date    : abap.dats;
  @Semantics.amount.currencyCode : 'ztab_employee.currency'
  salary          : abap.curr(15,2);
  currency        : abap.cuky;
  created_by      : syuname;
  created_at      : timestampl;
  changed_by      : syuname;
  changed_at      : timestampl;

}
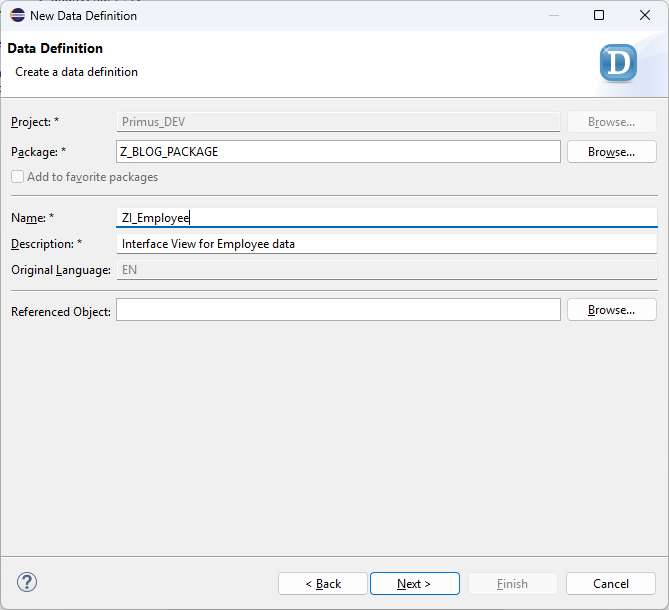
Step 3: Create the Interface CDS View
The interface view is the business logic layer that abstracts the database table and provides a clean interface for the application. It defines all fields that should be accessible and handles any business logic calculations.
Steps:
- Right-click on your package → New → CDS View
- Name it
ZI_EMPLOYEE - This is a root view (indicated by the
@AccessControl.authorizationCheckannotation) - Select
ztab_employeeas the data source - Activate the view using Ctrl+F3
Key Concept:
- This view acts as a gateway to the database table
- Any future changes to the table structure are handled here, keeping consumption views stable
- Metadata annotations here are inherited by consumption views
@AccessControl.authorizationCheck: #NOT_REQUIRED
@EndUserText.label: 'Employee Interface CDS View'
@Metadata.ignorePropagatedAnnotations: true
define root view entity ZI_EMPLOYEE
  as select from ztab_employee
{
  key employee_id,
      first_name,
      last_name,
      full_name,
      gender,
      date_of_birth,
      email,
      phone_number,
      department,
      designation,
      joining_date,
      @Semantics.amount.currencyCode: 'currency'
      salary,
      currency,
      created_by,
      created_at,
      changed_by,
      changed_at
}
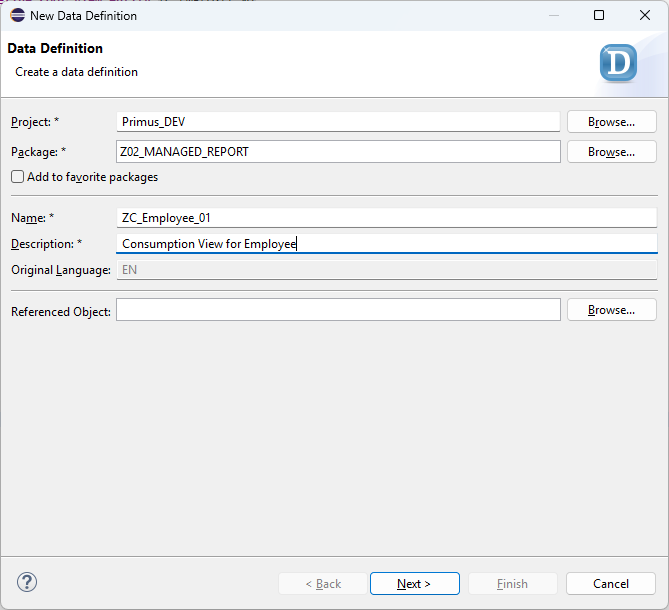
Step 4: Create the Consumption CDS View
The consumption view is what the UI layer actually uses. It provides role-specific filtering, additional UI metadata, and field annotations for the UI rendering engine.
Steps:
- Right-click on your package → New → CDS View
- Name it
ZC_EMPLOYEE_01 - Use
provider contract transactional_query- this enables transactional operations (CRUD) - Project all fields from
ZI_EMPLOYEE - Add
@Search.searchable: trueand@Search.defaultSearchElement: trueannotations to enable search functionality - Activate the view using Ctrl+F3
Key Point:
- The
transactional_queryprovider contract enables Create, Update, and Delete operations - Search annotations enable users to quickly find employees by ID, name, or other fields
- This view is what the SAP Fiori UI will consume
@AccessControl.authorizationCheck: #NOT_REQUIRED
@EndUserText.label: 'Employee Consumption View'
@Metadata.allowExtensions: true
@Search.searchable: true
define root view entity ZC_EMPLOYEE_01
  provider contract transactional_query
  as projection on ZI_EMPLOYEE
{
      @Search.defaultSearchElement: true
  key employee_id,

      @Search.defaultSearchElement: true
      first_name,

      @Search.defaultSearchElement: true
      last_name,

      full_name,
      gender,
      date_of_birth,
      email,
      phone_number,
      department,
      designation,
      joining_date,

      @Semantics.amount.currencyCode: 'currency'
      salary,

      currency,

      created_by,
      created_at,
      changed_by,
      changed_at
}
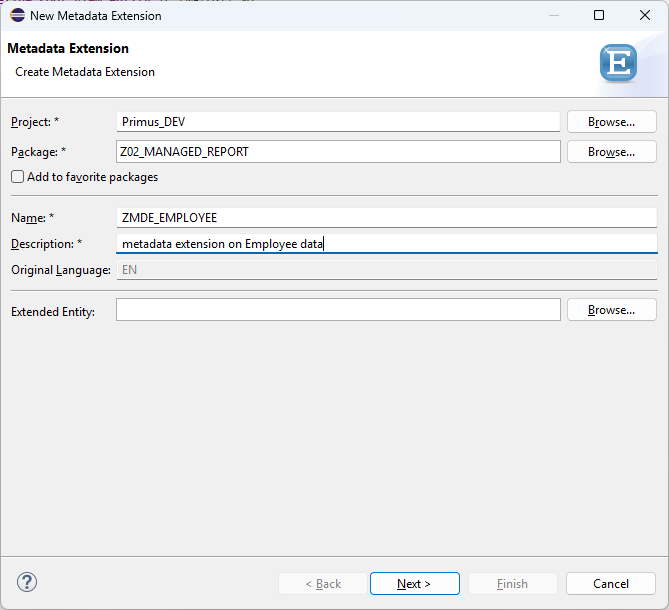
Step 5: Create the UI Metadata Extension
The metadata extension enriches the consumption view with UI annotations that define how data should be presented to users. This includes page layout, field properties, and grouping information.
Steps:
- Right-click on your package → New → Metadata Extension
- Target entity should be
ZC_EMPLOYEE_01 - Apply the annotations shown below
- Activate the metadata extension using Ctrl+F3
What These Annotations Do:
@UI.headerInfo- Defines the title and description shown at the top@UI.facet- Creates tabs/sections on the detail page (General Info, Employment, Audit)@UI.lineItem- Shows fields in the list report table@UI.identification- Shows fields in the object detail page@UI.fieldGroup- Groups fields together in sections
@Metadata.layer: #CORE
@UI.headerInfo: {
  typeName: 'Employee',
  typeNamePlural: 'Employees',
  title: {
    type: #STANDARD,
    value: 'full_name'
  },
  description: {
    value: 'designation'
  }
}
annotate entity ZC_EMPLOYEE_01 with
{

  @UI.facet: [
    {
      id: 'GeneralInfo',
      purpose: #STANDARD,
      type: #IDENTIFICATION_REFERENCE,
      label: 'General Information',
      position: 10
    },
    {
      id: 'EmploymentInfo',
      purpose: #STANDARD,
      type: #FIELDGROUP_REFERENCE,
      targetQualifier: 'Employment',
      label: 'Employment Details',
      position: 20
    },
    {
      id: 'AuditInfo',
      purpose: #STANDARD,
      type: #FIELDGROUP_REFERENCE,
      targetQualifier: 'Audit',
      label: 'Audit Information',
      position: 30
    }
  ]

  @EndUserText.label: 'Employee ID'
  @UI.lineItem: [{ position: 10 }]
  @UI.identification: [{ position: 10 }]
  employee_id;

  @EndUserText.label: 'First Name'
  @UI.lineItem: [{ position: 20 }]
  @UI.identification: [{ position: 20 }]
  first_name;

  @EndUserText.label: 'Last Name'
  @UI.lineItem: [{ position: 30 }]
  @UI.identification: [{ position: 30 }]
  last_name;

  @EndUserText.label: 'Full Name'
  @UI.lineItem: [{ position: 40 }]
  @UI.identification: [{ position: 40 }]
  full_name;

  @EndUserText.label: 'Gender'
  @UI.lineItem: [{ position: 50 }]
  @UI.identification: [{ position: 50 }]
  gender;

  @EndUserText.label: 'Date of Birth'
  @UI.identification: [{ position: 60 }]
  date_of_birth;

  @EndUserText.label: 'Email Address'
  @UI.lineItem: [{ position: 60 }]
  @UI.identification: [{ position: 70 }]
  email;

  @EndUserText.label: 'Phone Number'
  @UI.lineItem: [{ position: 70 }]
  @UI.identification: [{ position: 80 }]
  phone_number;

  @EndUserText.label: 'Department'
  @UI.lineItem: [{ position: 80 }]
  @UI.fieldGroup: [{
      qualifier: 'Employment',
      position: 10
  }]
  department;

  @EndUserText.label: 'Designation'
  @UI.lineItem: [{ position: 90 }]
  @UI.fieldGroup: [{
      qualifier: 'Employment',
      position: 20
  }]
  designation;

  @EndUserText.label: 'Joining Date'
  @UI.fieldGroup: [{
      qualifier: 'Employment',
      position: 30
  }]
  joining_date;

  @EndUserText.label: 'Salary'
  @UI.lineItem: [{ position: 100 }]
  @UI.fieldGroup: [{
      qualifier: 'Employment',
      position: 40
  }]
  salary;

  @EndUserText.label: 'Currency'
  @UI.fieldGroup: [{
      qualifier: 'Employment',
      position: 50
  }]
  currency;

  @EndUserText.label: 'Created By'
  @UI.fieldGroup: [{
      qualifier: 'Audit',
      position: 10
  }]
  created_by;

  @EndUserText.label: 'Created At'
  @UI.fieldGroup: [{
      qualifier: 'Audit',
      position: 20
  }]
  created_at;

  @EndUserText.label: 'Changed By'
  @UI.fieldGroup: [{
      qualifier: 'Audit',
      position: 30
  }]
  changed_by;

  @EndUserText.label: 'Changed At'
  @UI.fieldGroup: [{
      qualifier: 'Audit',
      position: 40
  }]
  changed_at;

}
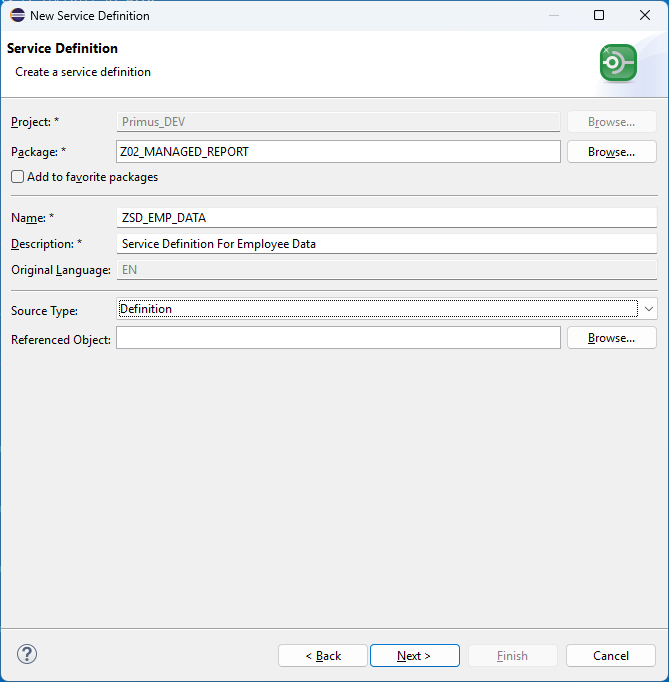
Step 6: Create the Service Definition
The service definition exposes the consumption view via an OData service. This is what external applications and UI tools will consume.
Steps:
- Right-click on your package → New → Service Definition
- Name it
ZSD_EMP_DATA - Specify
ZC_EMPLOYEE_01as the leading entity - Expose the
ZC_EMPLOYEE_01entity - Activate using Ctrl+F3
What It Does:
- Makes your CDS view available as an OData v2 service
- The
leadingEntityannotation tells the system which entity is the main one - Only exposed entities are accessible via the service
@EndUserText.label: 'Service Definition For Employee Data'
@ObjectModel.leadingEntity.name: 'ZC_EMPLOYEE_01'
define service ZSD_EMP_DATA {
  expose ZC_EMPLOYEE_01;
}
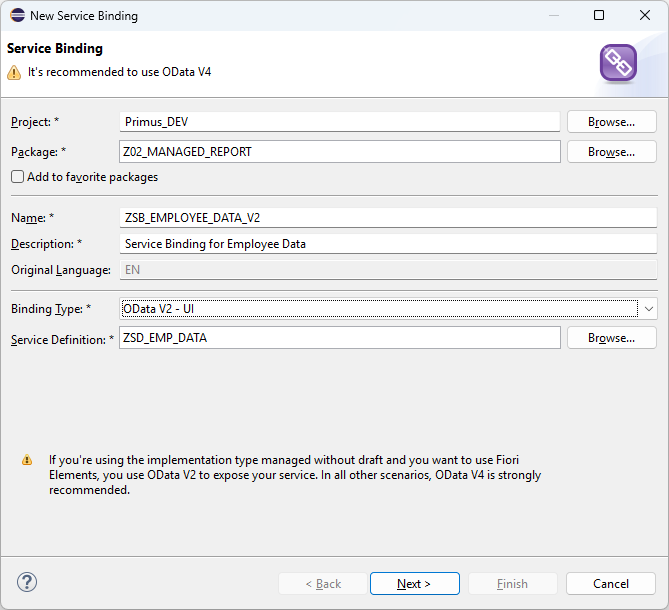
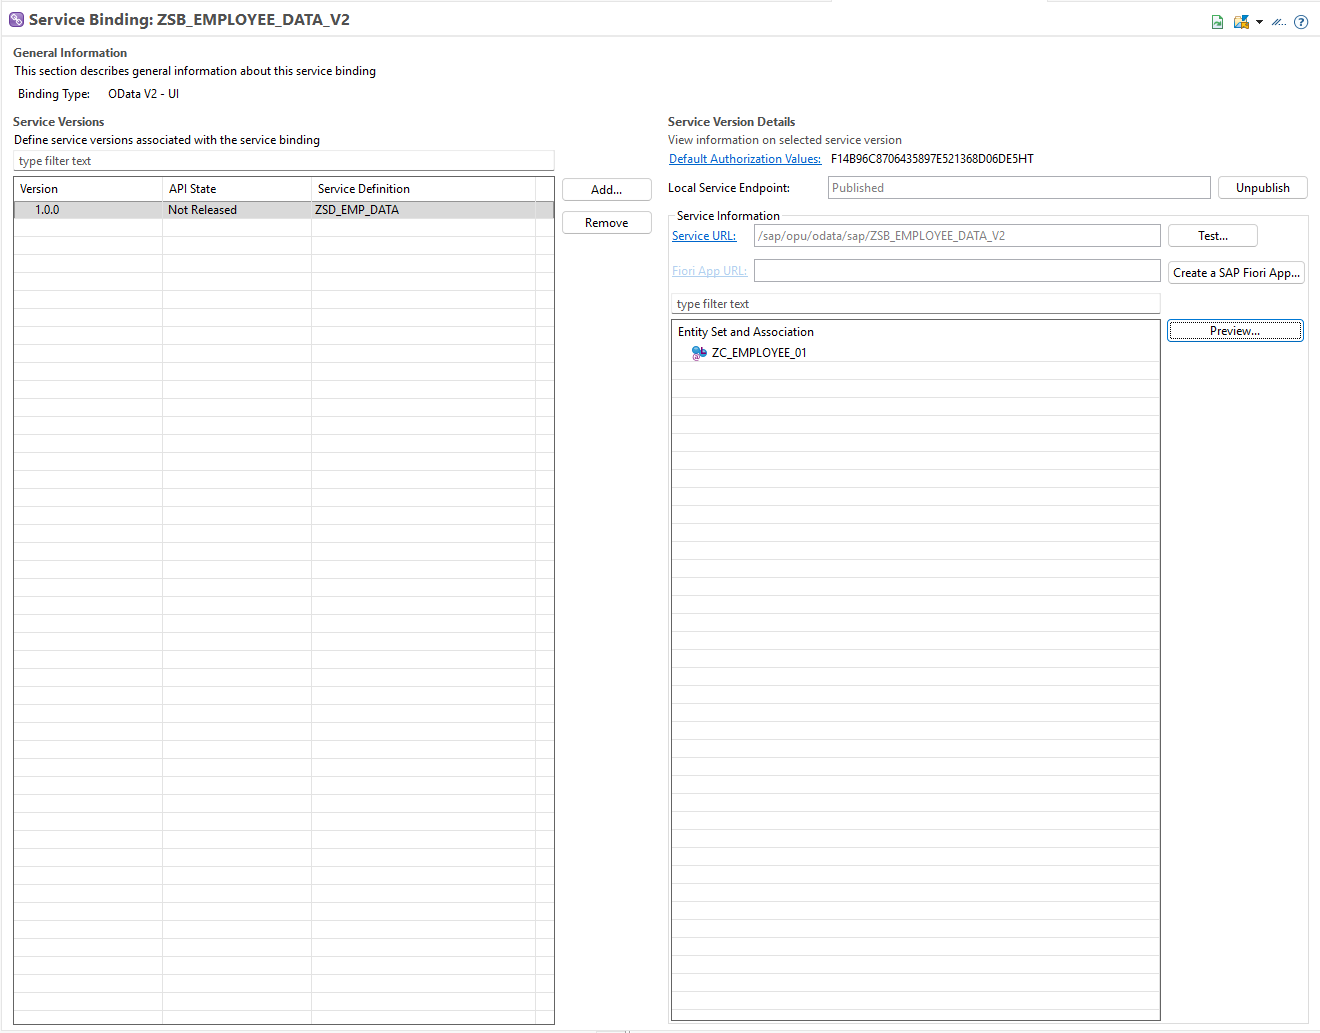
Step 7: Create and Publish the Service Binding
The service binding connects your service definition to a specific protocol (in this case, OData v2) and makes it available for consumption.
Steps:
- Right-click on your package → New → Service Binding
- Choose OData Version: V2 - Web API
- Click Finish
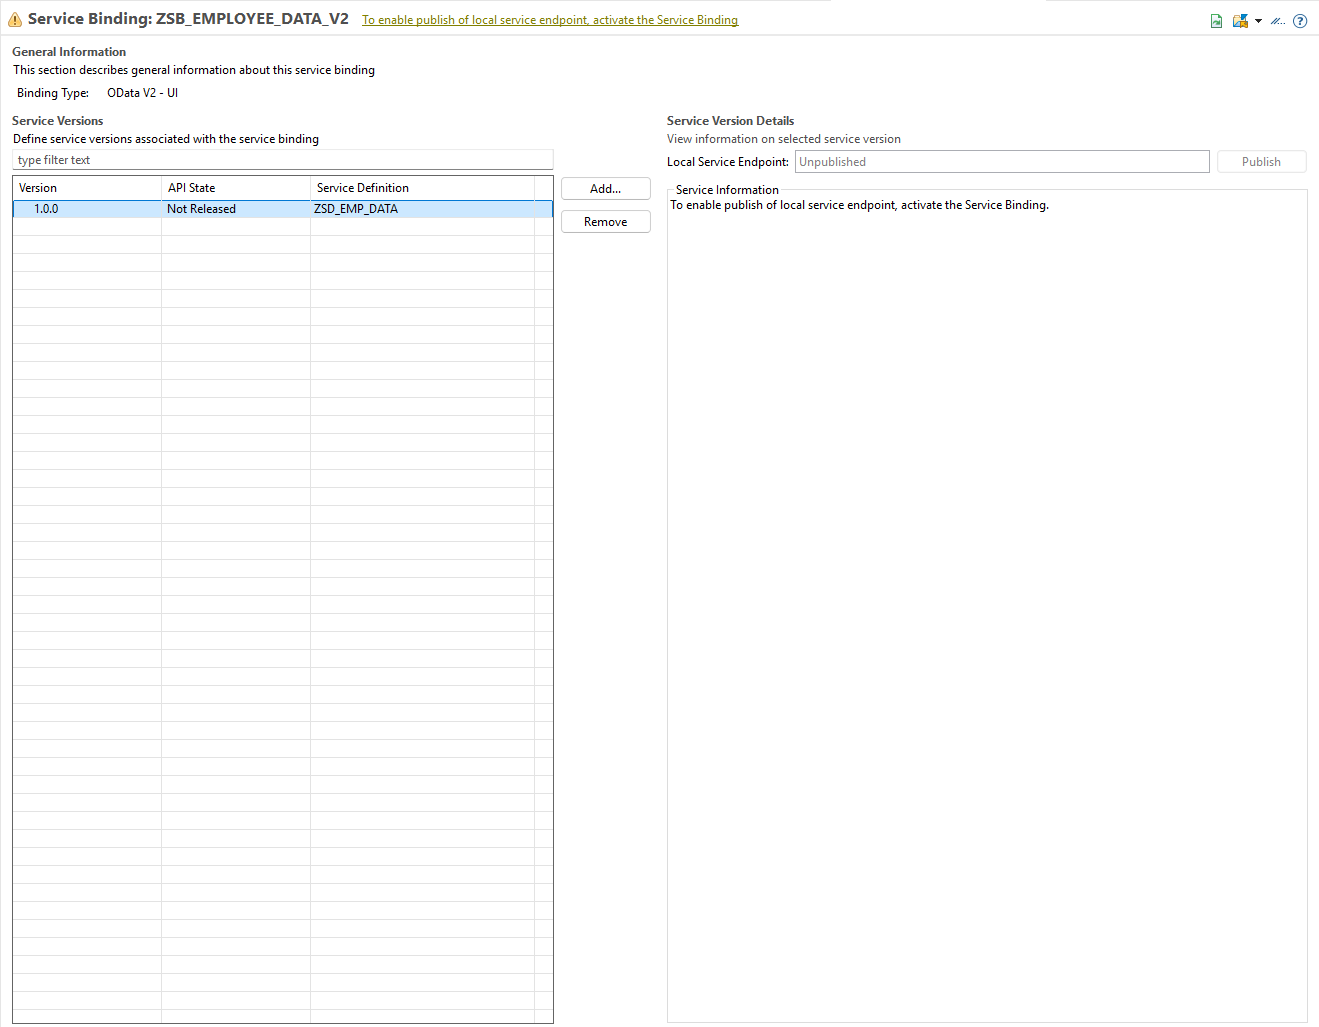
- Activate the service binding using Ctrl+F3
- Click the Publish button to expose the service
Expected Result: After publishing, you'll see:
- The service is now active and available
- Generated objects appear in your package
- Entity sets are listed and ready for preview

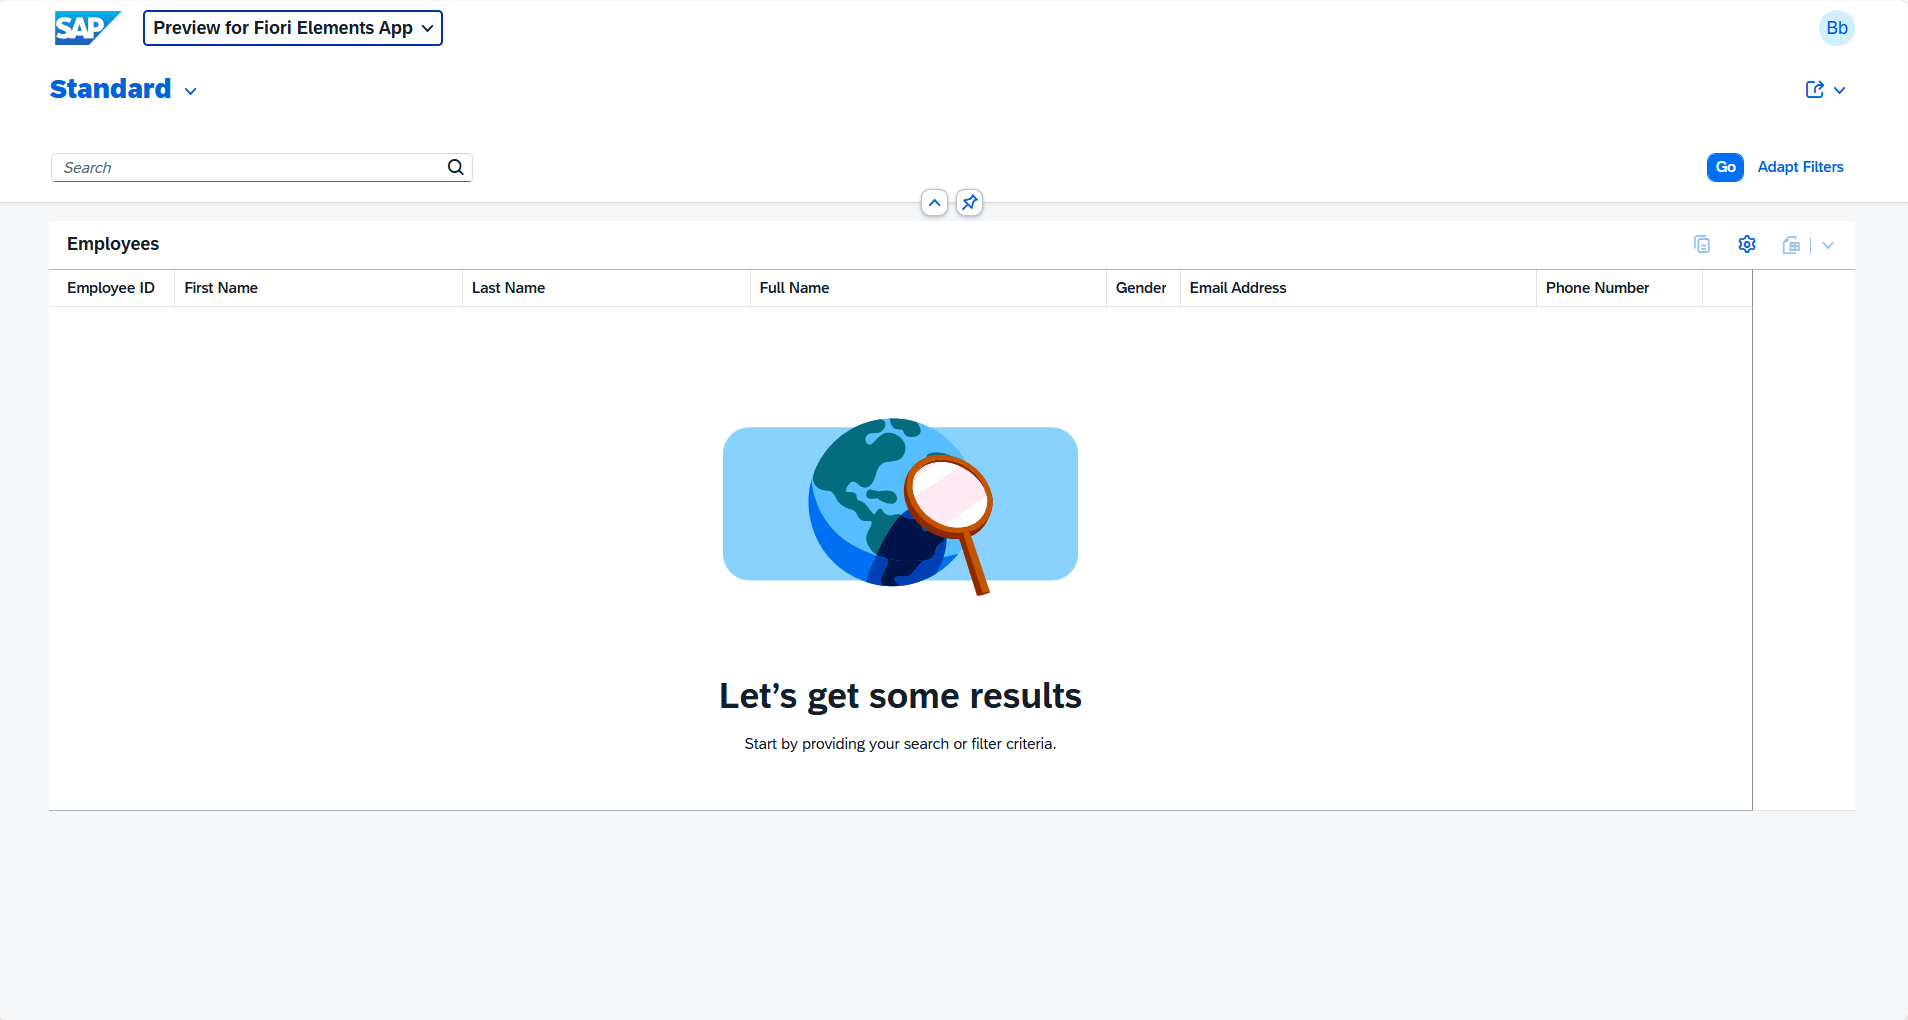
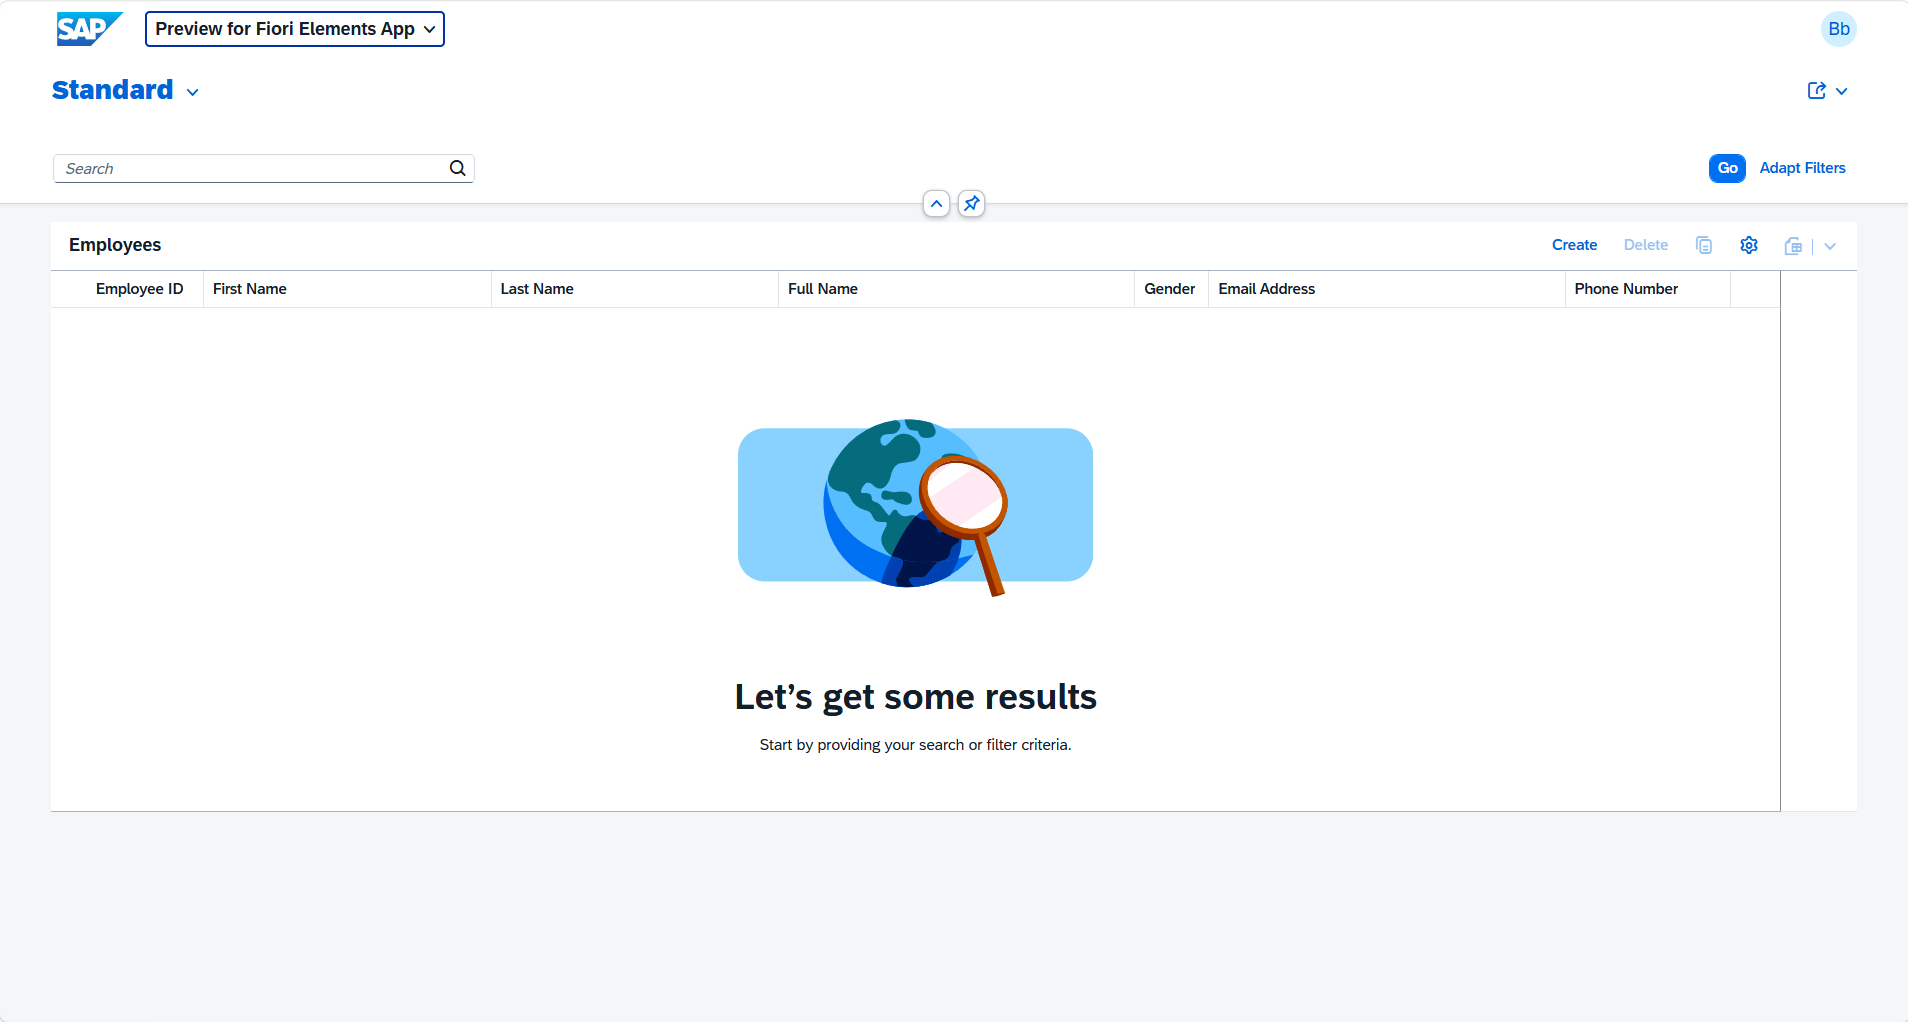
Step 8: Preview the Service
At this point, your application is read-only. Let's preview what we have so far.
Steps:
- Click the Entity Sets section in the service binding editor
- Select
C_EMPLOYEE_01 - Click the Preview button
What You'll See: A list report displaying all employees with a clean table layout. Note: This is currently read-only because we haven't added CRUD behavior yet.
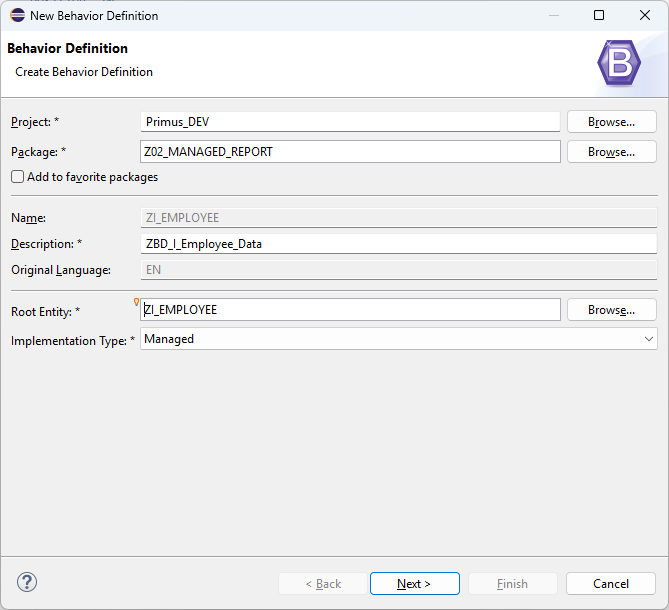
Step 9: Add Behavior Definition to Interface View
To enable CRUD operations, we need to define the business logic behavior. In the managed scenario, SAP handles most operations automatically.
Steps:
- Right-click on your package → New → Behavior Definition
- Name it
ZI_EMPLOYEE(same name as the interface view) - Select Managed as the scenario type (enables automatic CRUD handling)
- Specify the persistent table:
ztab_employee - Set up authorization and lock handling
- Activate using Ctrl+F3
What This Enables:
- Create: Users can create new employee records
- Update: Existing records can be modified
- Delete: Records can be deleted
- Lock: Prevents concurrent modification conflicts
- Authorization: Controls who can perform these operations
managed implementation in class zbp_i_employee unique;
strict ( 2 );

define behavior for ZI_EMPLOYEE
persistent table ztab_employee
lock master
authorization master ( instance )
{
  create ( authorization : global );
  update;
  delete;
  field ( readonly ) employee_id;
}
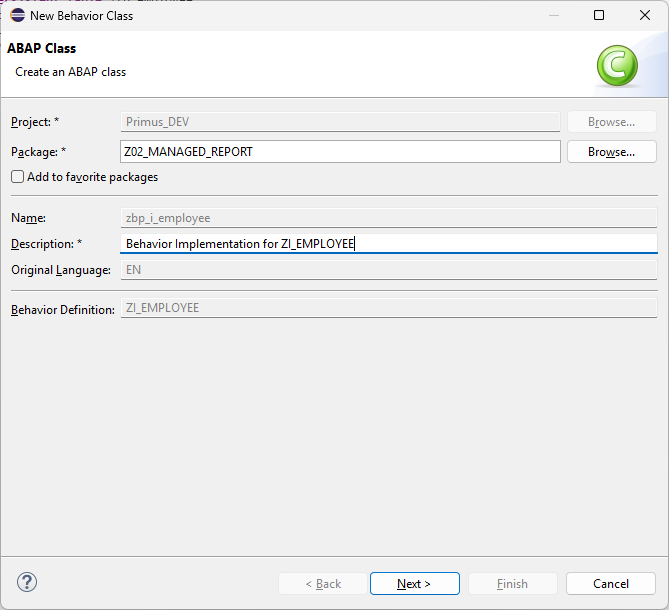
The system automatically creates a behavior handler class zbp_i_employee with default authorization methods:
CLASS lhc_ZI_EMPLOYEE DEFINITION INHERITING FROM cl_abap_behavior_handler.
  PRIVATE SECTION.

    METHODS get_instance_authorizations FOR INSTANCE AUTHORIZATION
      IMPORTING keys REQUEST requested_authorizations FOR zi_employee RESULT result.

    METHODS get_global_authorizations FOR GLOBAL AUTHORIZATION
      IMPORTING REQUEST requested_authorizations FOR zi_employee RESULT result.

ENDCLASS.

CLASS lhc_ZI_EMPLOYEE IMPLEMENTATION.

  METHOD get_instance_authorizations.
  ENDMETHOD.

  METHOD get_global_authorizations.
  ENDMETHOD.

ENDCLASS.
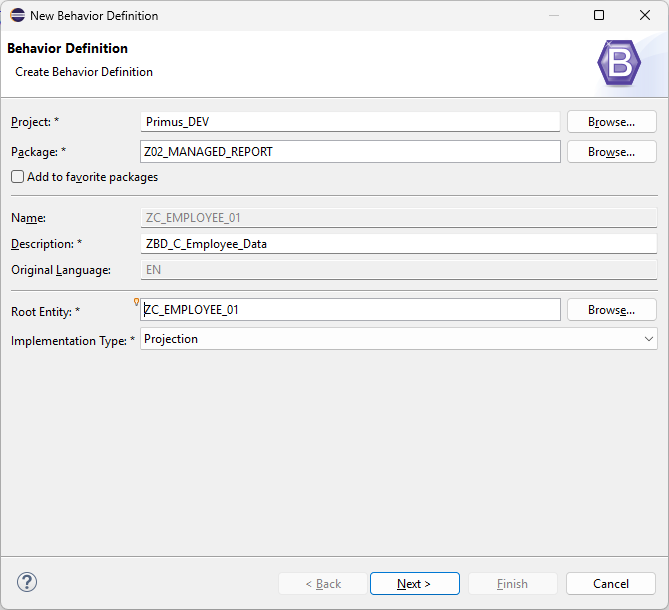
Step 10: Add Behavior Definition to Consumption View
Now we need to tell the consumption view to use the CRUD operations from the interface view.
Steps:
- Right-click on your package → New → Behavior Definition
- Name it
ZC_EMPLOYEE_01(same name as the consumption view) - Select Projection type
- Use the create, update, and delete operations from the interface view
- Activate using Ctrl+F3
After Activating: The list report will now show CRUD buttons:
- Create button to add new employees
- Edit buttons to modify records
- Delete buttons to remove records
projection;
strict ( 2 );

define behavior for ZC_EMPLOYEE_01
{
  use create;
  use update;
  use delete;
}
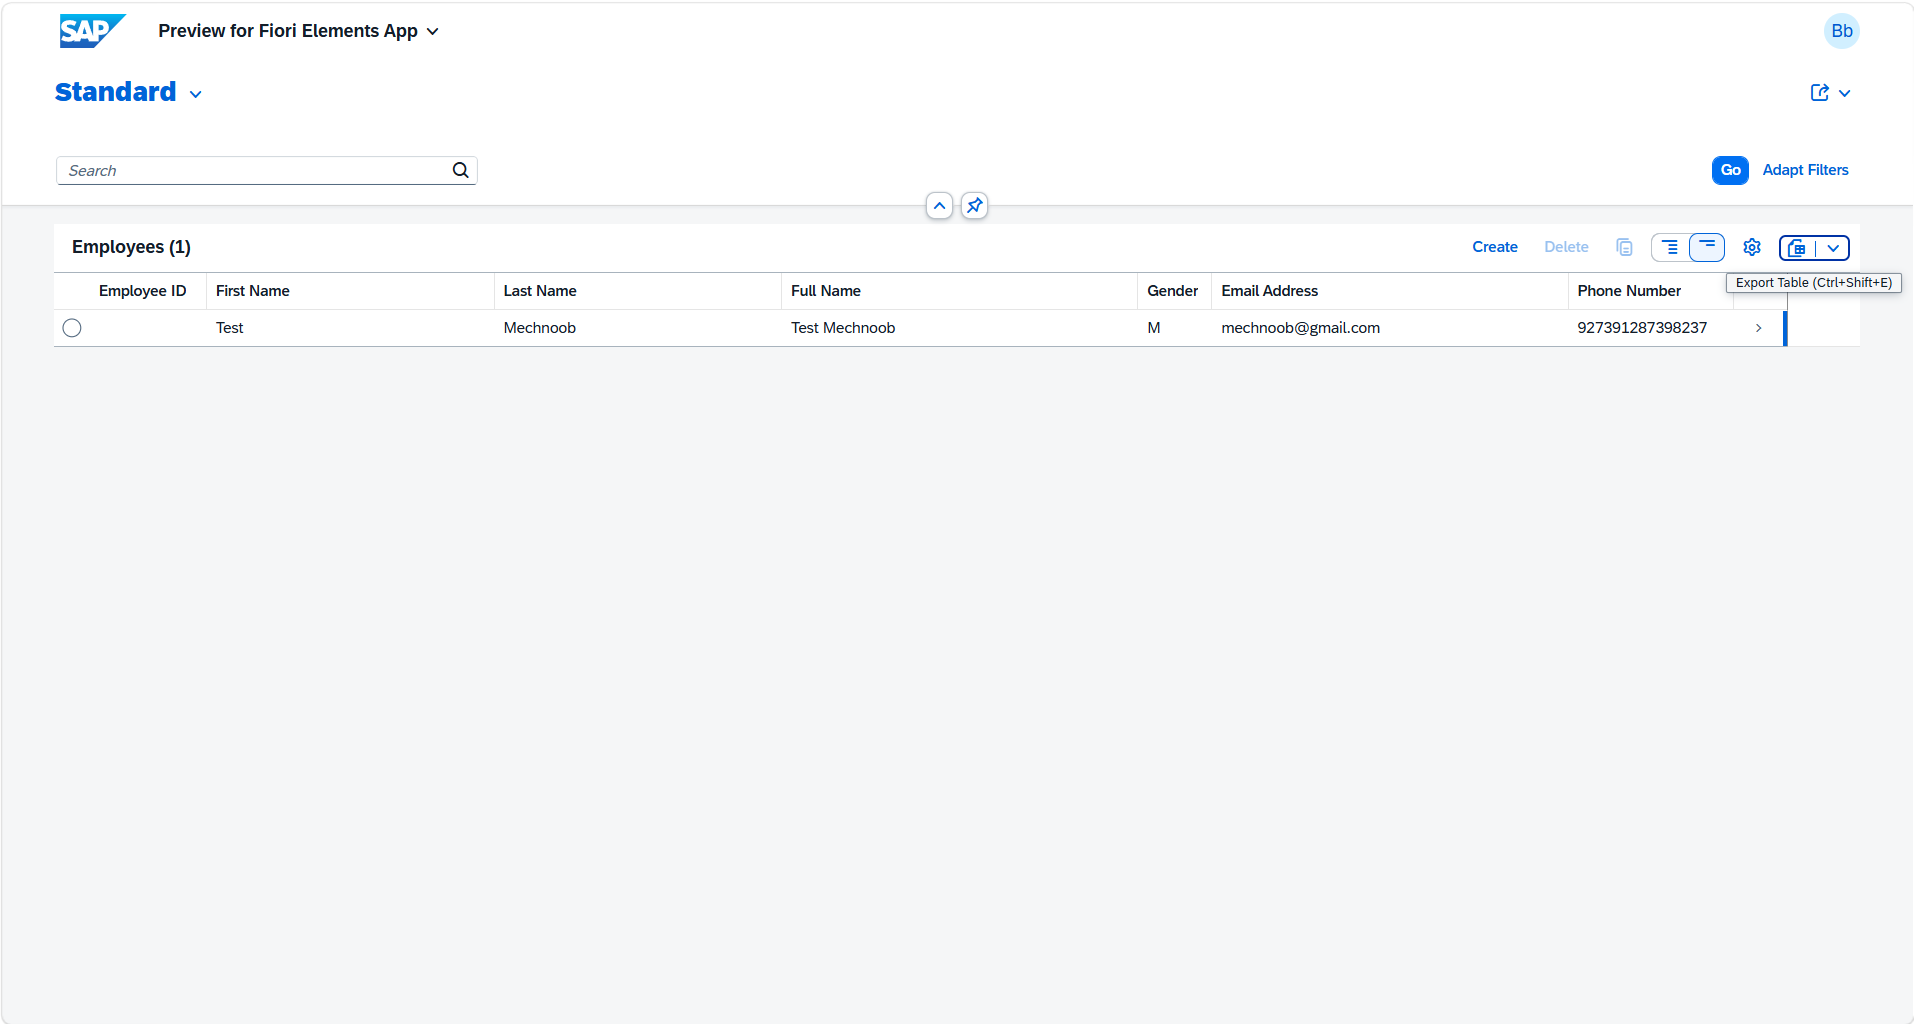
Step 11: Test CRUD Operations
Now let's test the full functionality.
Creating an Employee:
- Click the Create button in the list report
- Fill in the employee details in the form that appears

- Click Save to persist the record
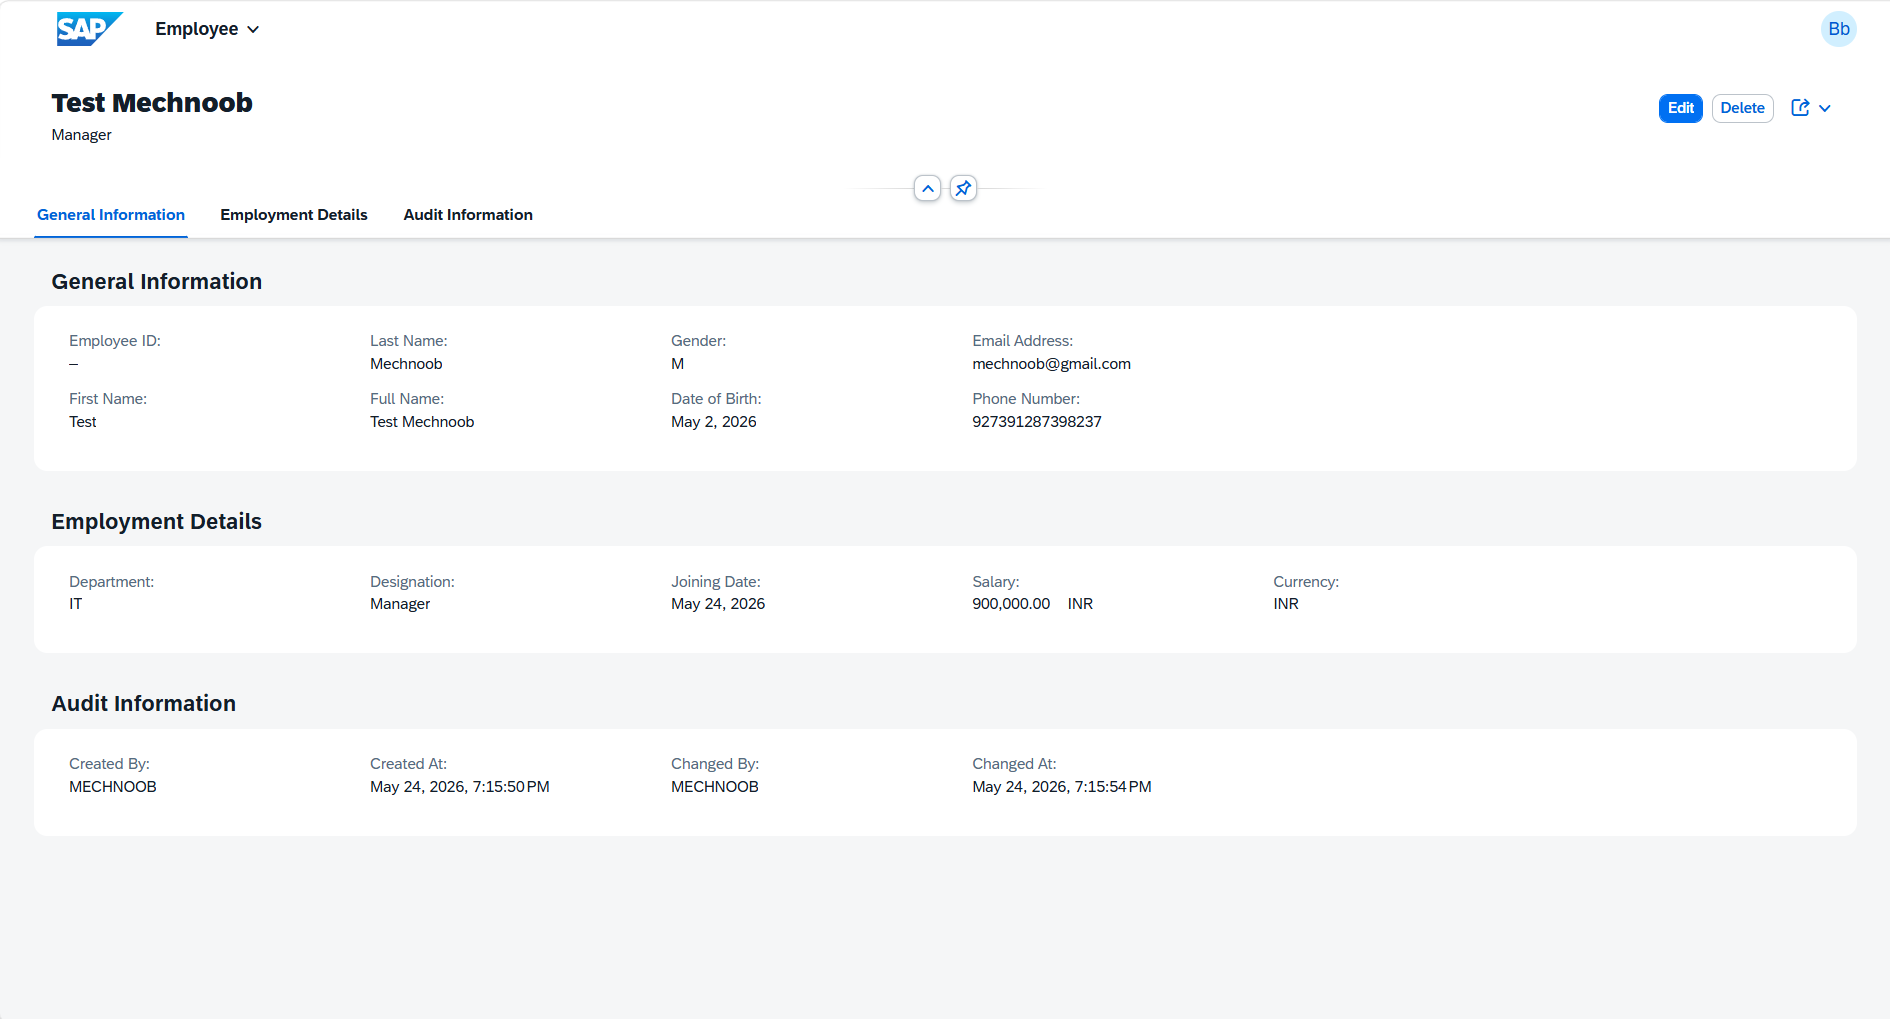
Editing and Deleting:
- Click on any employee record to open the detail view
- Edit fields and click Save to update
- Click Delete to remove the record
Summary
Congratulations! You've successfully created a complete RAP transactional application with:
- Database table for persistent storage
- CDS views for data access and business logic
- UI metadata for a professional user interface
- Service binding exposing OData v2 APIs
- Managed behavior enabling CRUD operations
- A working employee management system