Introduction
In this blog, we will walk through the complete deployment process of a RAP (RESTful Application Programming) Application.
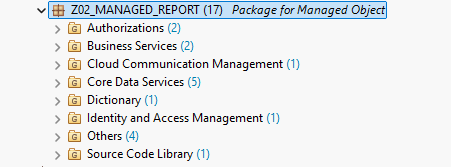
We will be deploying the RAP Application created in our previous blog. Below is the structure of the application before deployment.
There are two ways to deploy a Fiori Application — using Business Application Studio (BAS) or using VS Code locally. If you are using BAS, skip directly to Step 4, as all the required tools come pre-installed in the BAS environment.
In this guide, we will deploy using a local VS Code setup. Before we can deploy, we need to configure VS Code to work with Fiori development.
Step 1: Install VS Code
Begin with a fresh installation of Visual Studio Code. Download and install it from the official VS Code website if you haven't already.
Step 2: Add Required Extensions to VS Code for Fiori Development
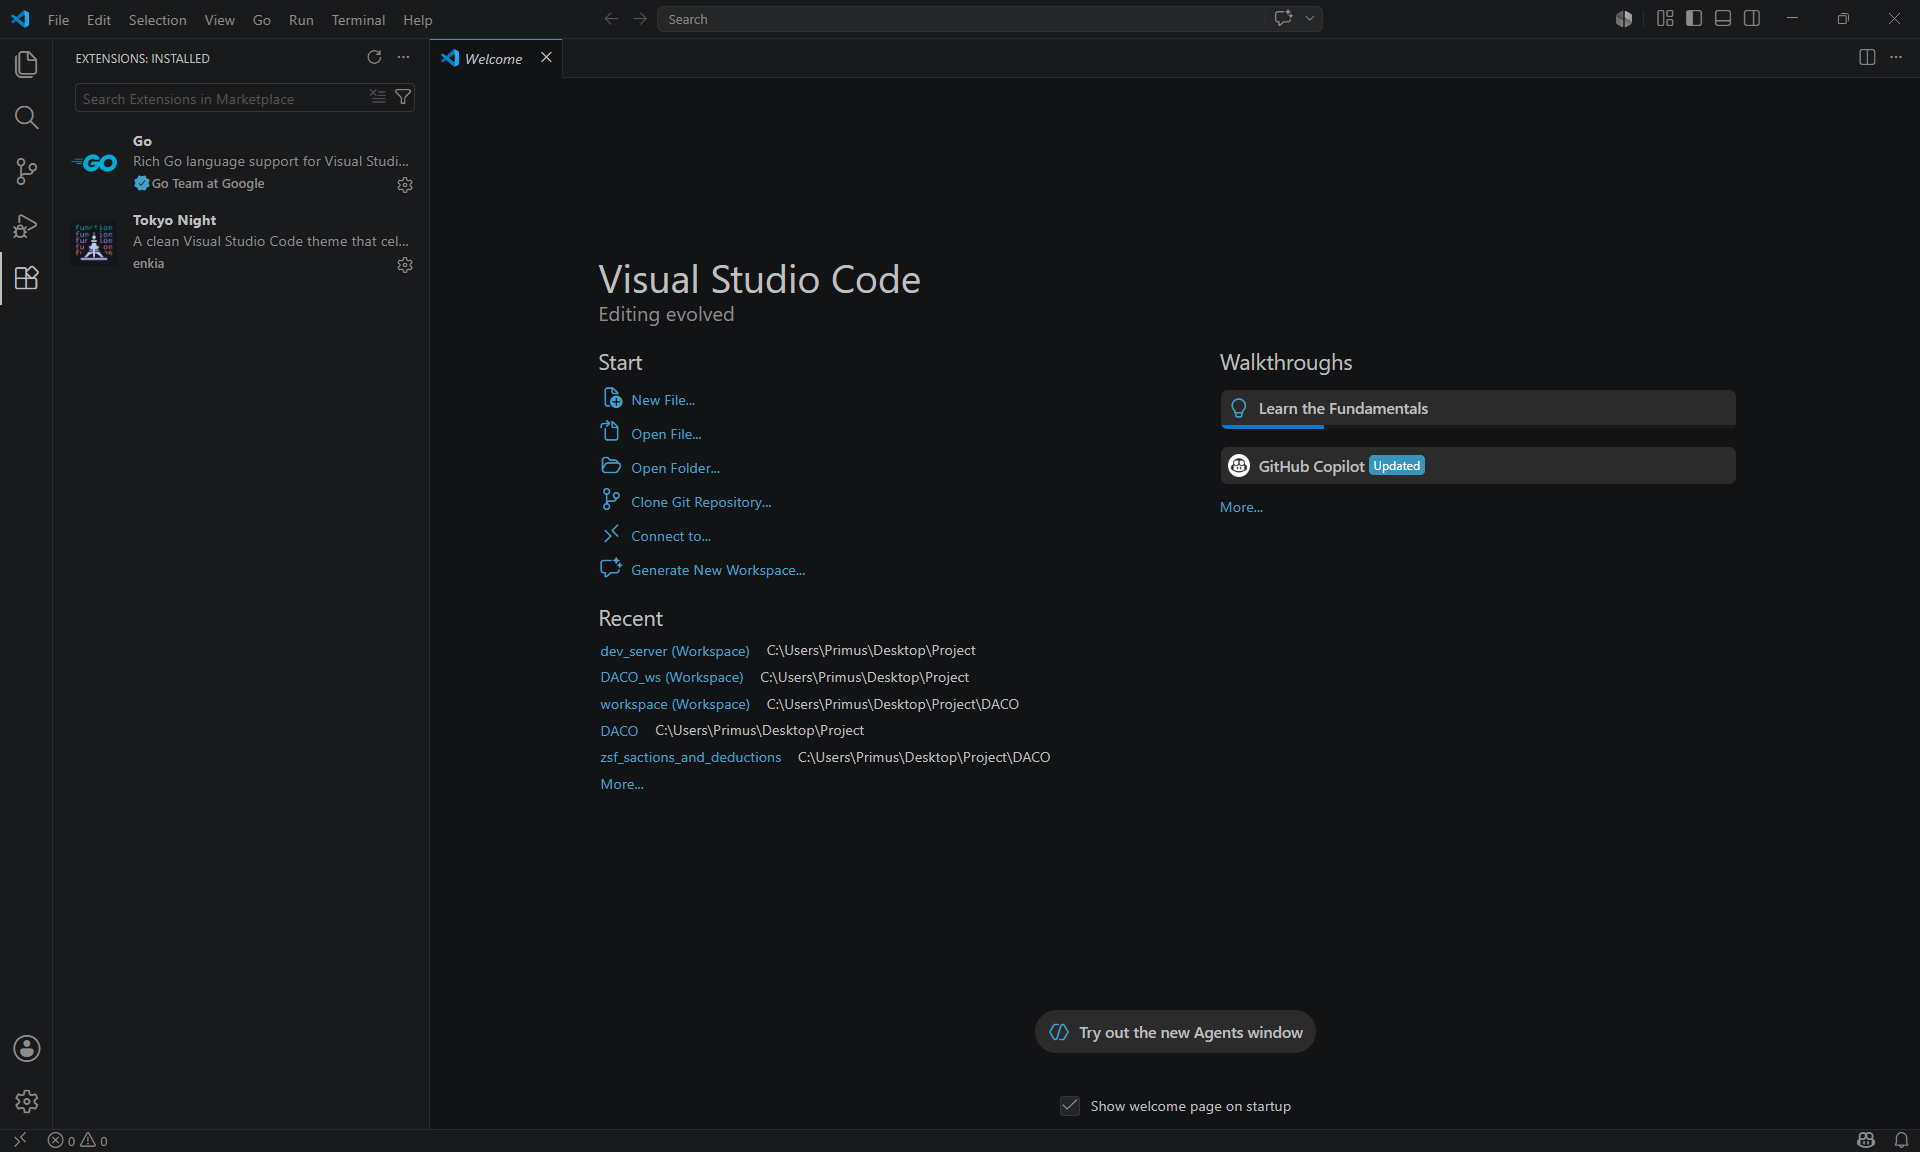
Several extensions are required to deploy a Fiori Application from VS Code. The easiest way to install them is by using ABAP Development Tools (ADT) to configure VS Code automatically.
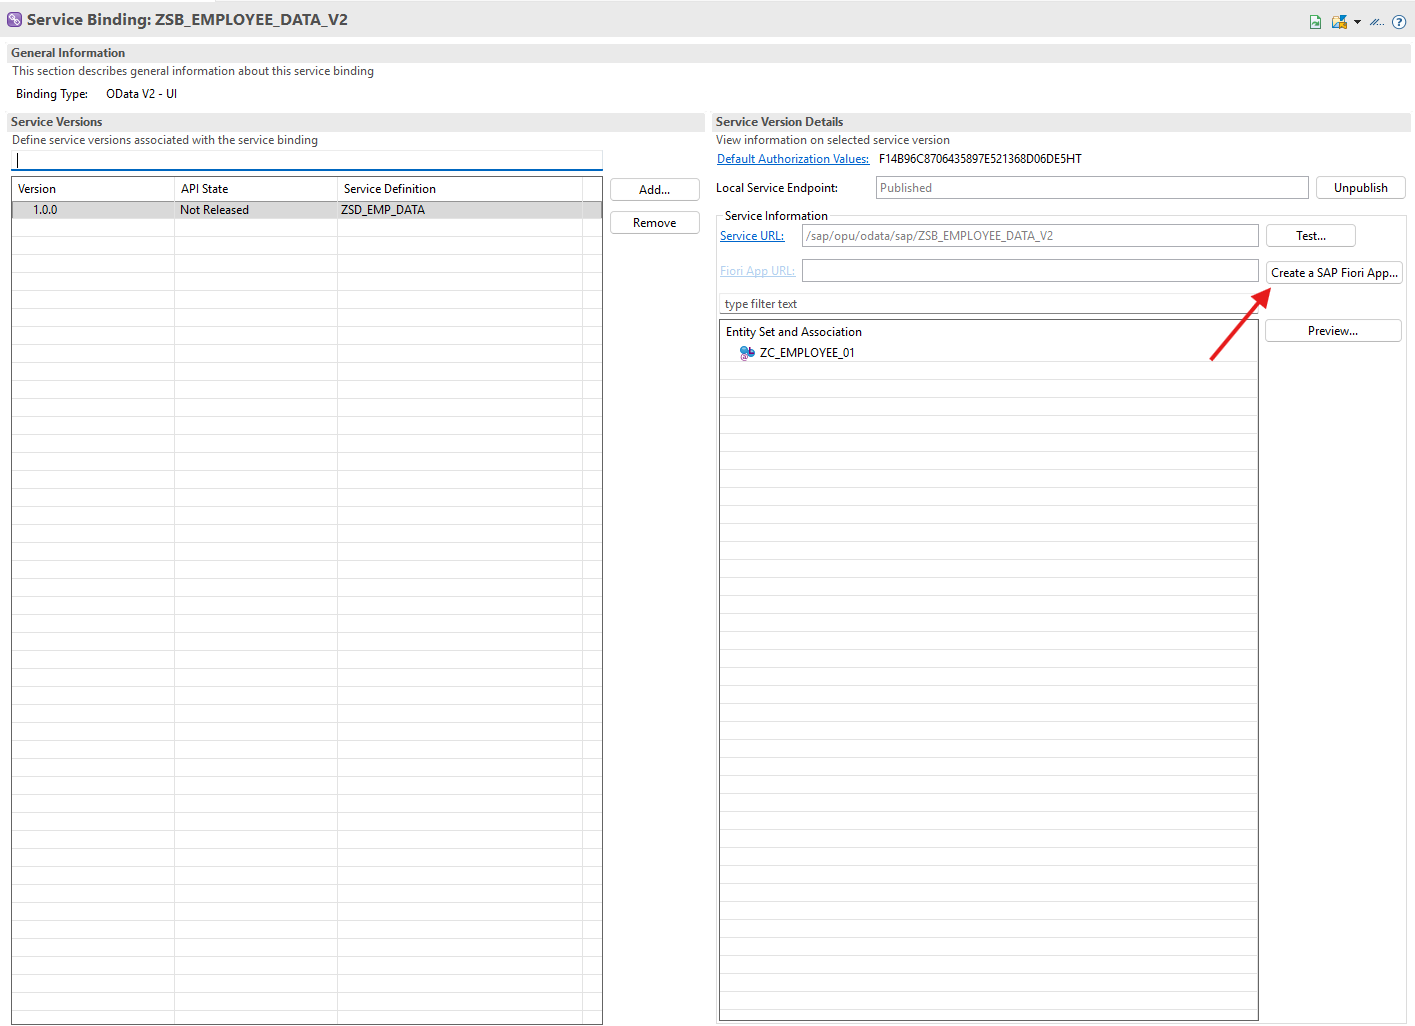
2.1 : Open the Service Binding in ADT
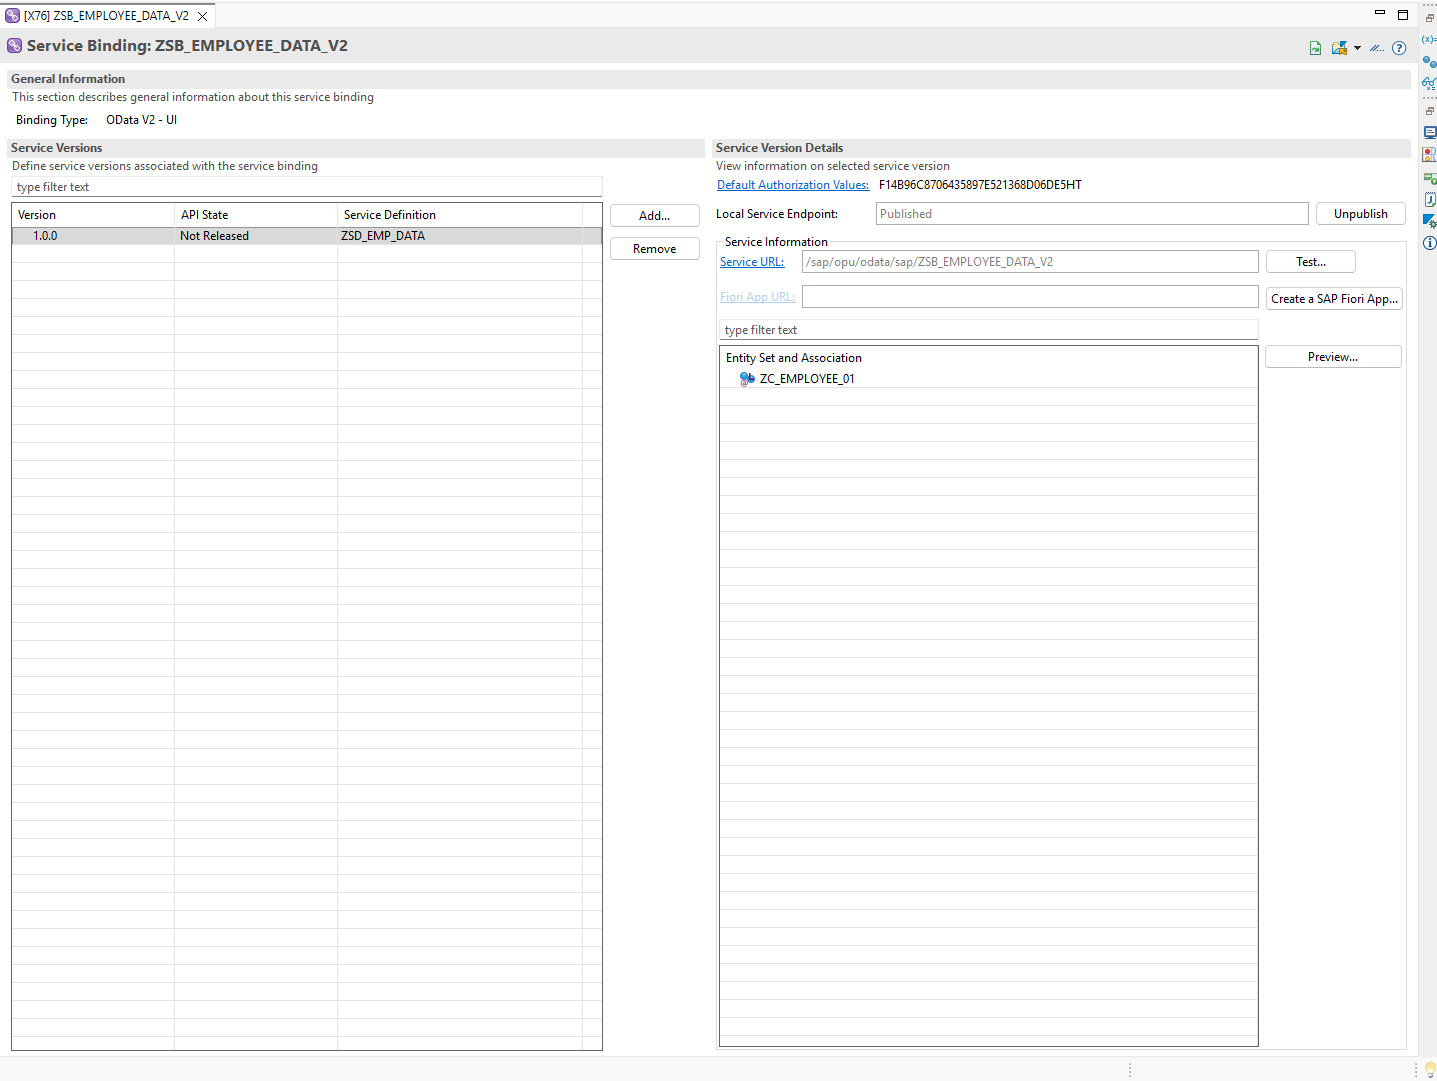
Navigate to your Service Binding in Eclipse (ADT) and click the Create a SAP Fiori app... button.
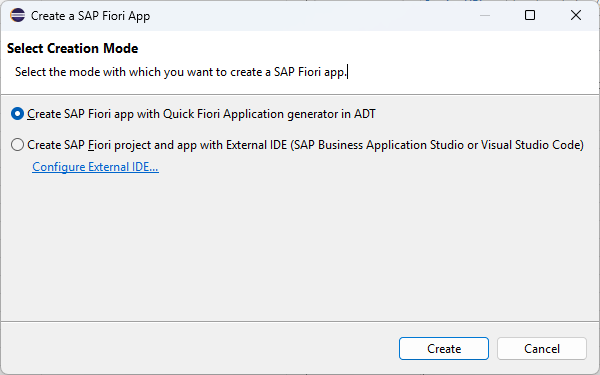
2.2 : Open the External IDE Configuration
In the dialog that opens, click the Configure External IDE... link.
This will open the following configuration window.
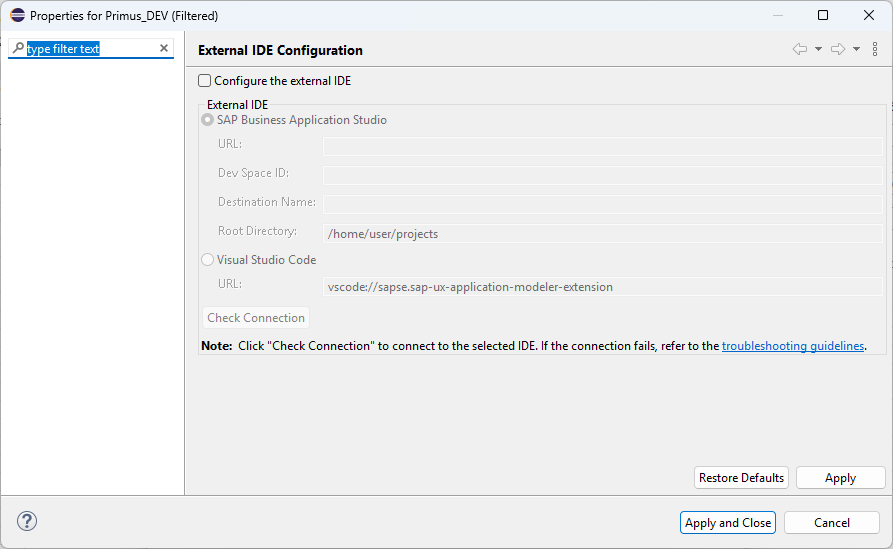
2.3 : Select VS Code as the External IDE
Enable the Configure the external IDE checkbox, then select the Visual Studio Code radio button.
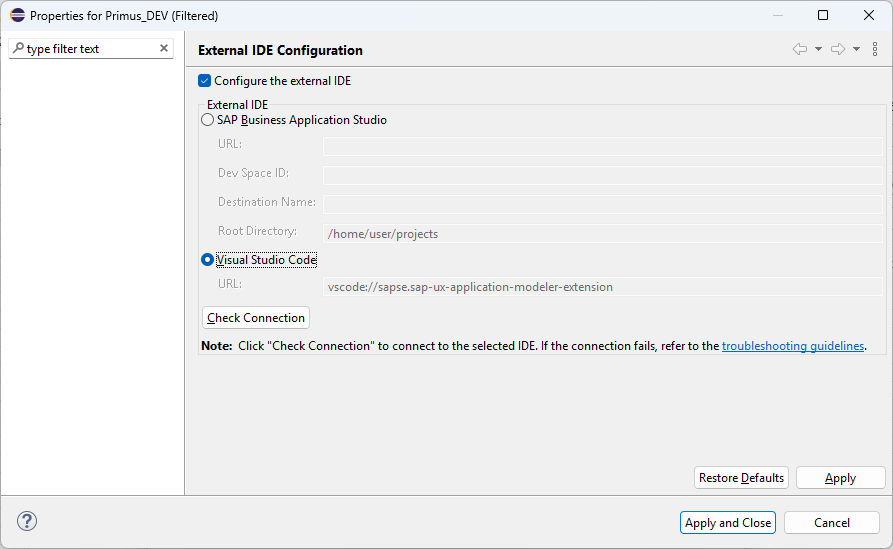
2.4 : Establish the Connection
Click the Check Connection button. A dialog will appear — click Install Extension and then Open URI to proceed.
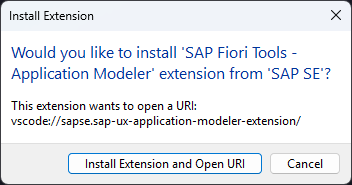
This will install the SAP Fiori Tools extension pack in VS Code.
2.5 : Install Additional Extensions
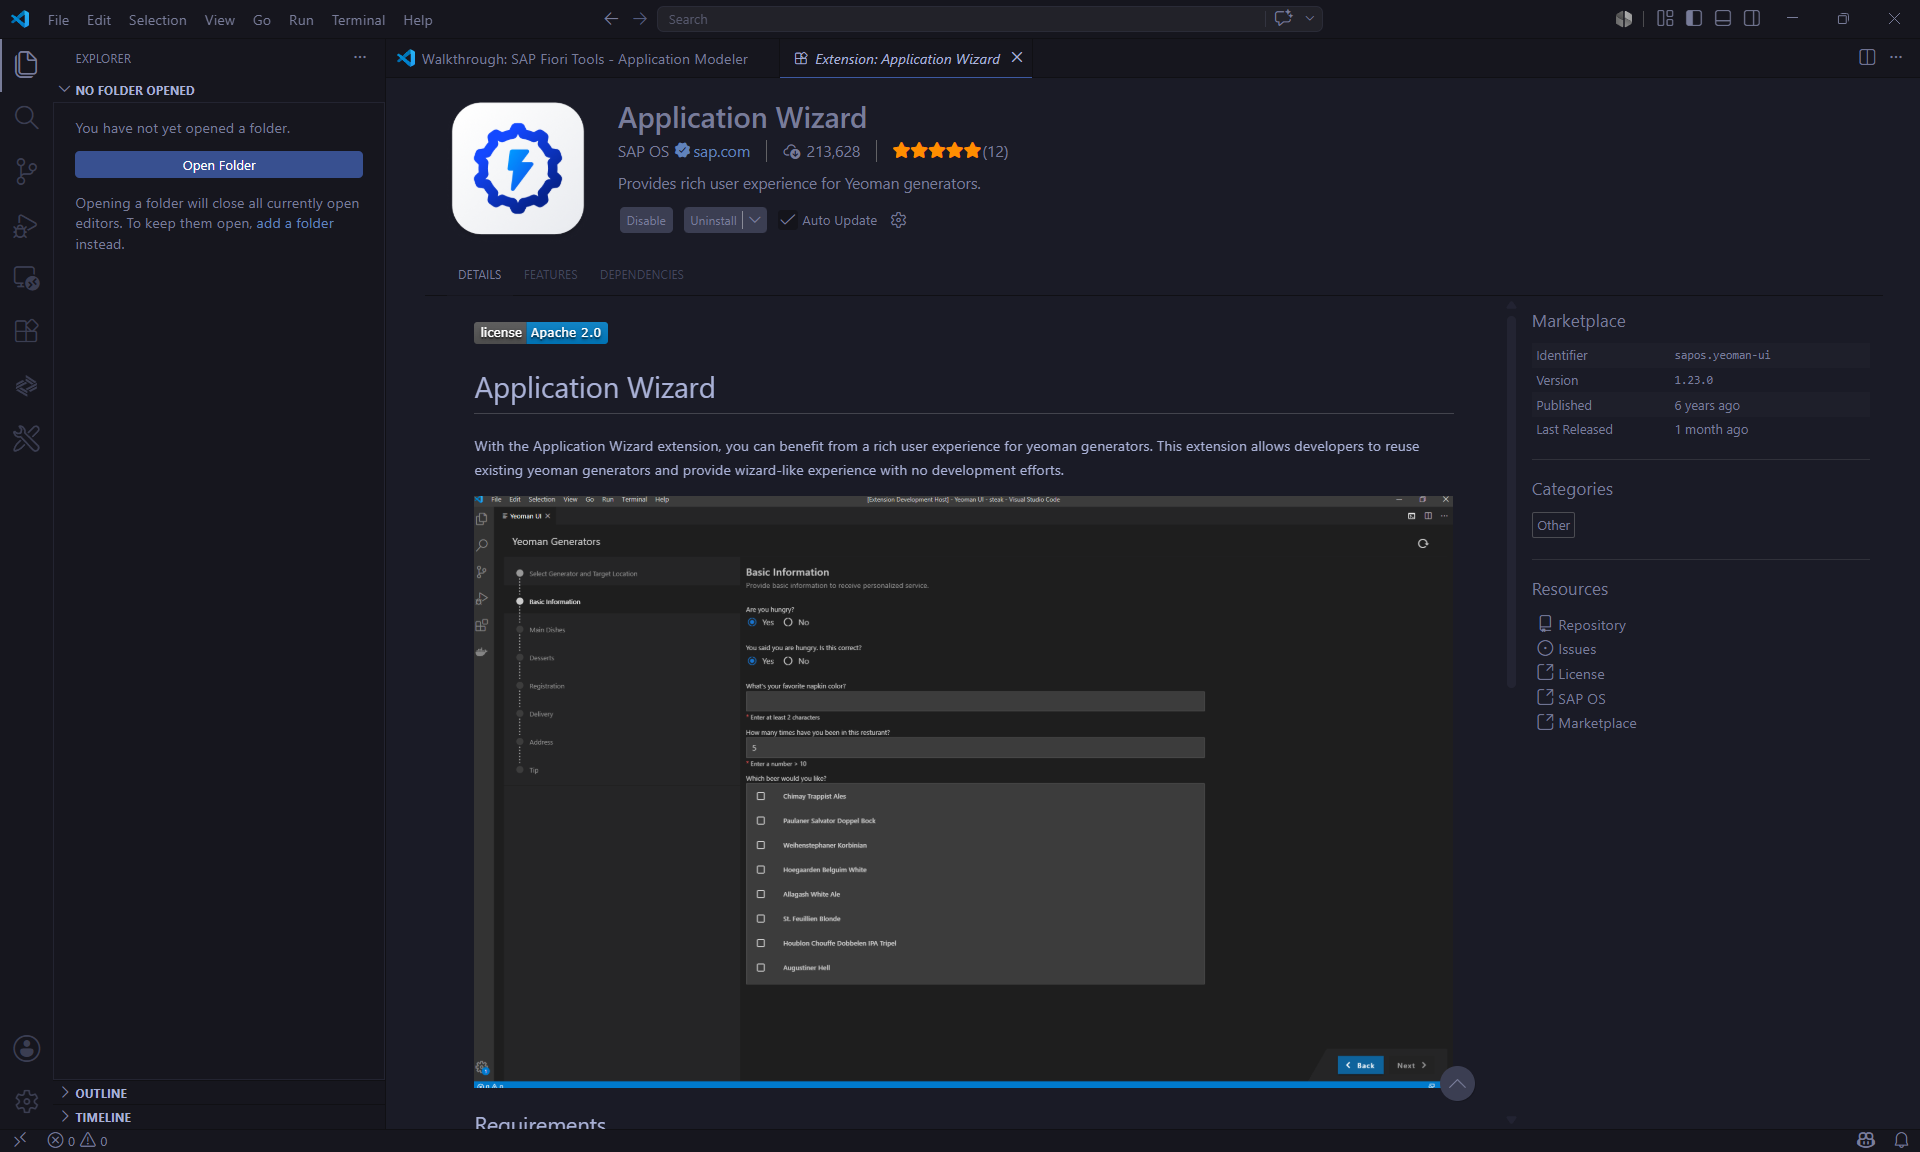
Next, install the Application Wizard extension.
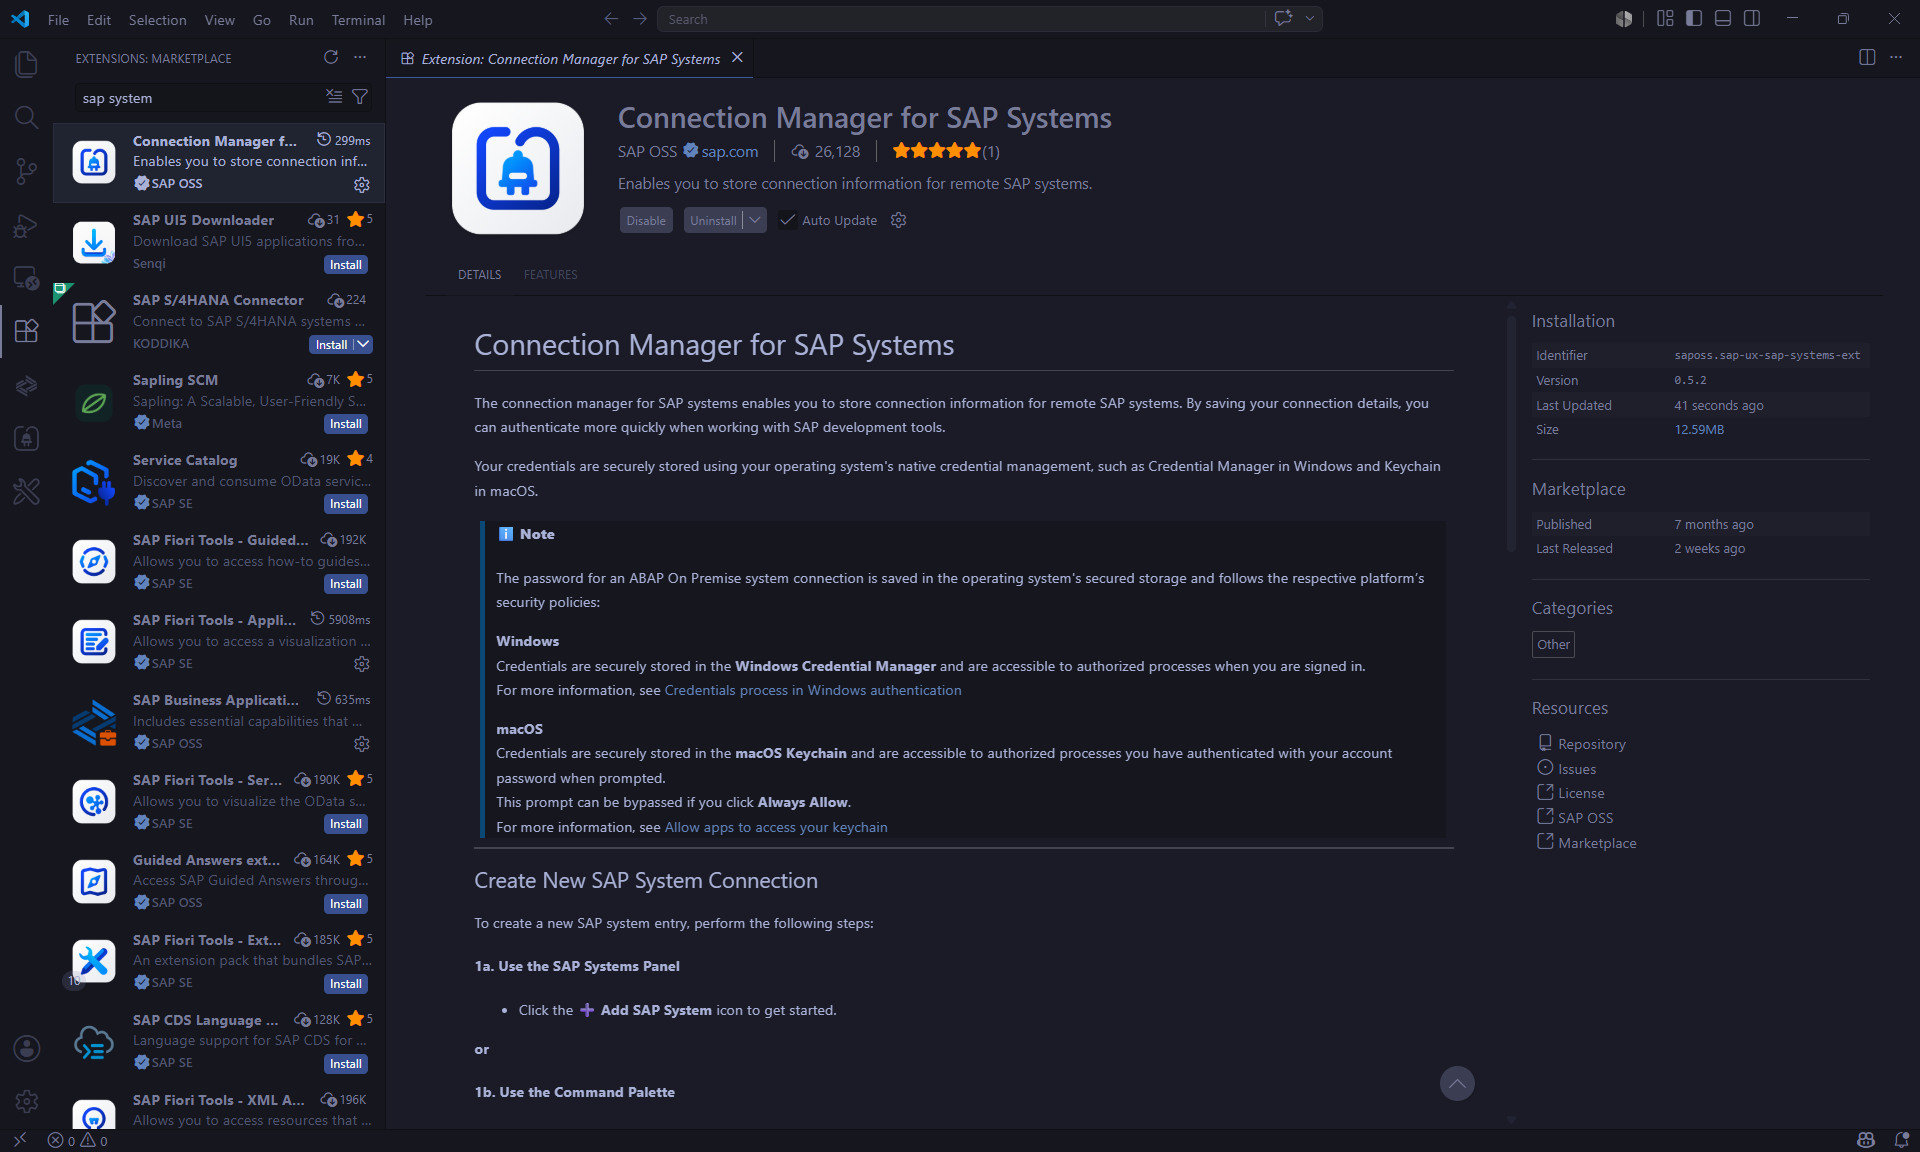
Then install the Connection Manager for SAP Systems extension.
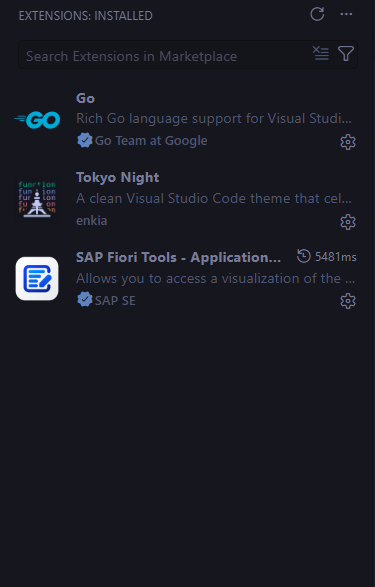
2.6 : Verify Your Extensions
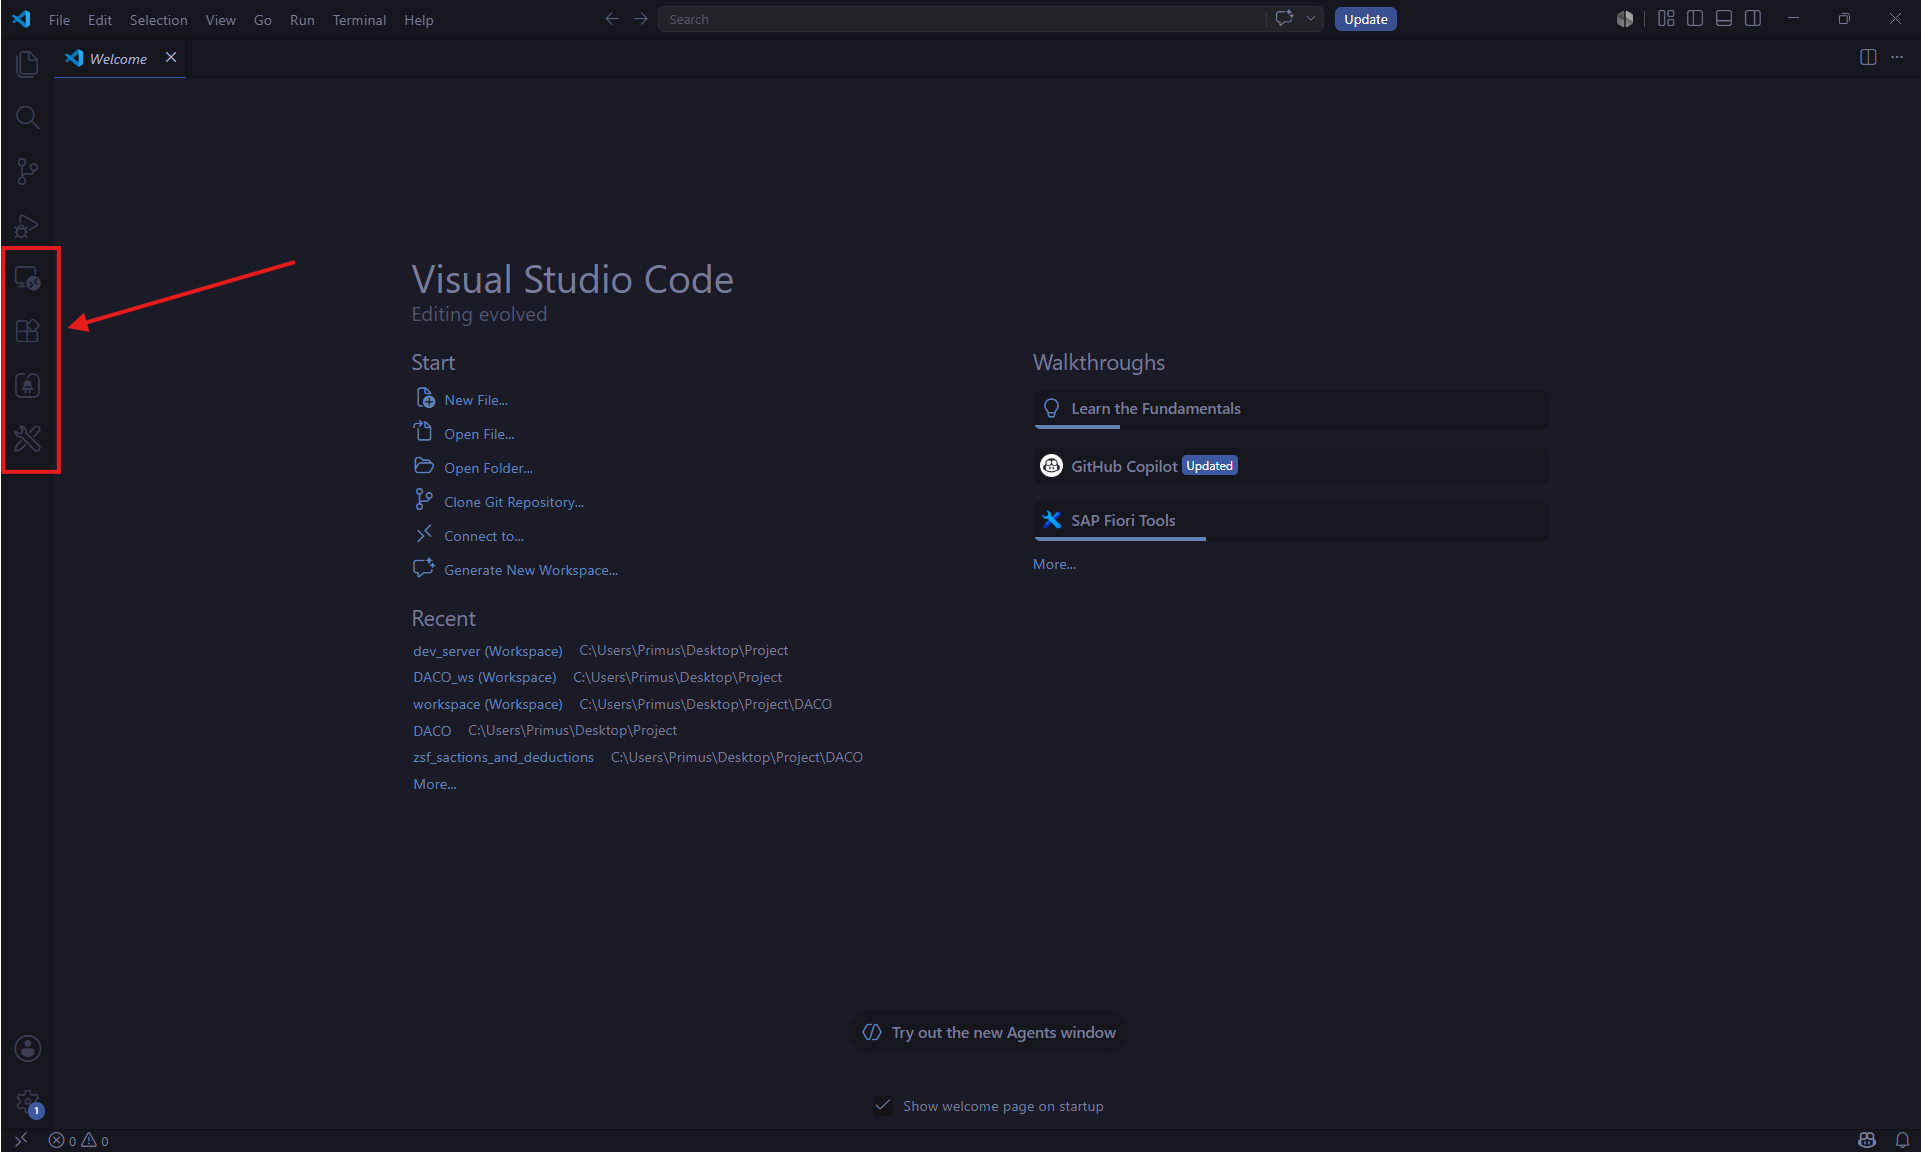
Once all extensions are installed, your VS Code should display the following extensions in the sidebar.
Step 3: Add a Connection to Your Development Tenant
With the extensions in place, you now need to configure a connection to your SAP development tenant (Client 080) using the Connection Manager.
3.1 : Open Connection Manager and Create a New Connection
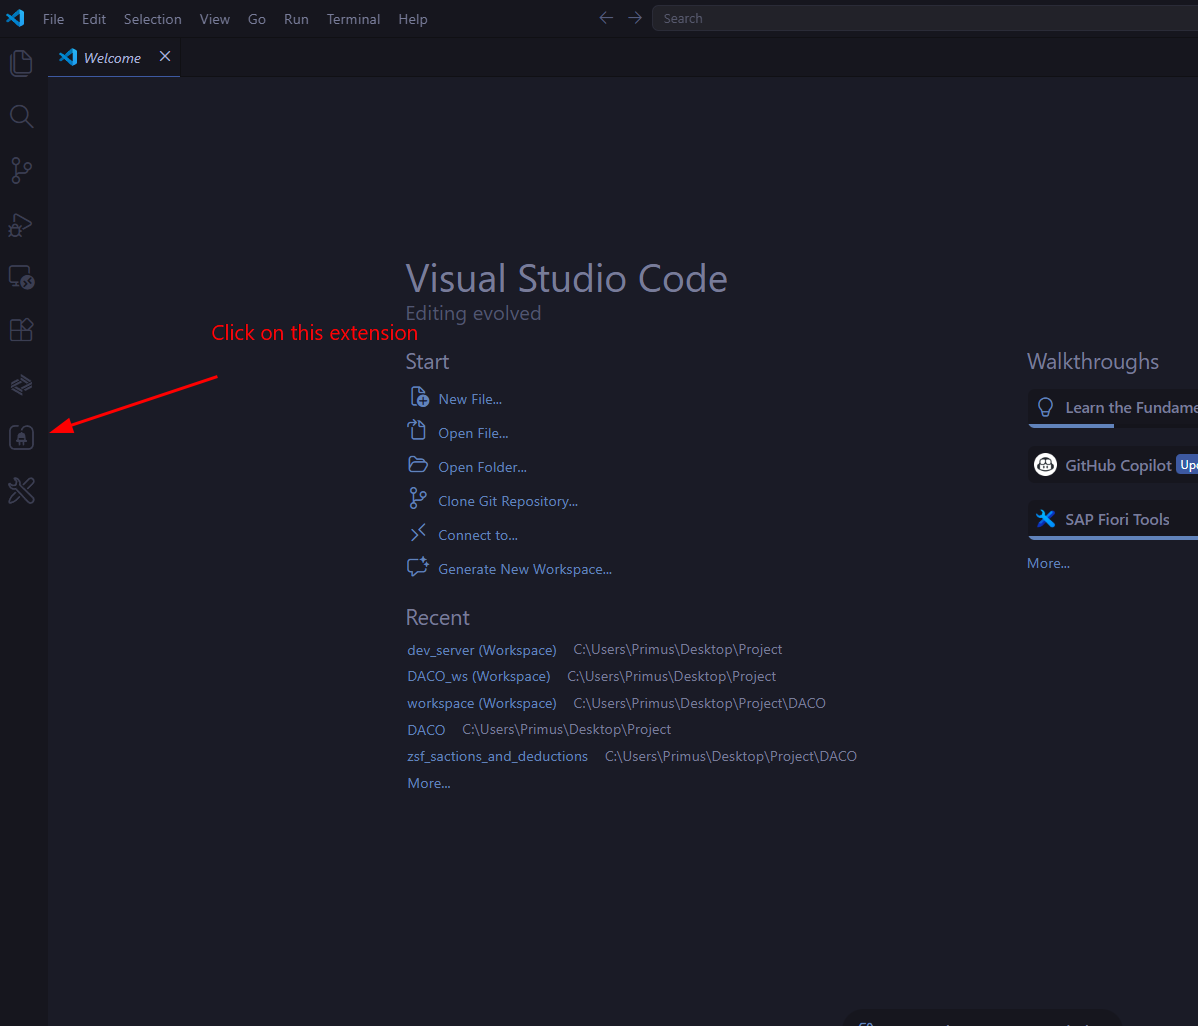
Open the Connection Manager from the VS Code activity bar and add a new connection.
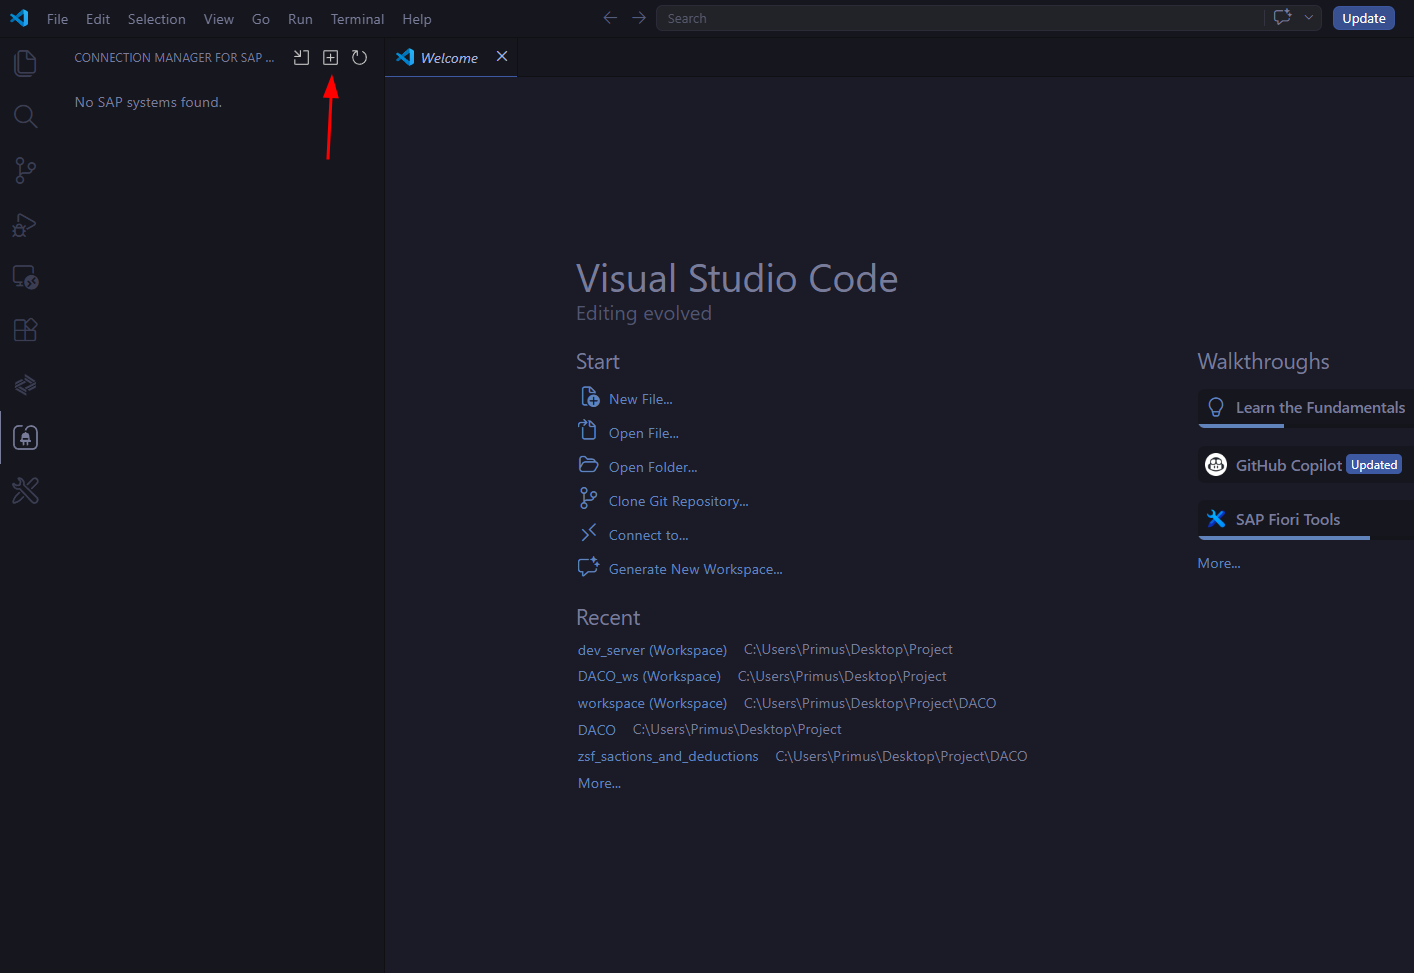
3.2 : Select the Correct Connection Type
Choose the appropriate connection type based on your environment:
- Public Cloud (BTP ABAP Environment): Select the 1st option
- On-Premise System: Select the 2nd option
Since we are working on Public Cloud, we will select the 1st option.
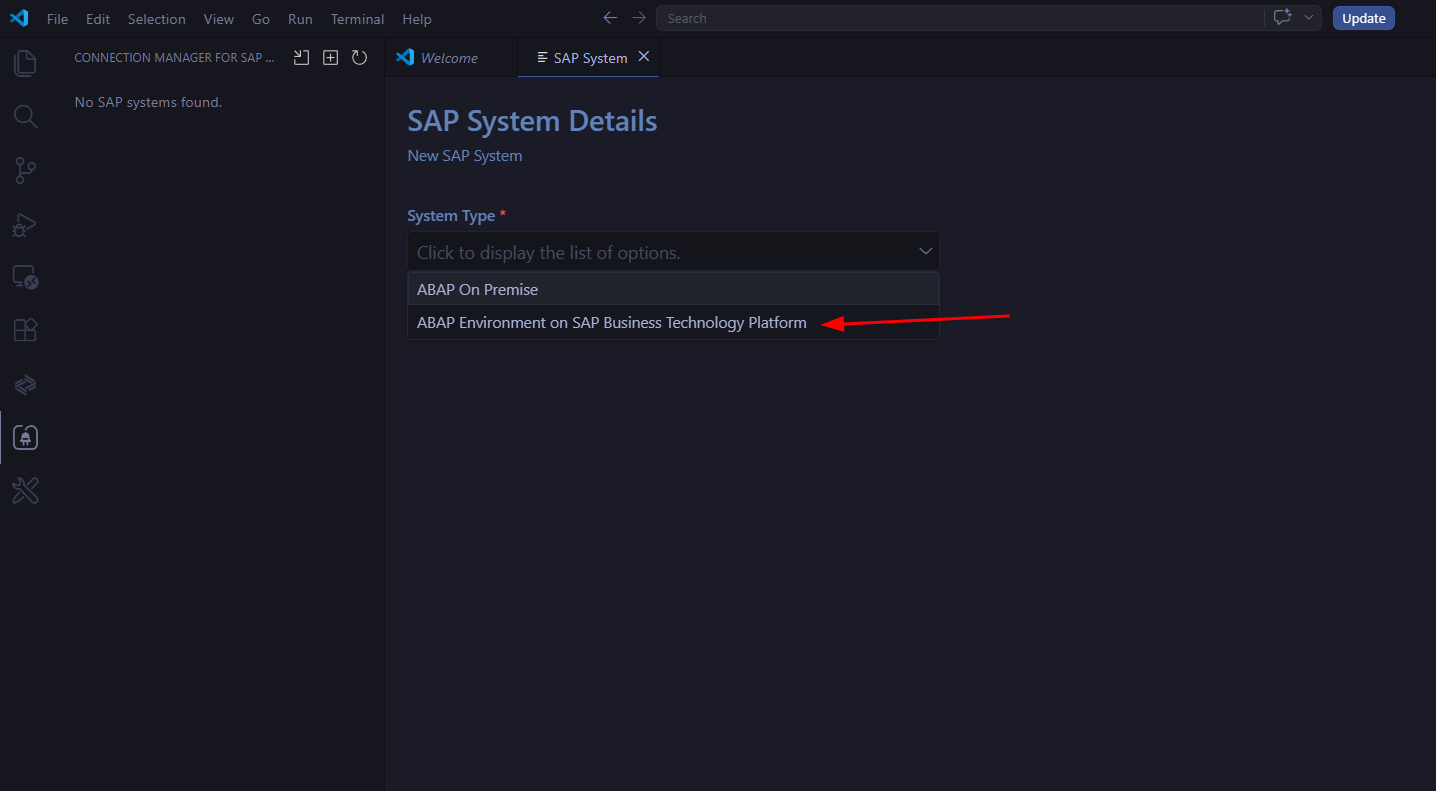
3.3 : Enter Connection Details
Provide a meaningful Connection Name, set the Connection Type to ABAP Catalog, and enter the URL of your development tenant.
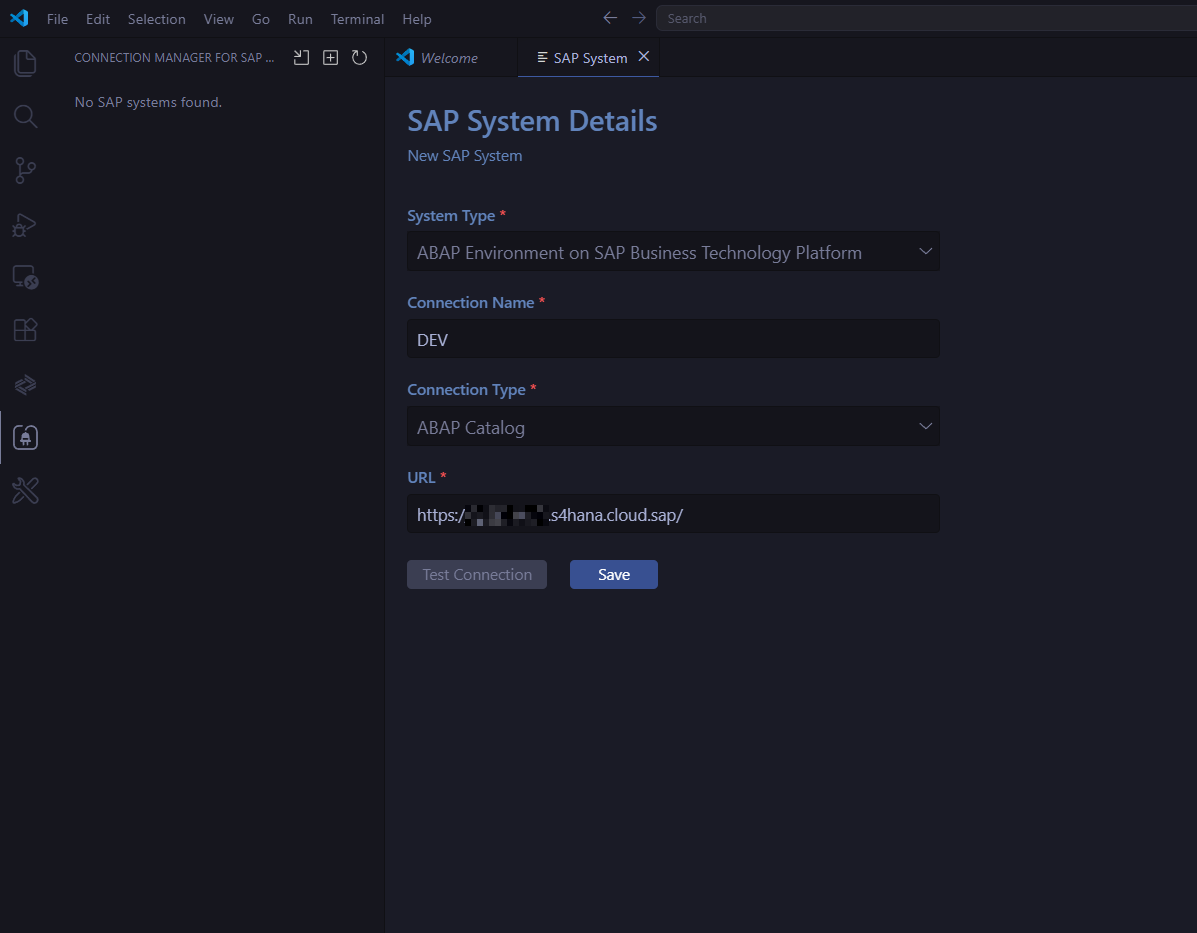
Step 4: Create the Fiori Application
Note: Steps from this point onward are identical for both BAS and local VS Code users.
4.1 : Launch the Application Generator
Click on Create Fiori Application from the SAP Fiori Tools panel.
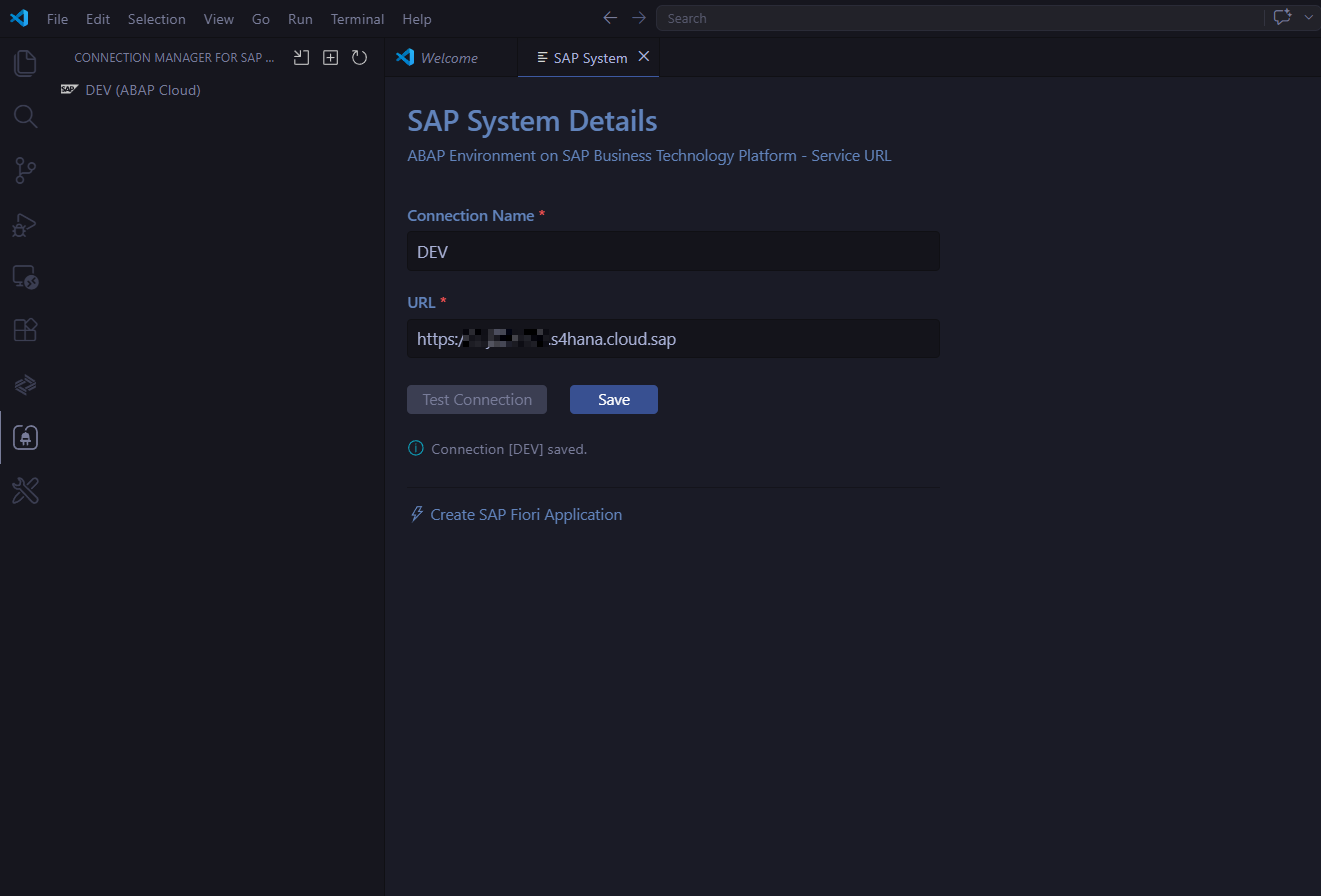
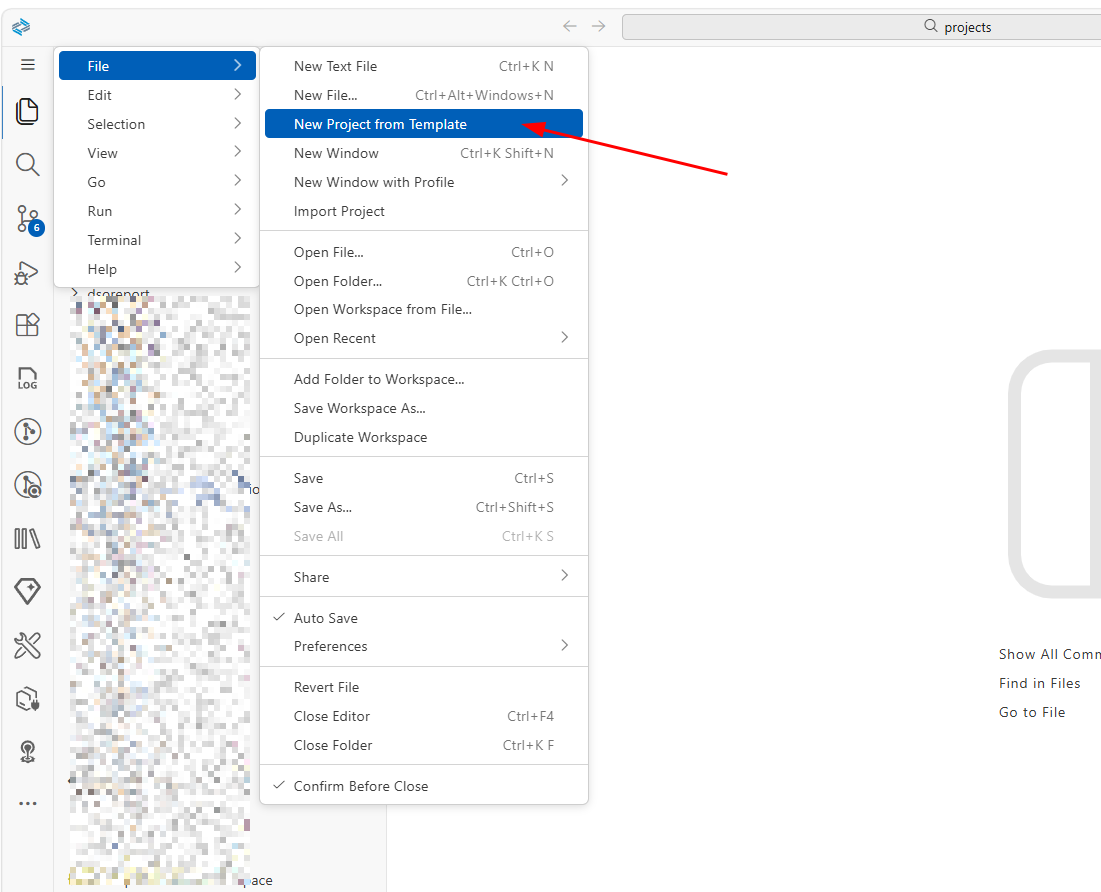
If you are using BAS, you will navigate through the following route instead.
4.2 : Select the Application Template
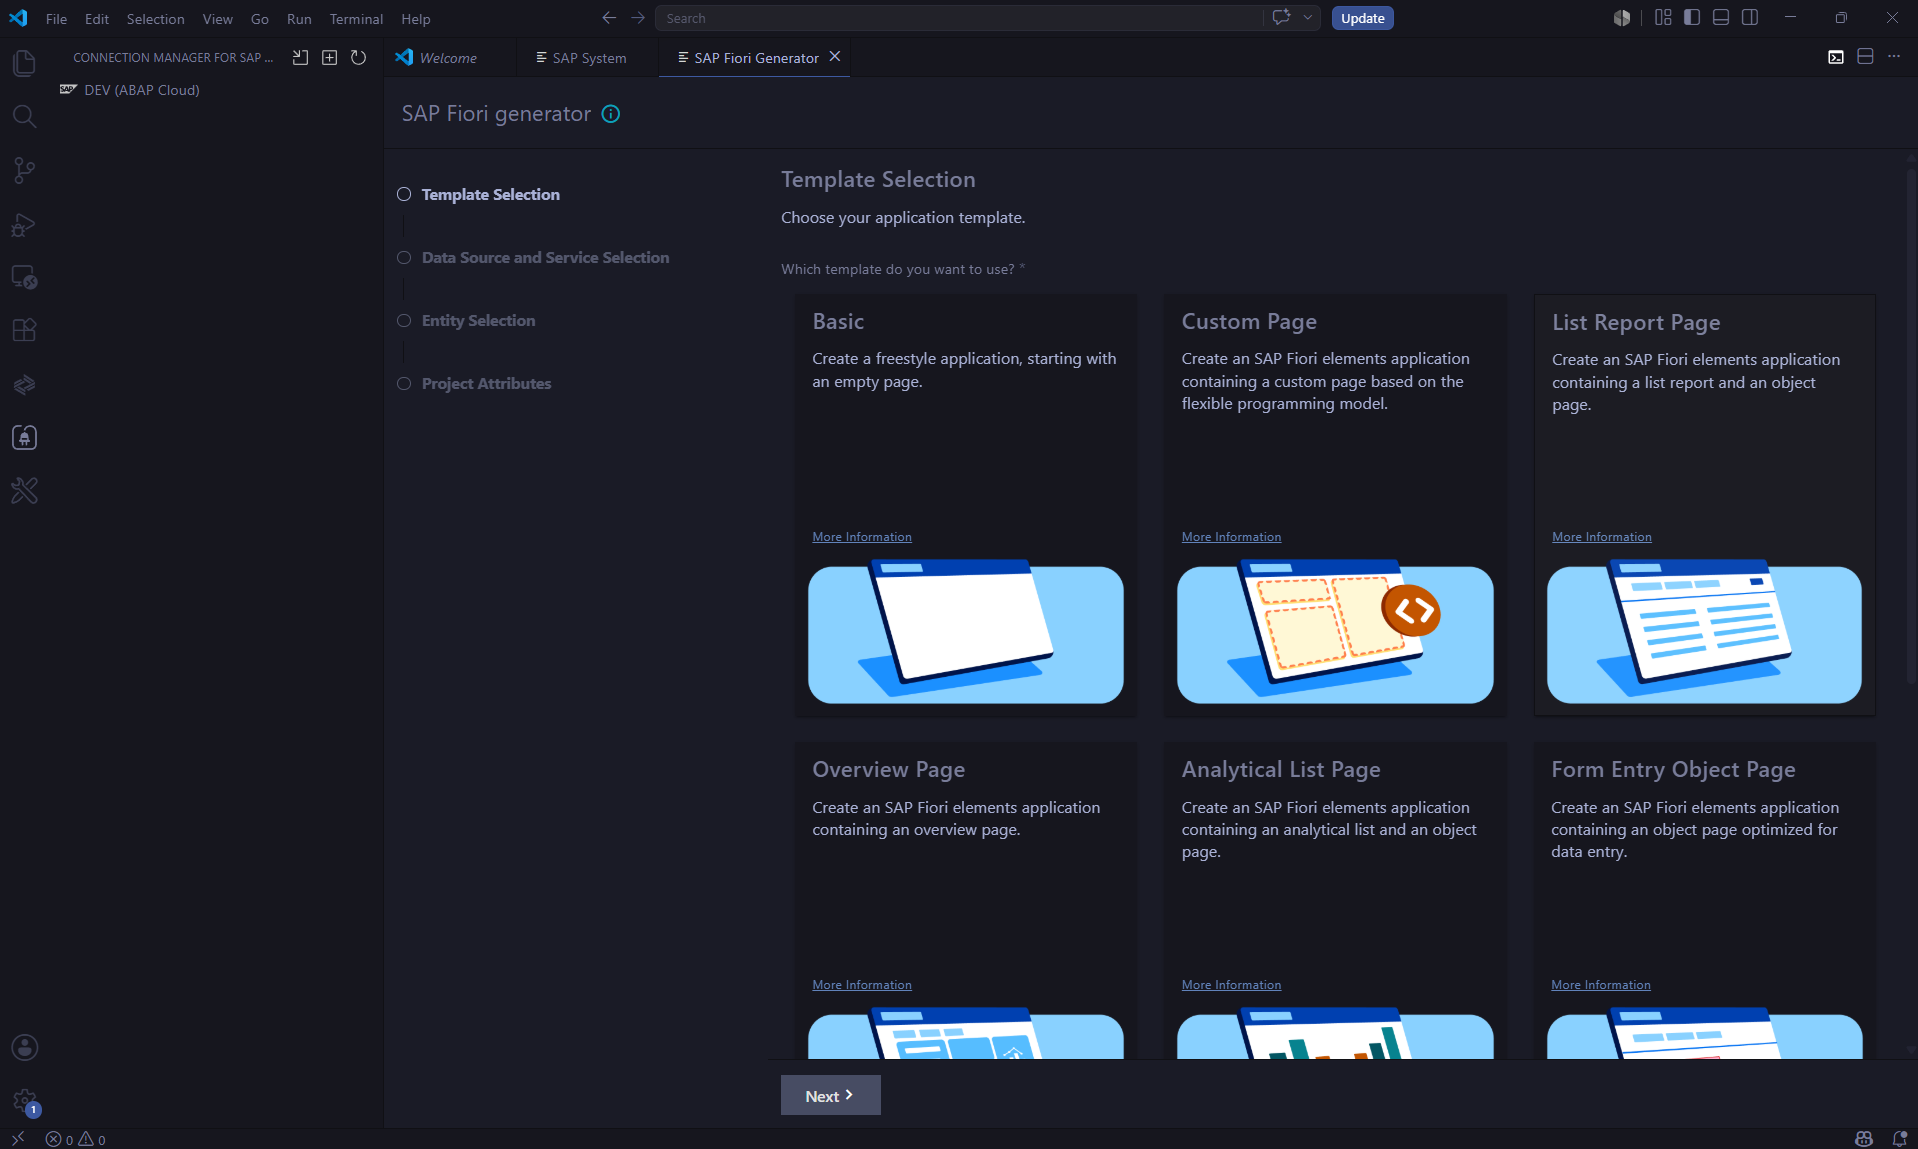
Select List Report Page as the template type and click Next.
4.3 : Connect to Your Service Binding
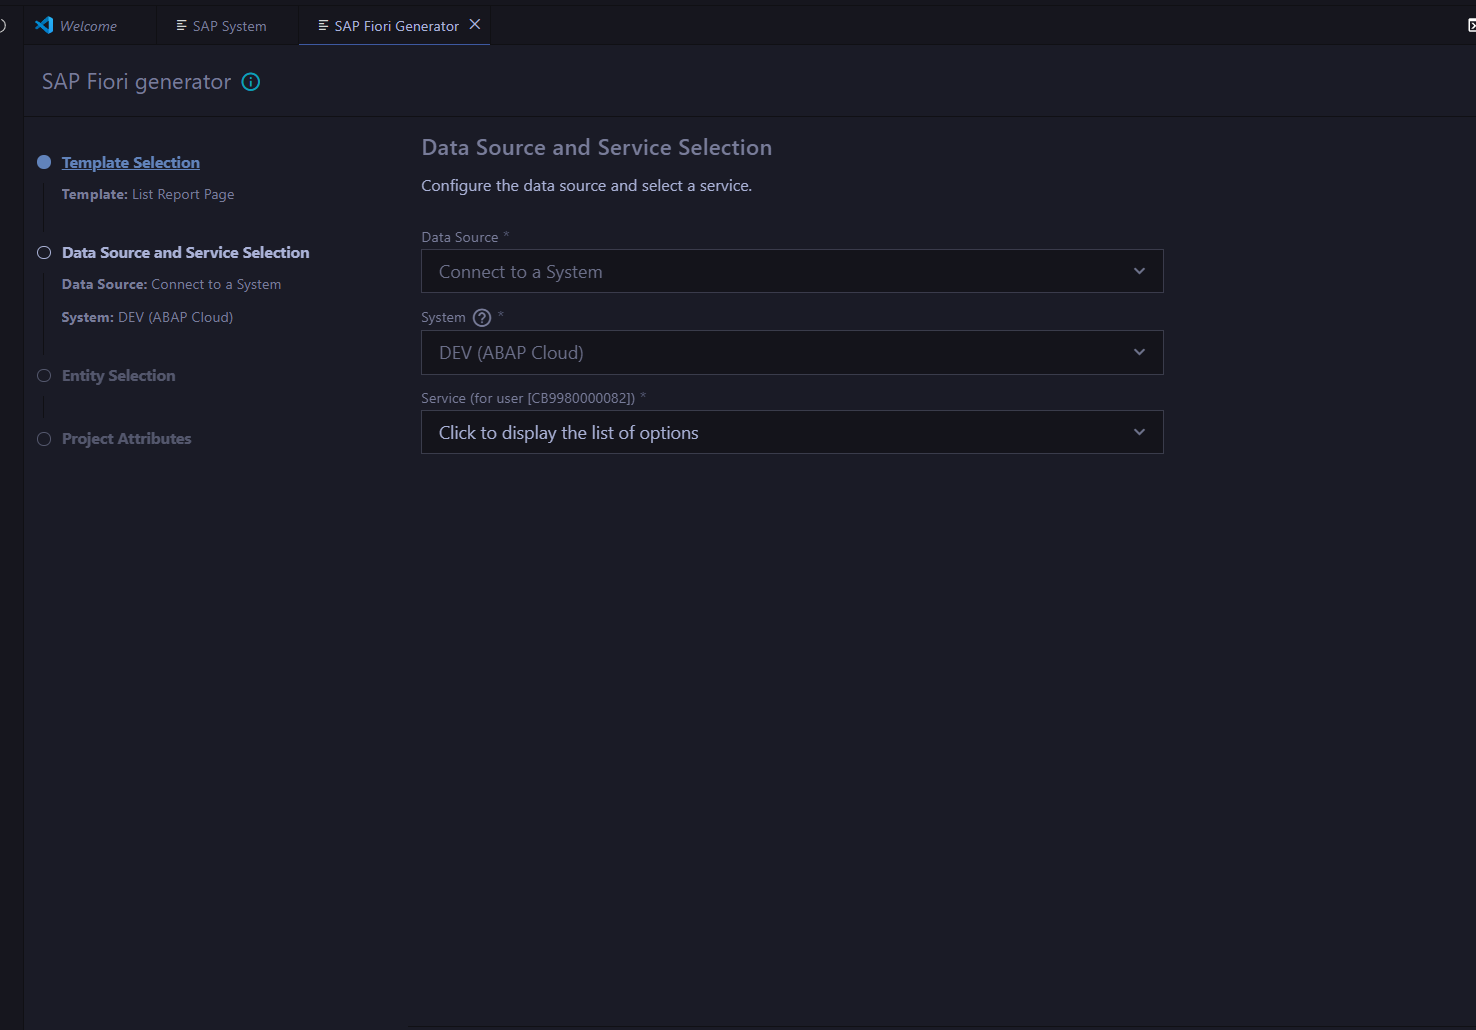
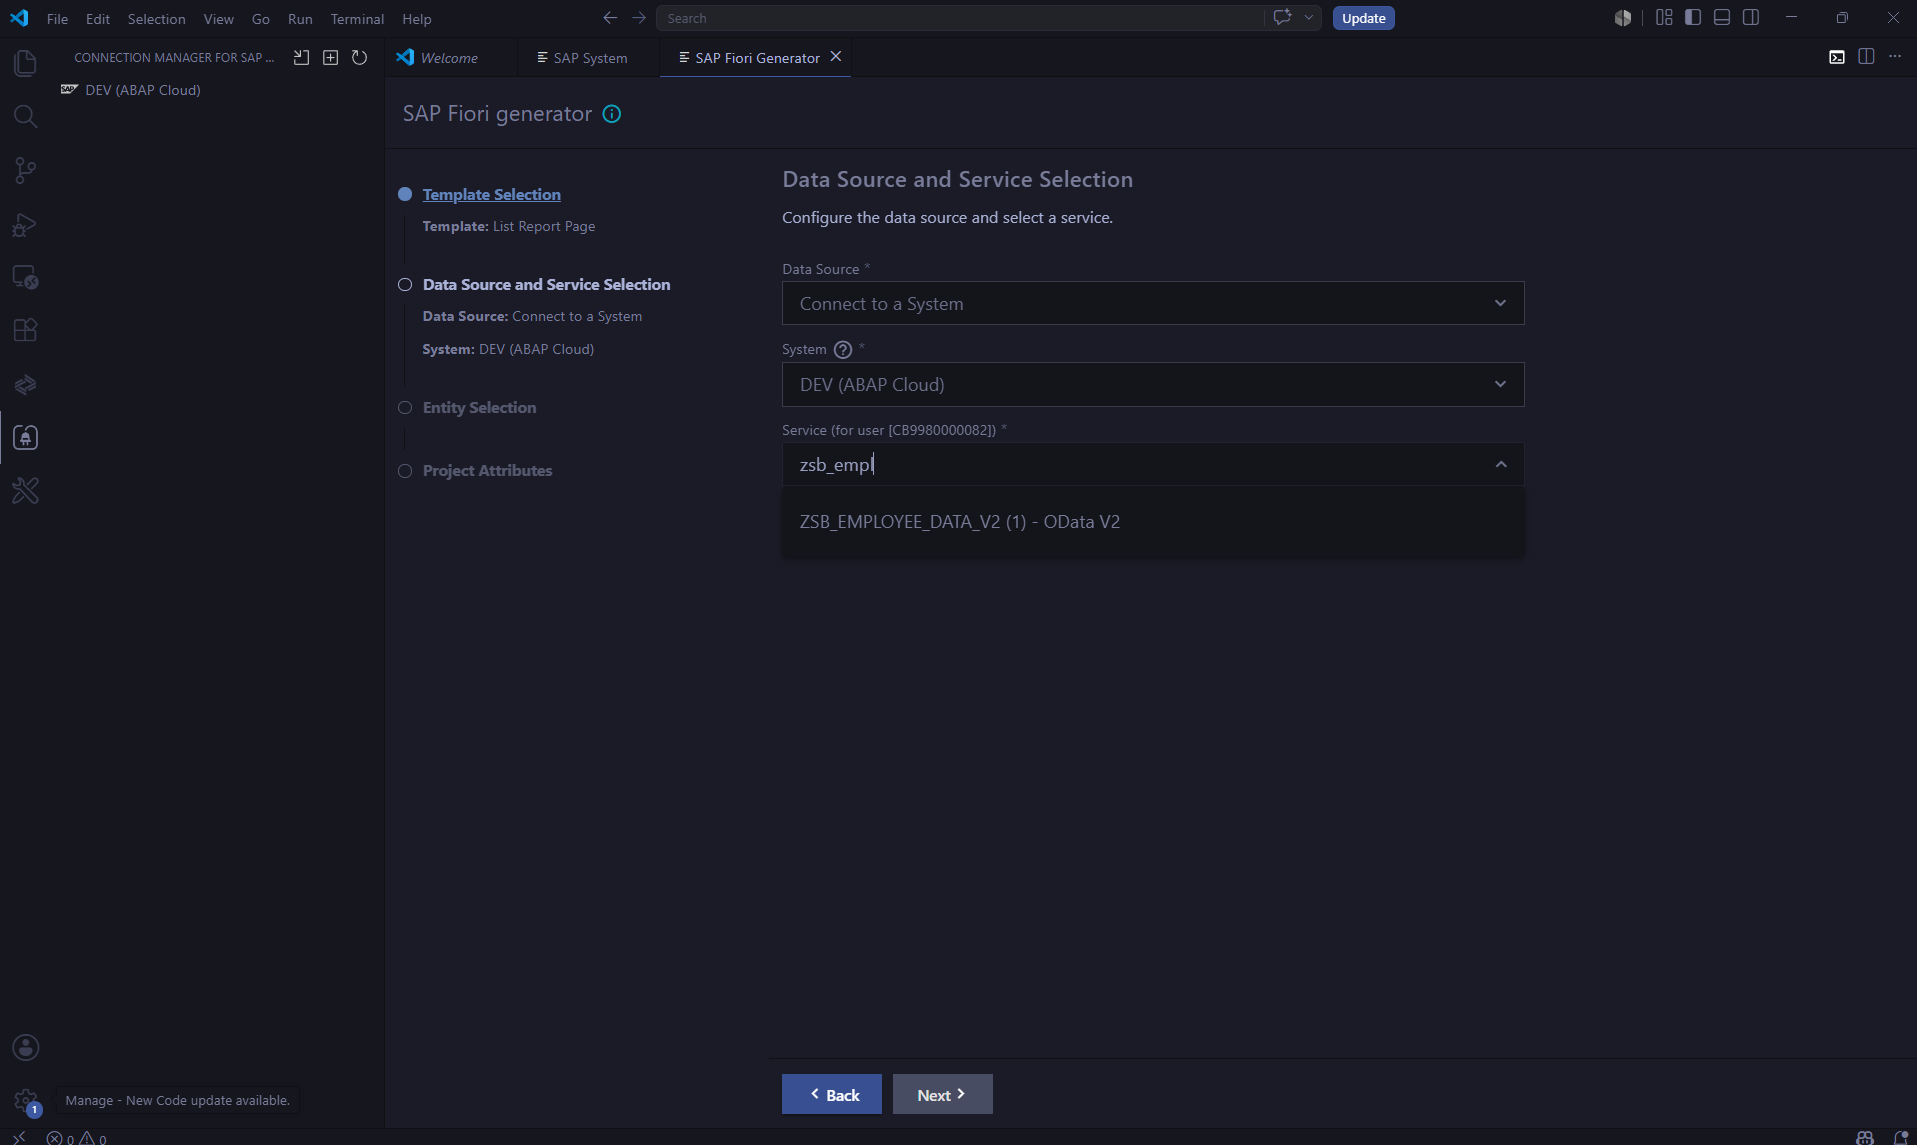
In the Service search field, search for the name of the Service Binding you created for your application and select it.
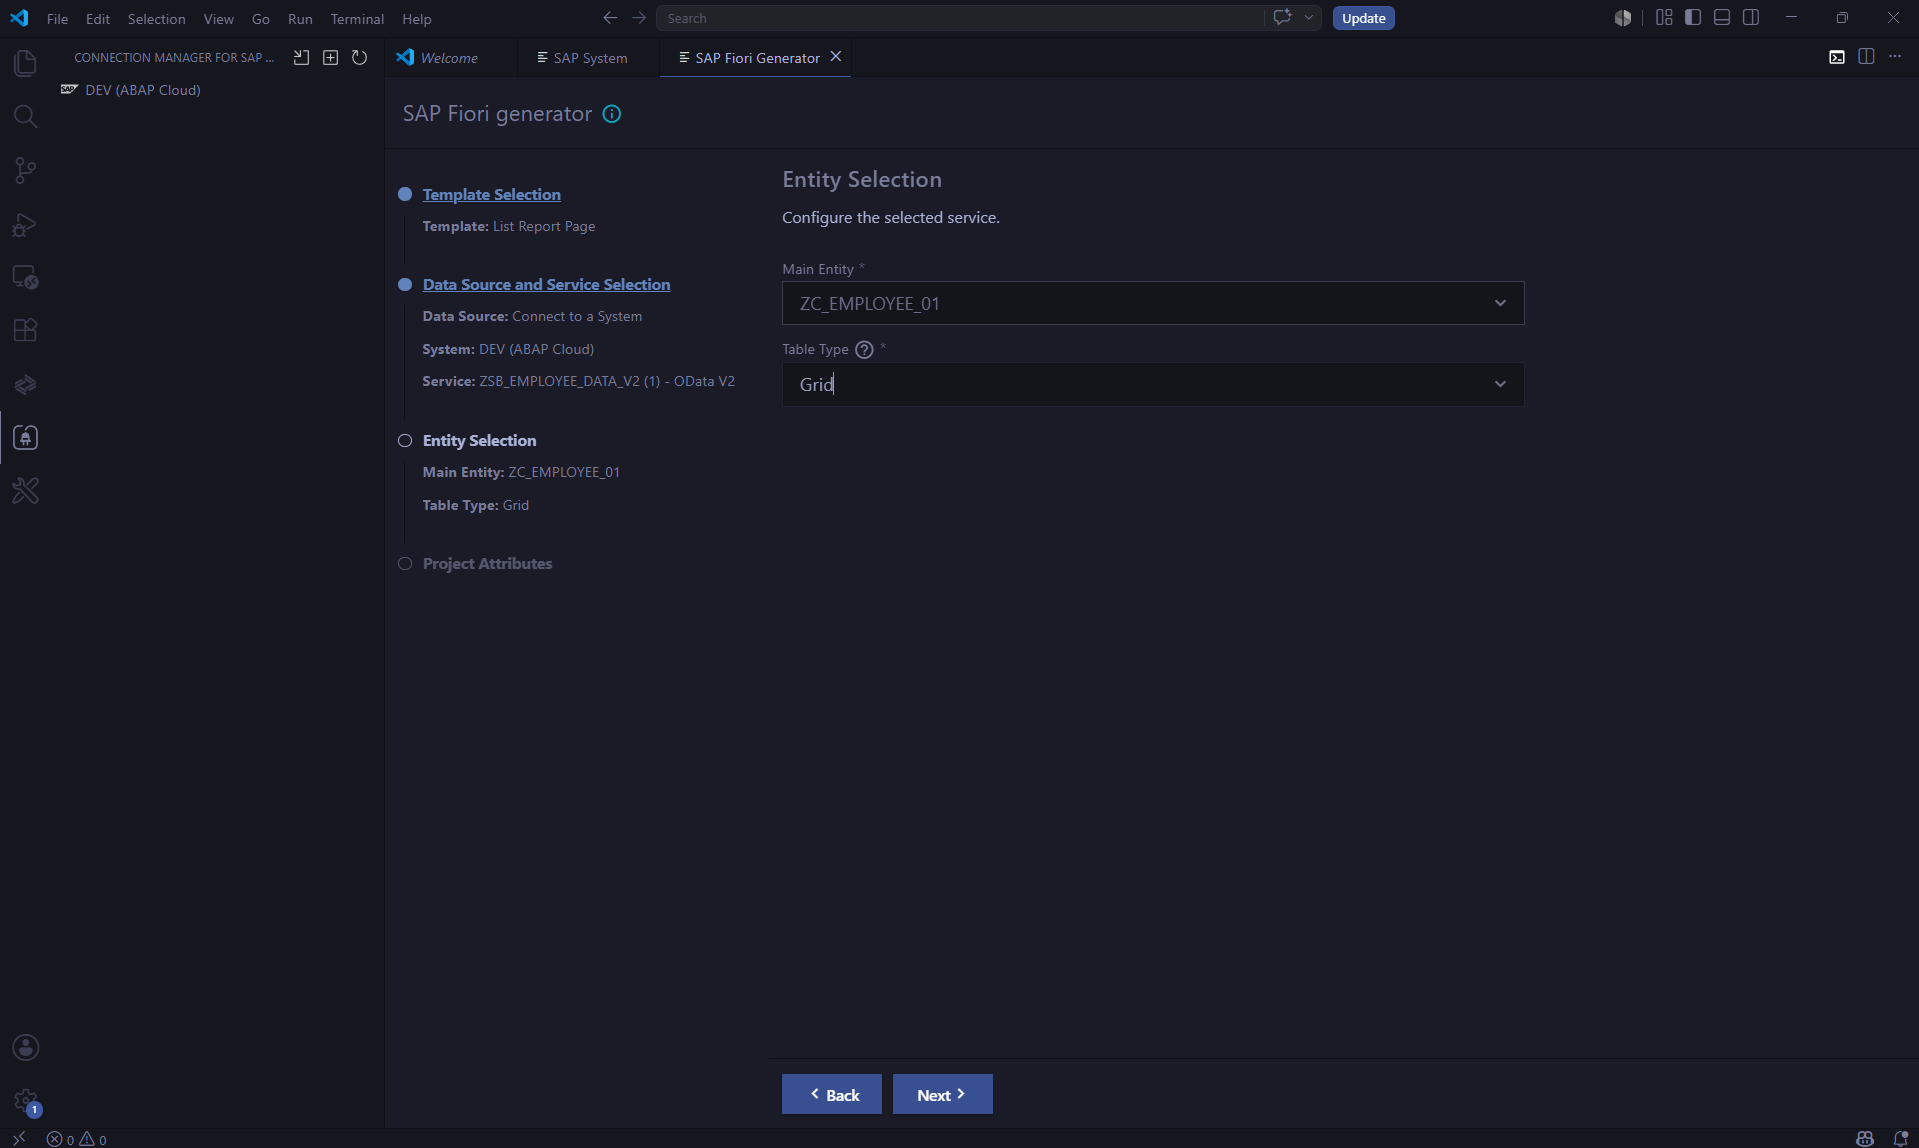
4.4 : Select the Table Type
Select Grid Table as the table type. This is suitable for most scenarios, but feel free to choose a different table type if your use case requires it.
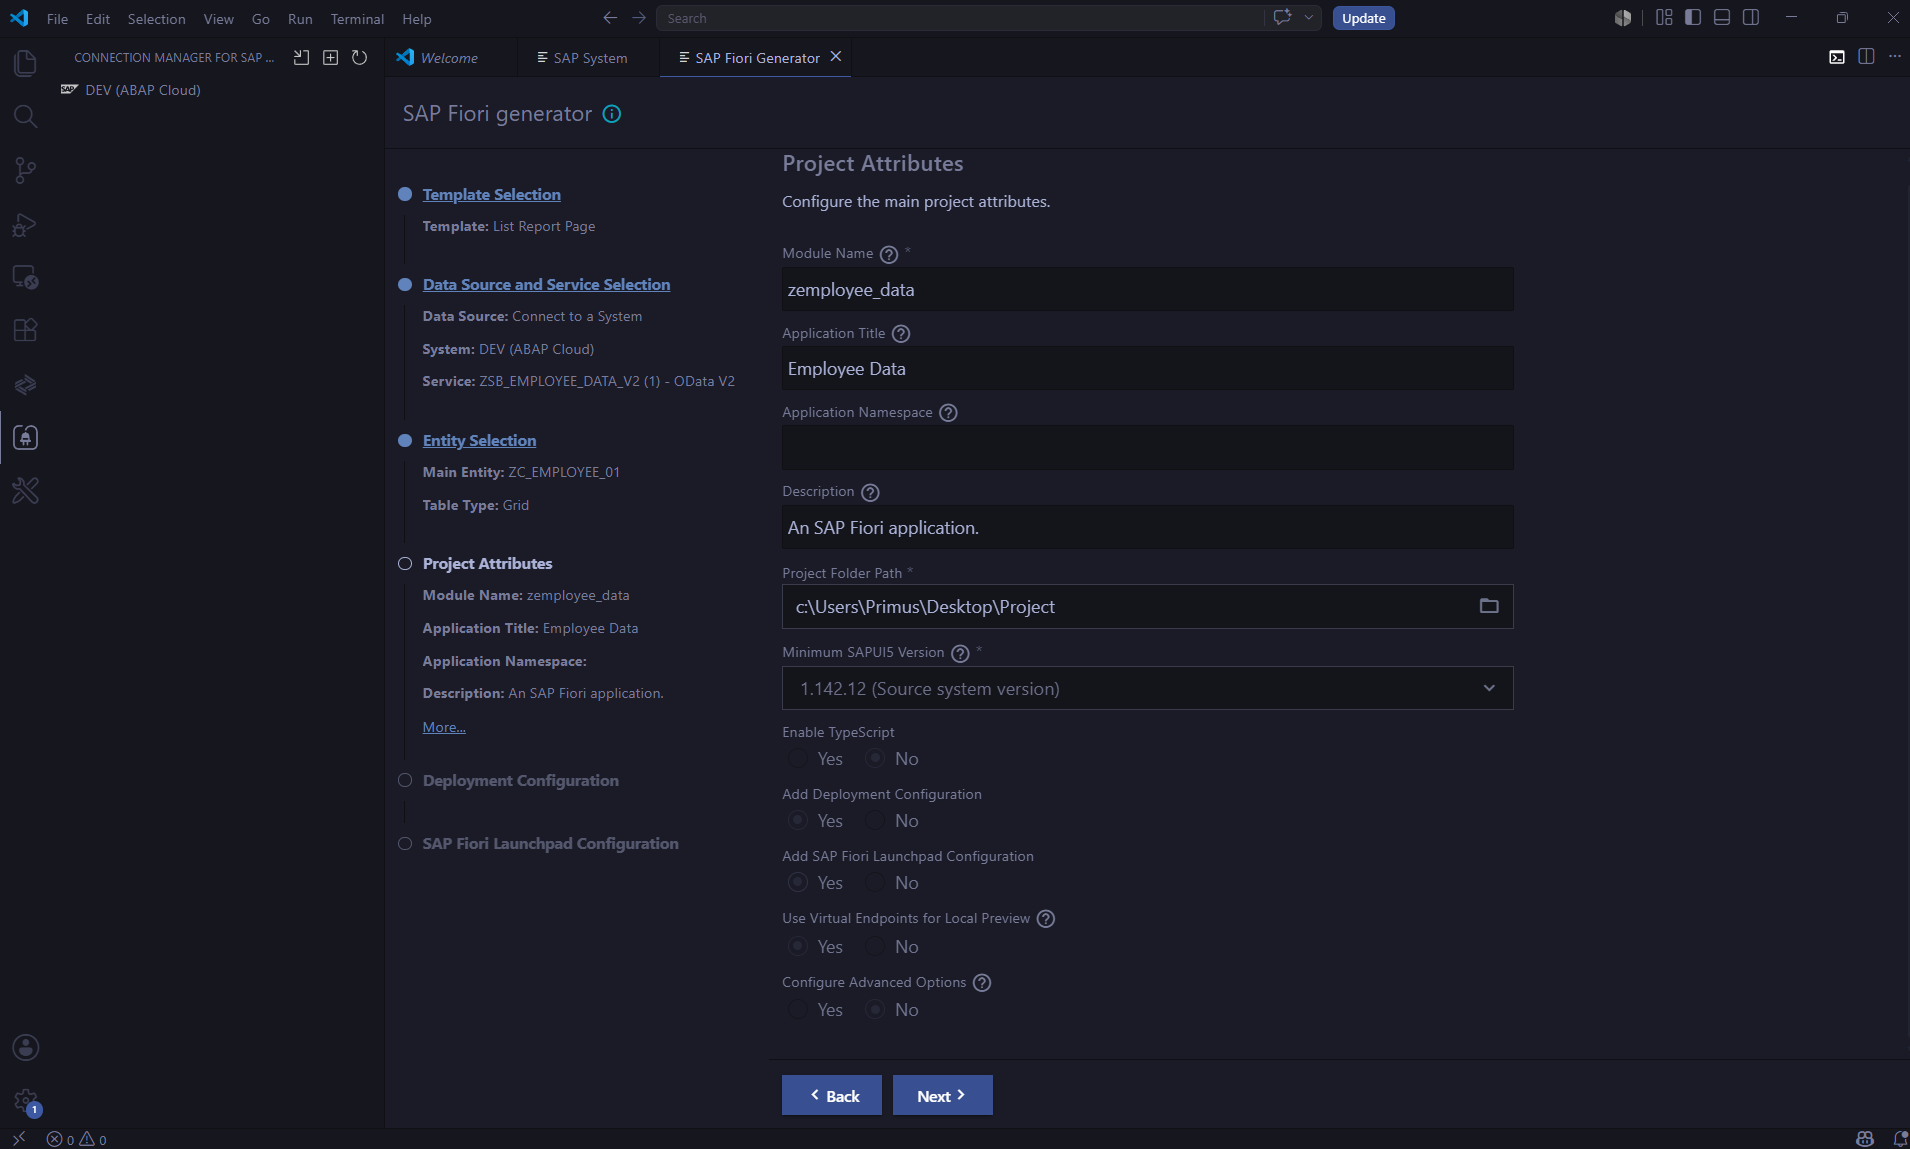
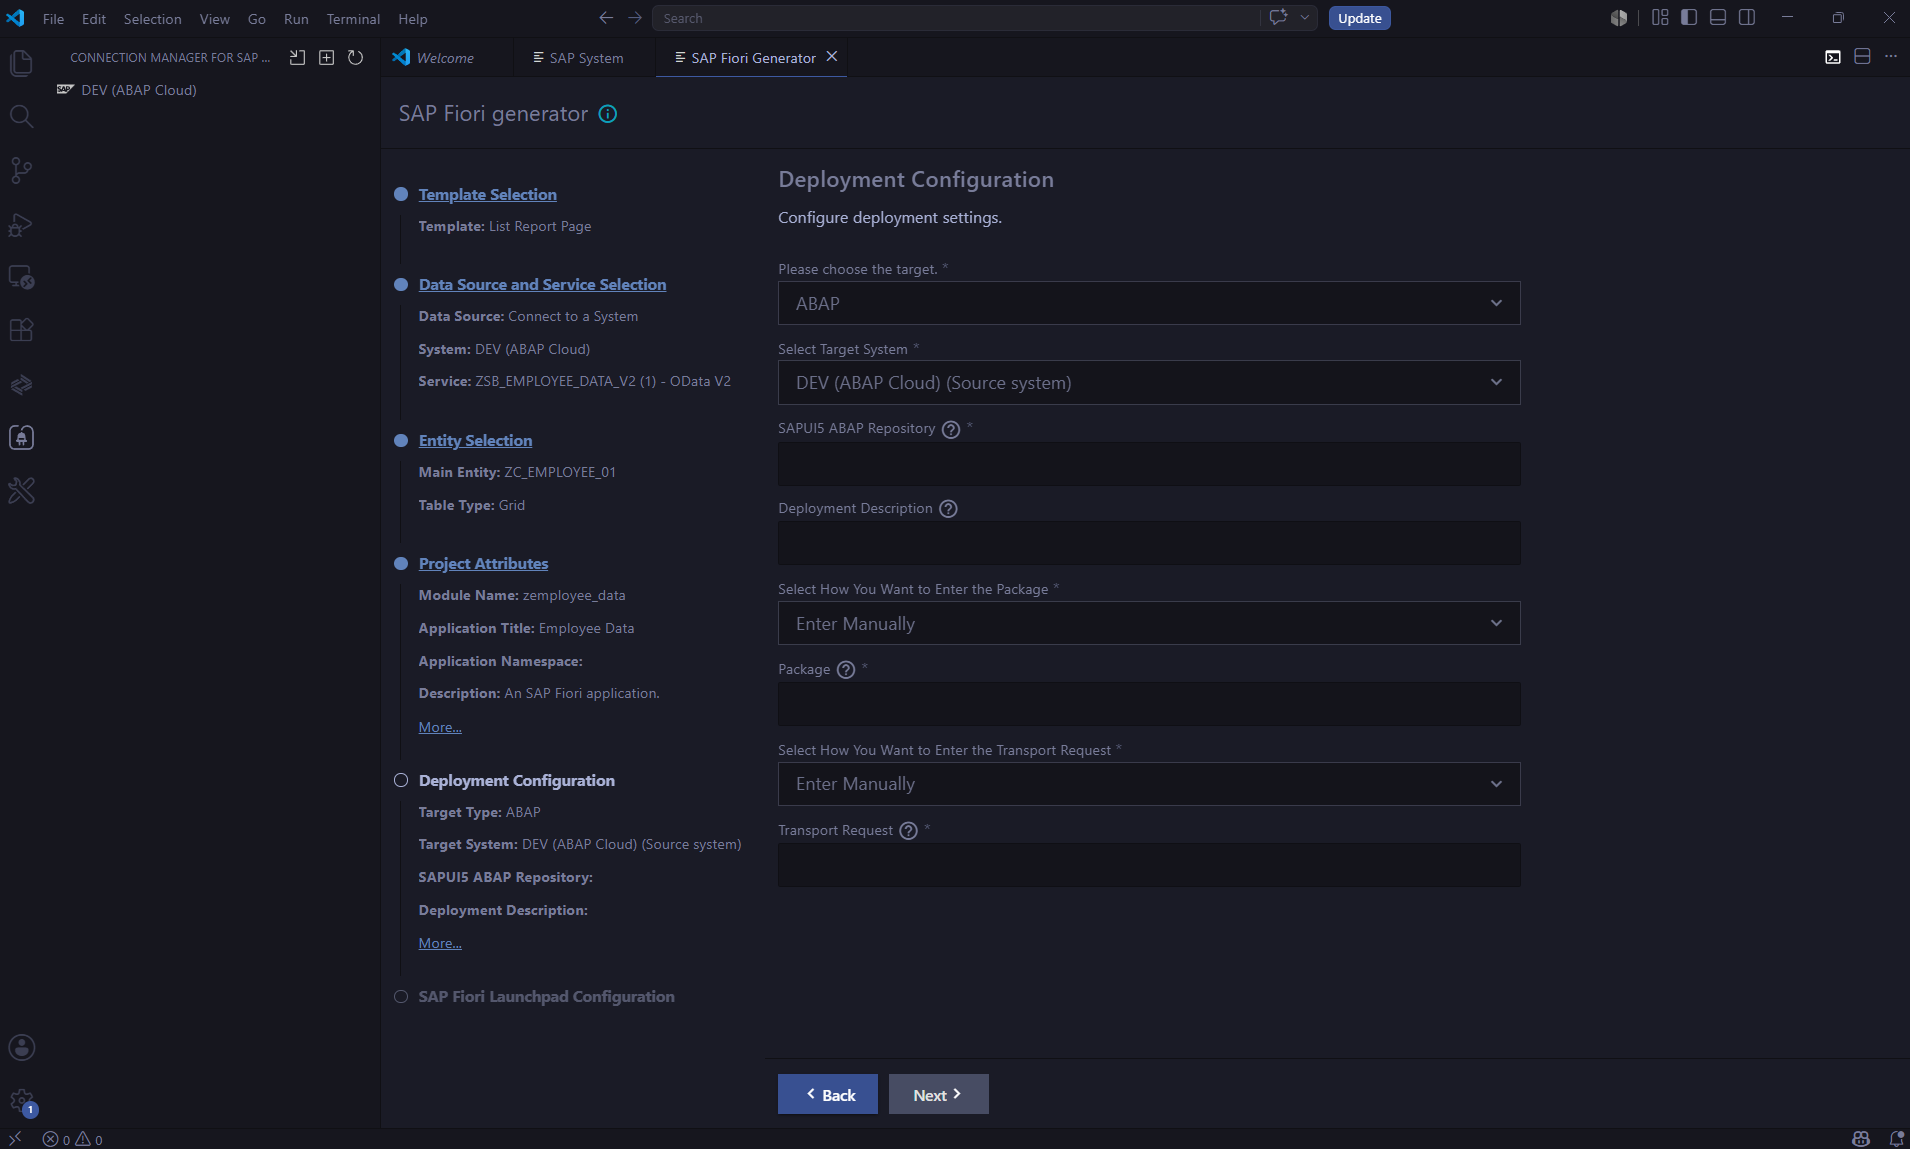
4.5 : Configure Project and Deployment Settings
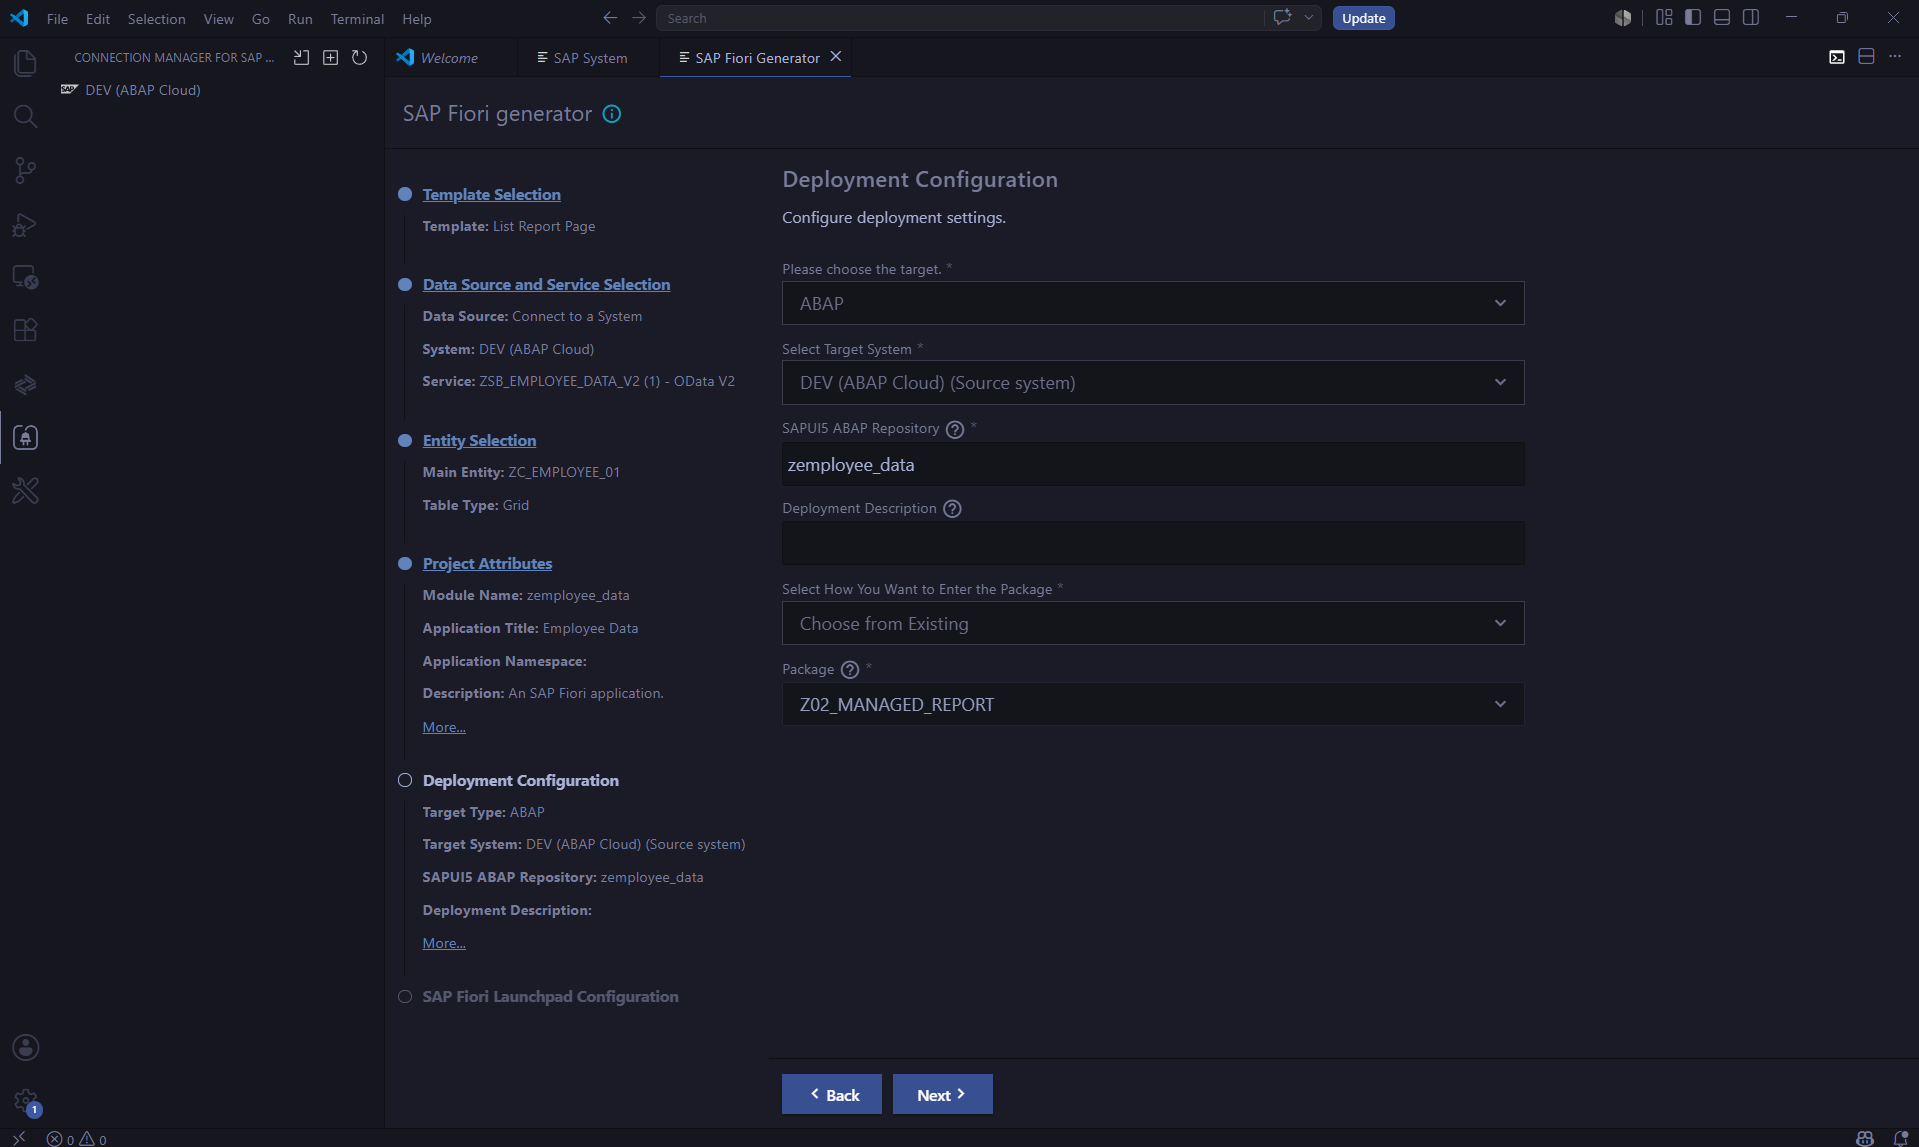
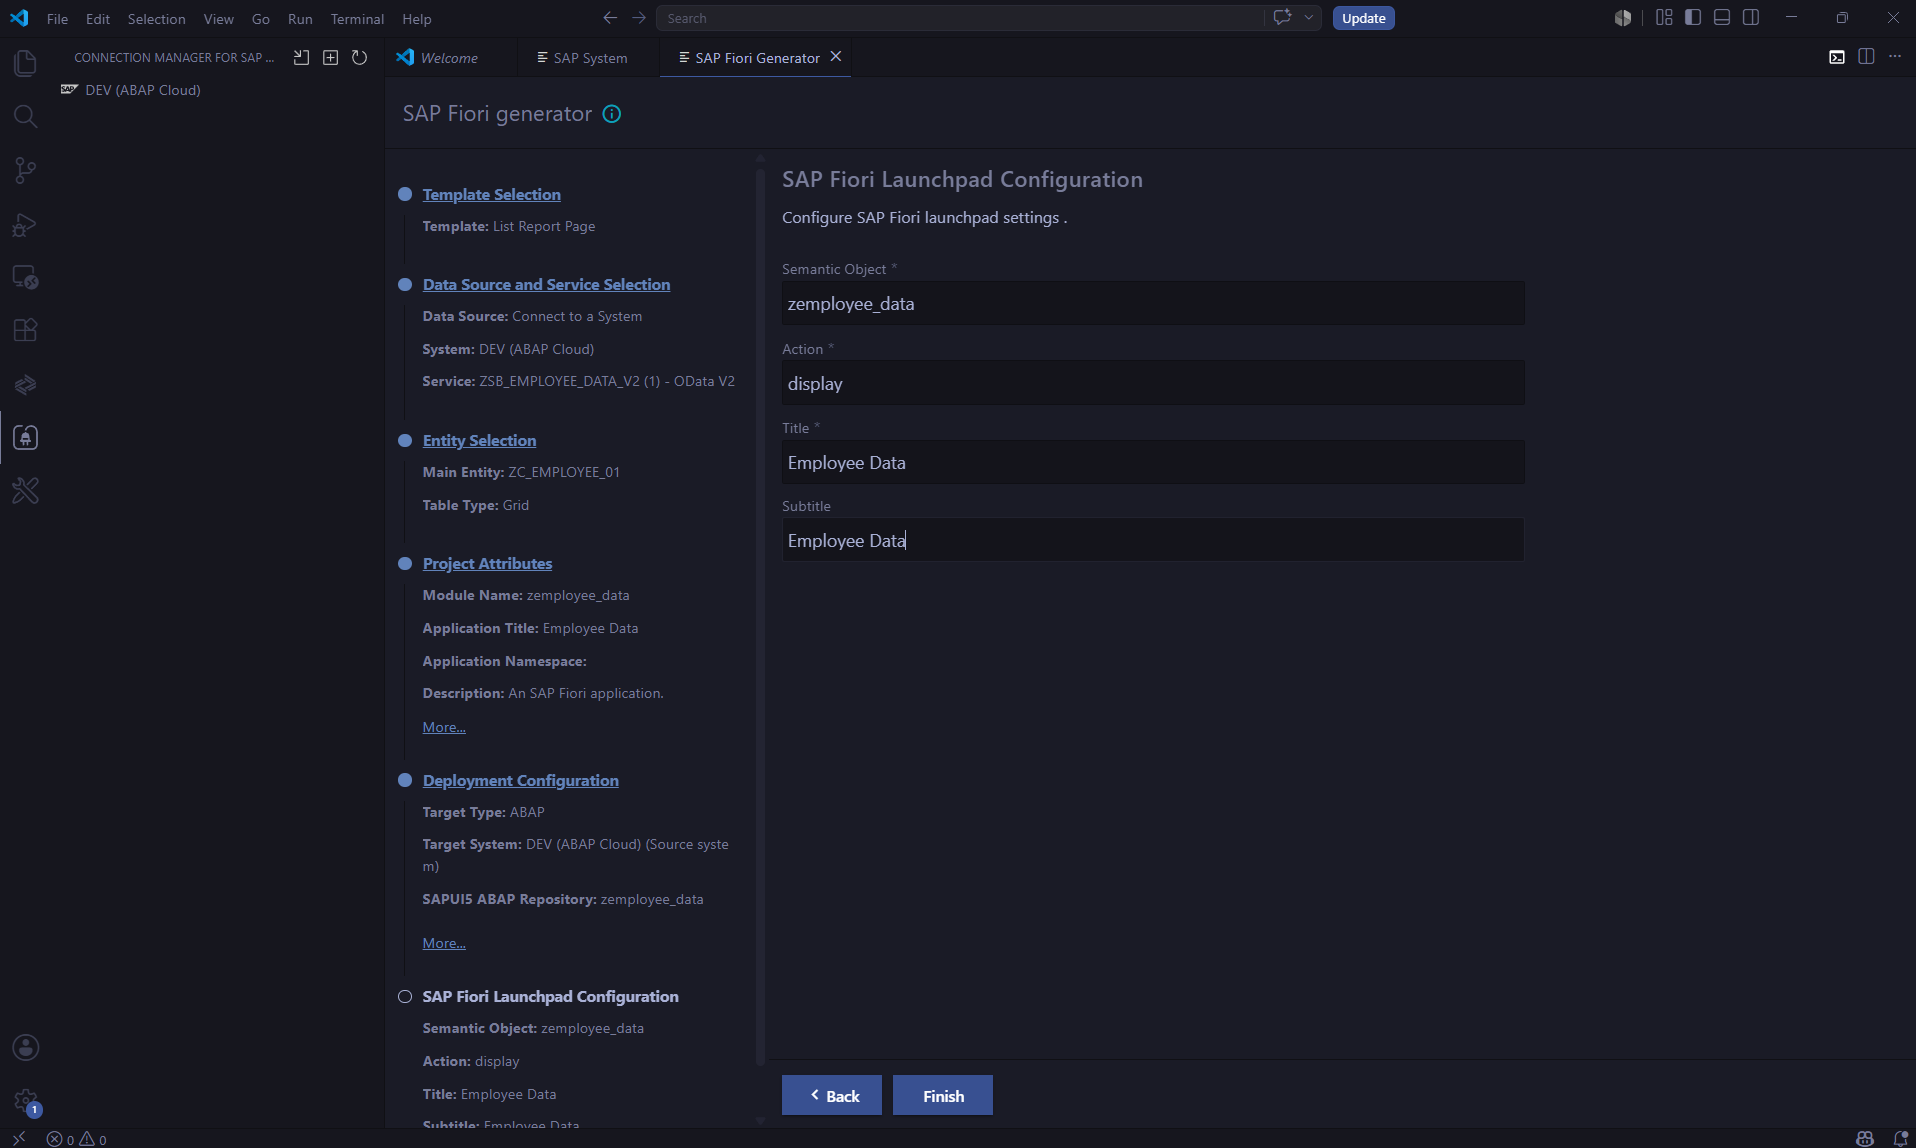
Fill in all the required project details. Ensure you check both the Configure Deployment checkbox and the Fiori Launchpad Configuration checkbox.
Tip: If you want more tile customization options in Eclipse later, check only the Configure Deployment checkbox and skip the Fiori Launchpad radio button for now — you can configure the tile manually in ADT.
4.6 : Open Application Info
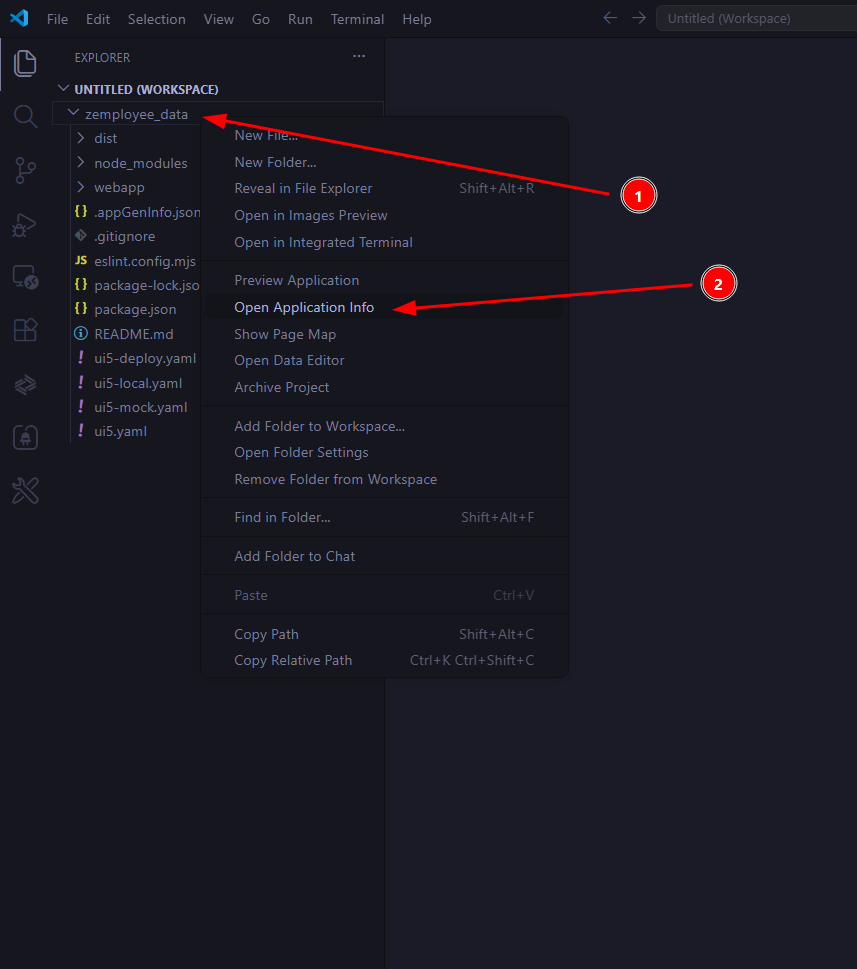
Once the project folder is generated, right-click on it in the VS Code Explorer and select Open Application Info.
Step 5: Deploy the Application
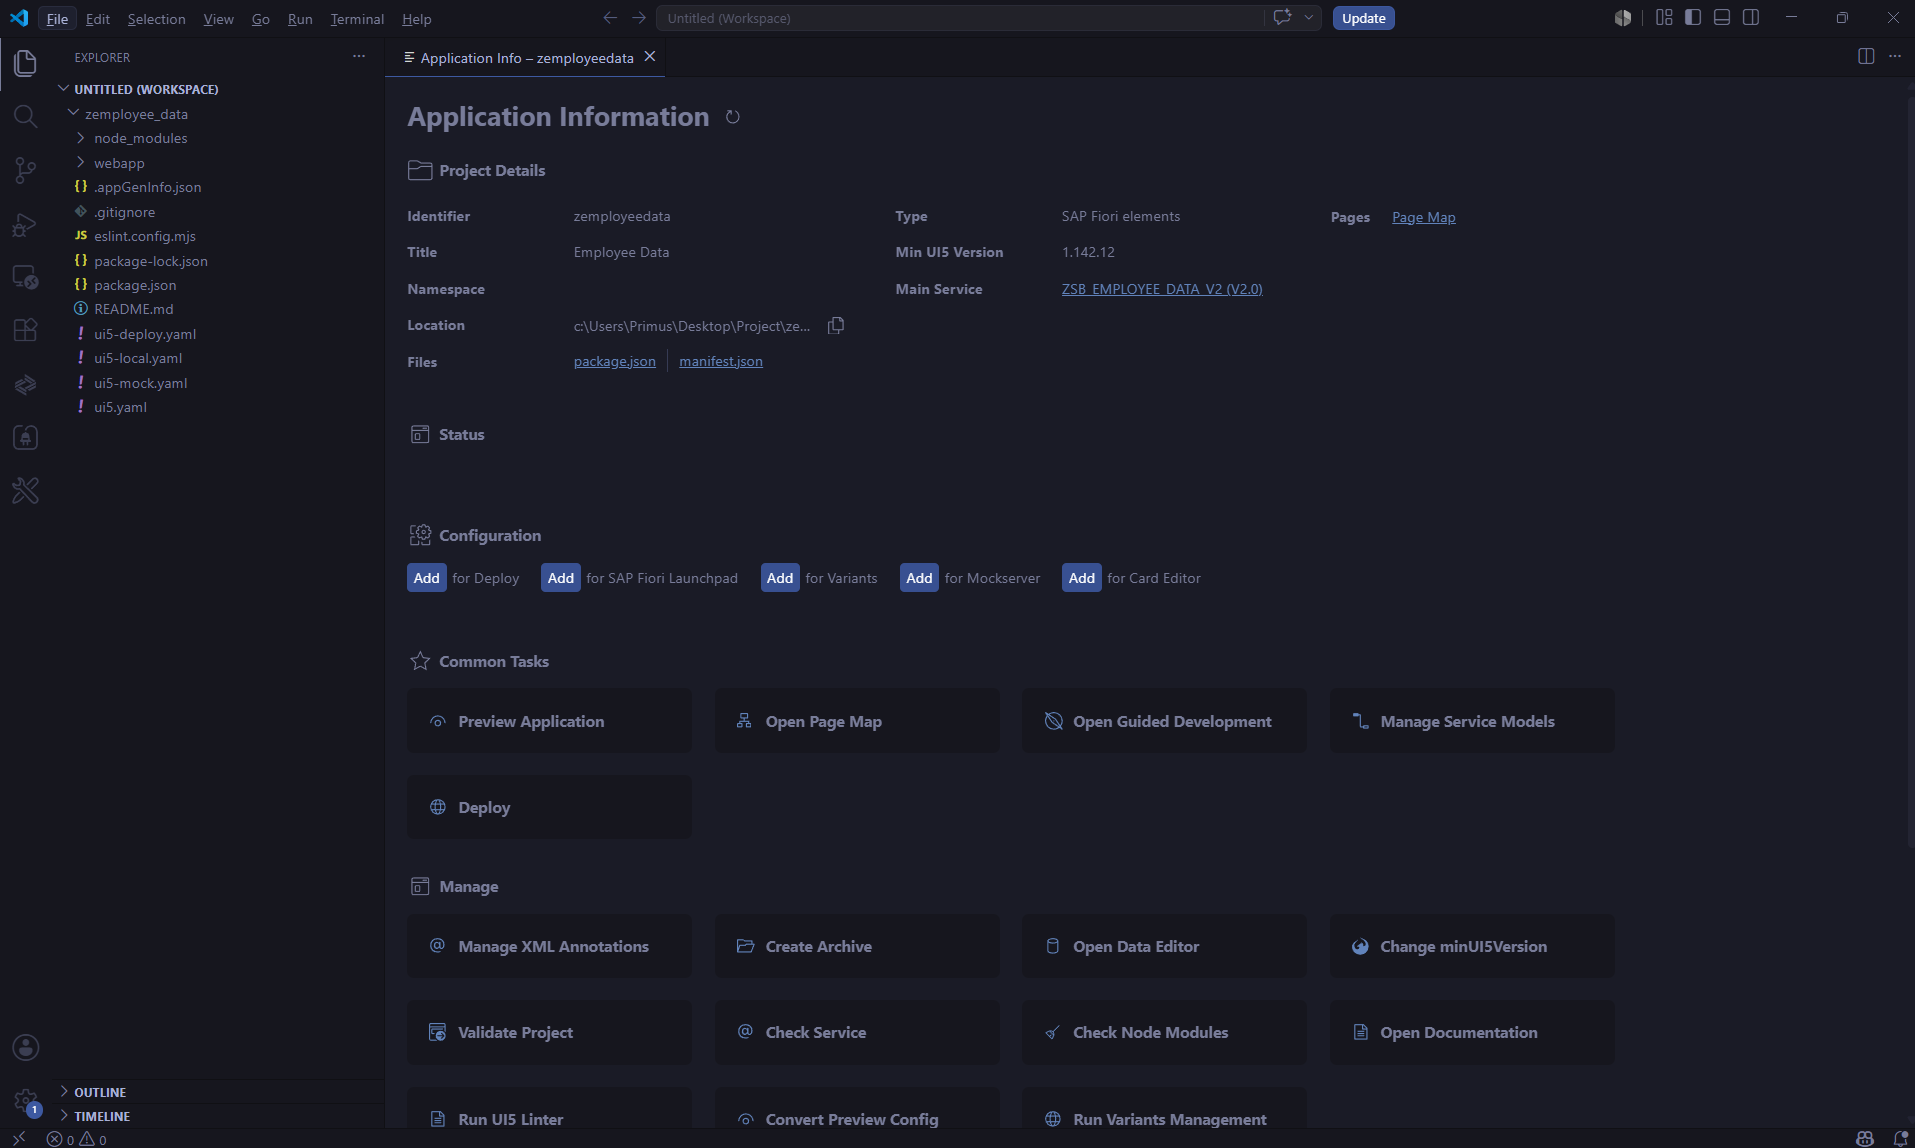
5.1 : Initiate Deployment
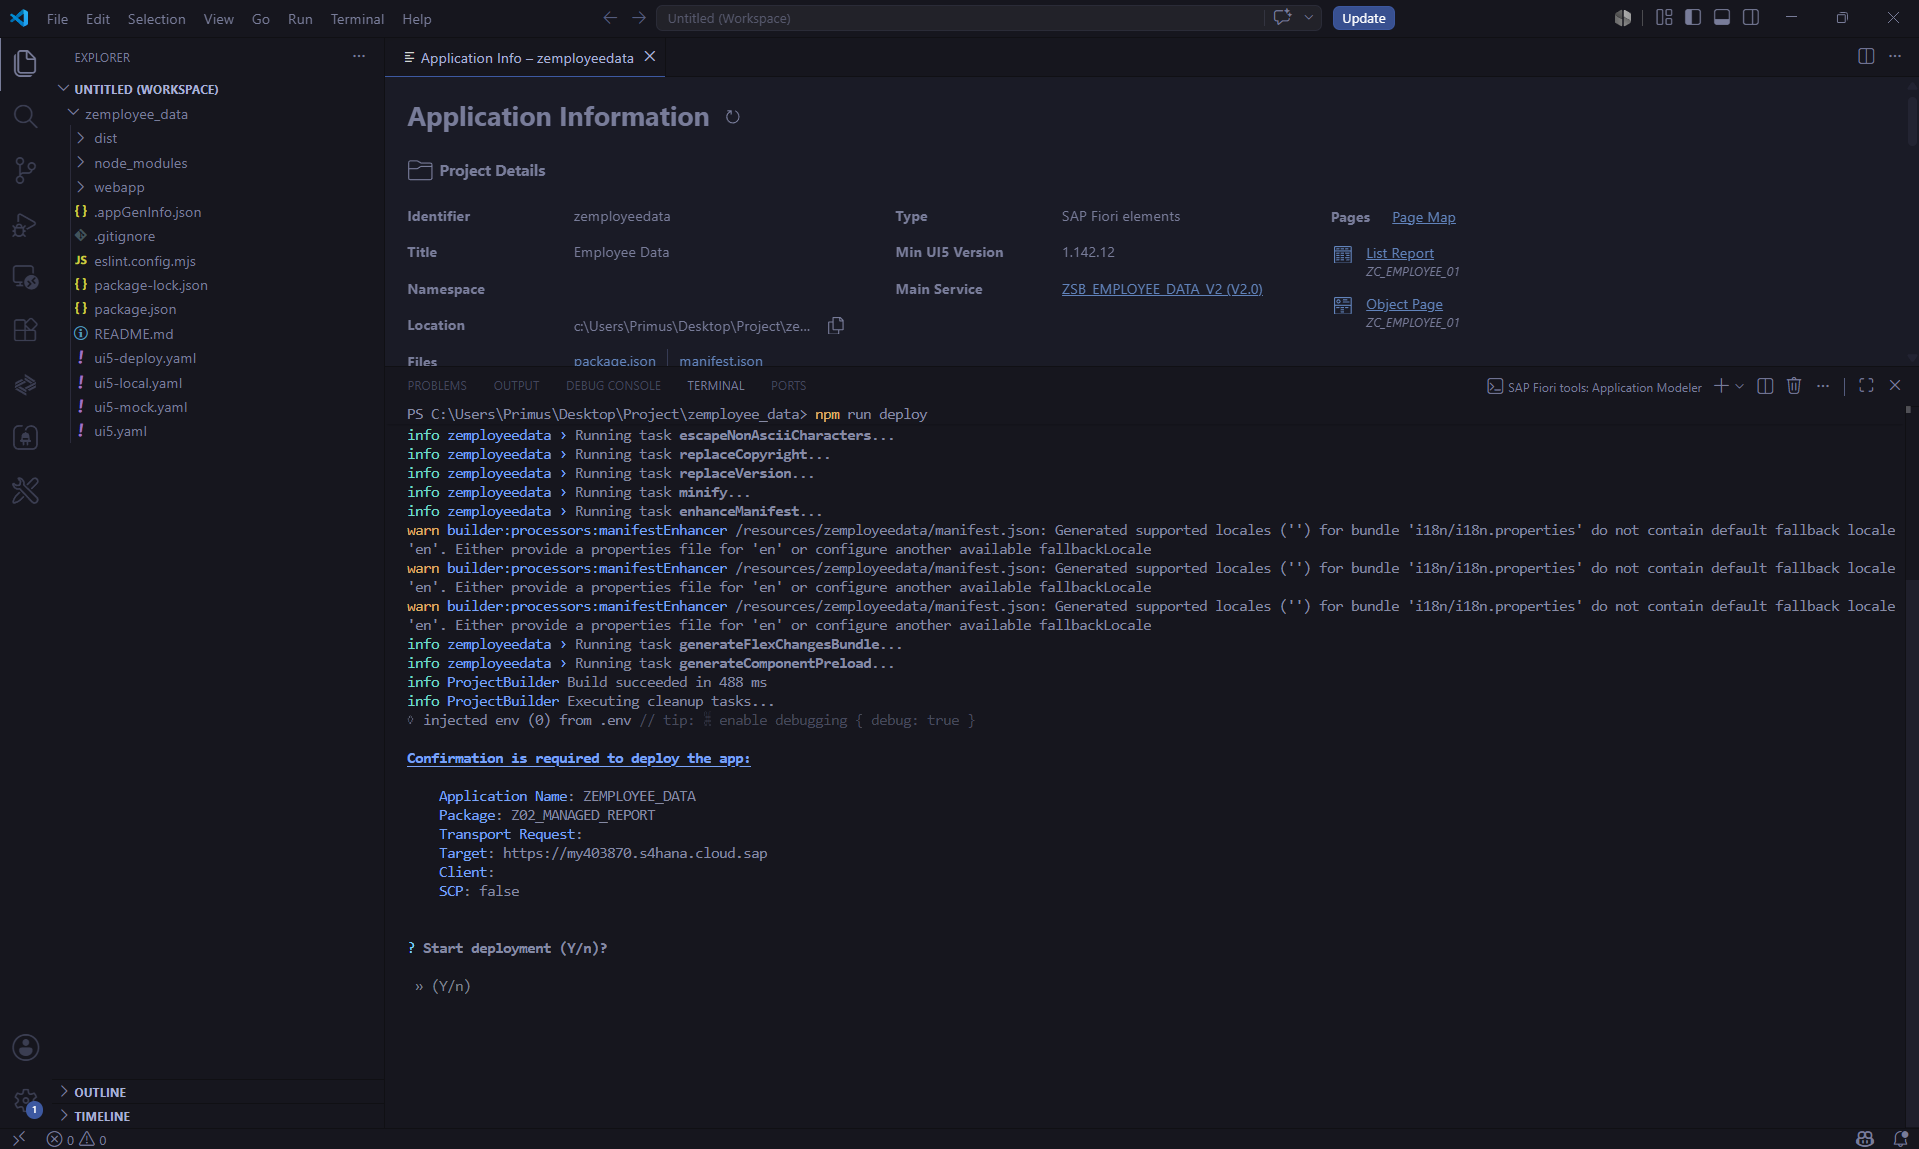
On the Application Info page, click the Deploy button.
Alternative: Deployment can also be triggered from the integrated terminal by running the following commands in sequence:
npm run build
npm run deploy
5.2 : Confirm Deployment
When prompted, press Y to confirm and start the deployment process.
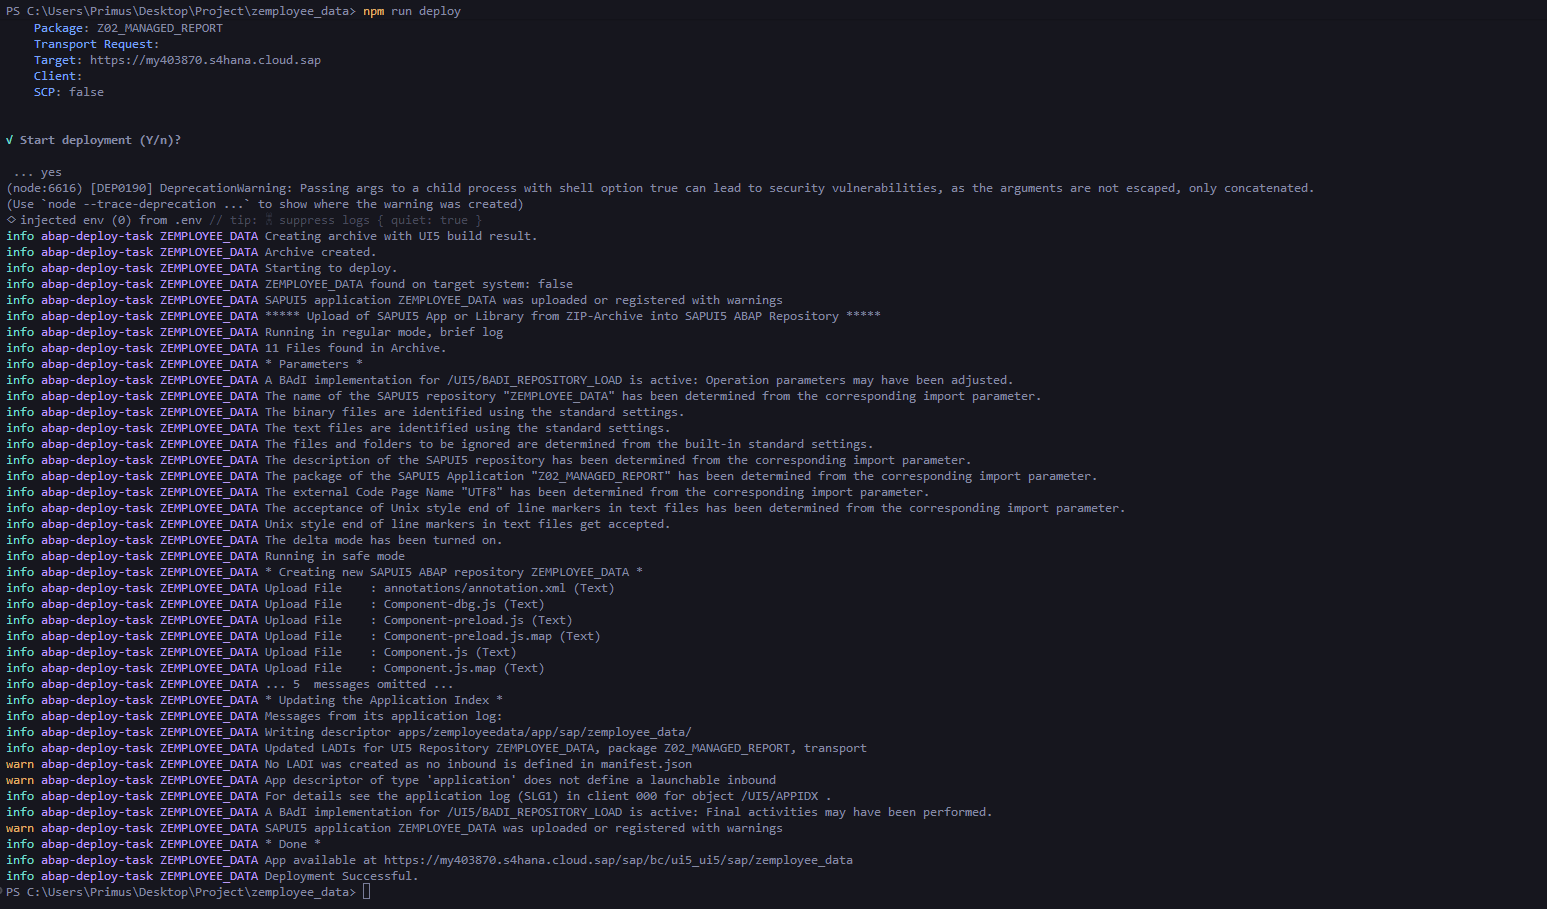
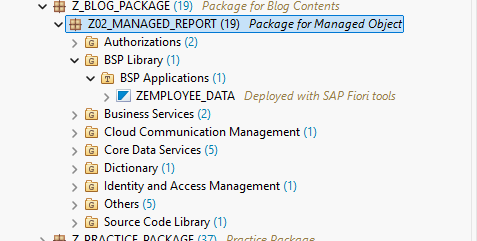
5.3 : Verify the Deployed Object
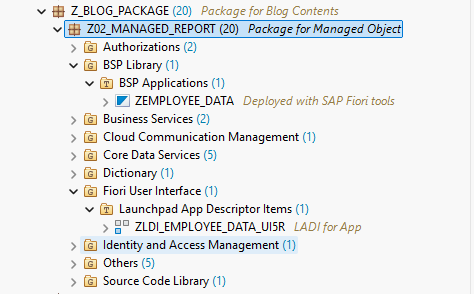
Upon successful deployment, a new BSP Application object will appear in your ABAP package in ADT. The exact name may vary depending on your project configuration.
Step 6: Configure the Launchpad Tile
A Launchpad App Descriptor Item object is typically created automatically when you selected both the deployment and Fiori Launchpad options in Step 4.5. If it was generated automatically, skip to Step 7.
If it was not generated, follow the steps below to create it manually.
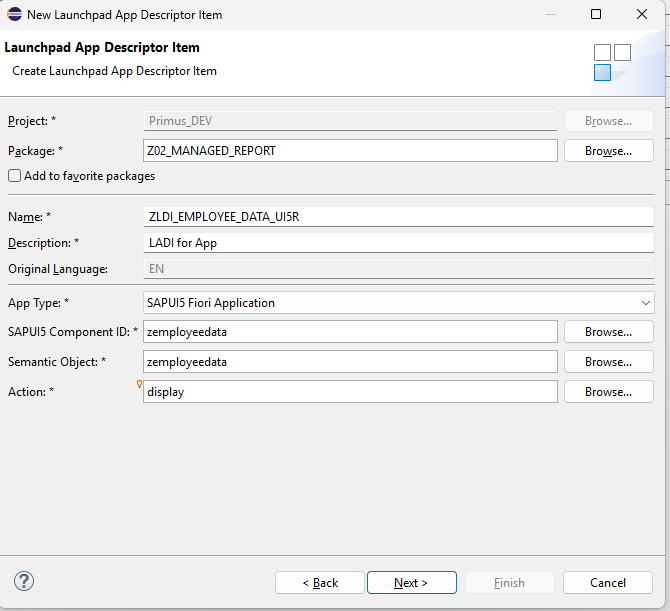
6.1 : Create a New Launchpad App Descriptor Item
In ADT, create a new Launchpad App Descriptor Item object inside your package.
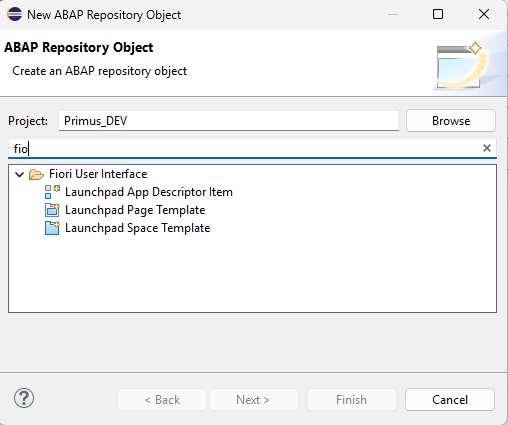
Fill in the following fields:
- SAPUI5 Component ID: Enter the BSP Application object name (e.g.,
zemployeedata) - Semantic Object: Enter any name — using the same name as the BSP Application object is a common convention
- Action: Enter
display
6.2 : Add a Tile
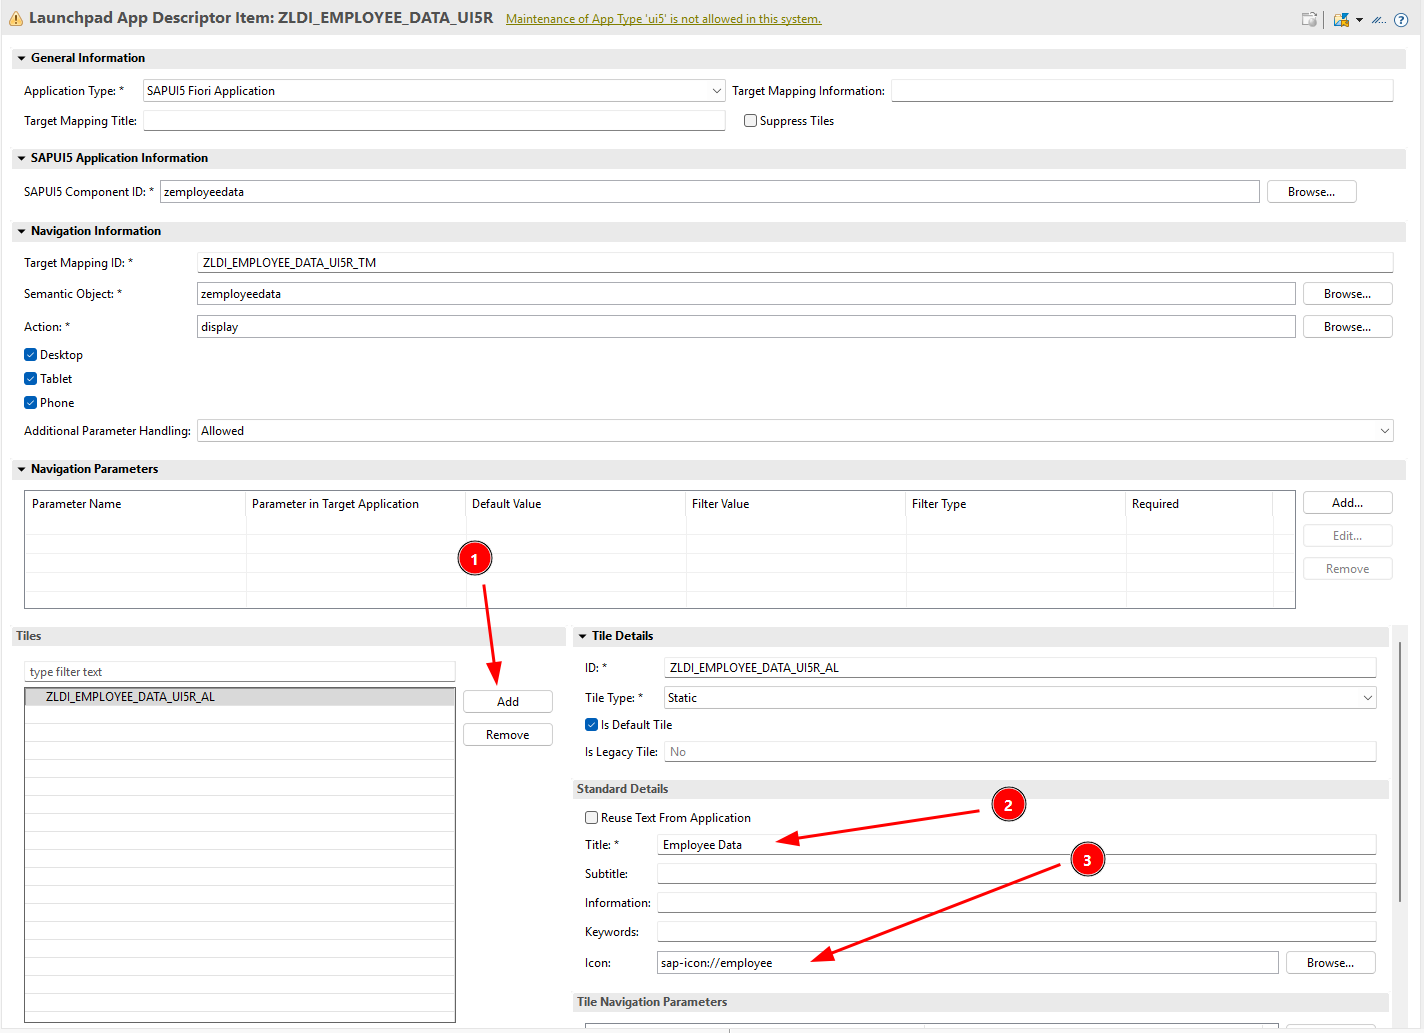
Click Add to define the tile that will appear on the Fiori Launchpad.
- Enter a Tile Name
- Select an Icon for the tile
Step 7: Create an IAM App for the External Application
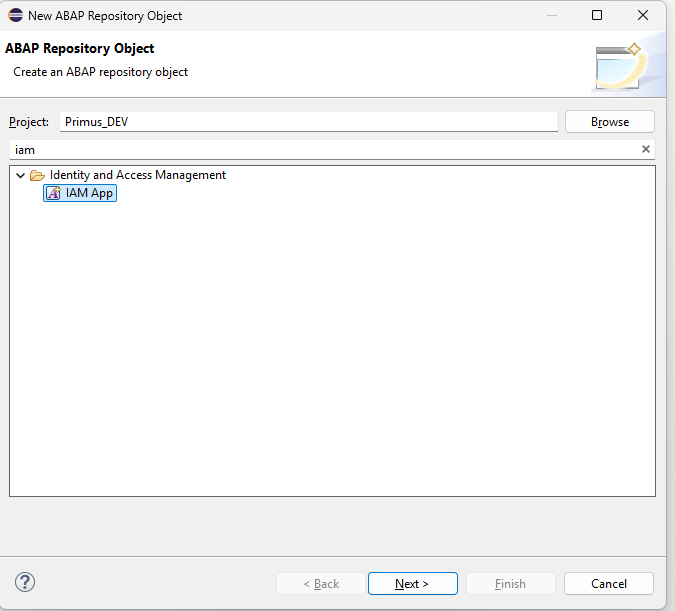
7.1 : Create a New IAM App
In ADT, create a new IAM App object.
7.2 : Select the Application Type
When prompted, select External Application as the application type.
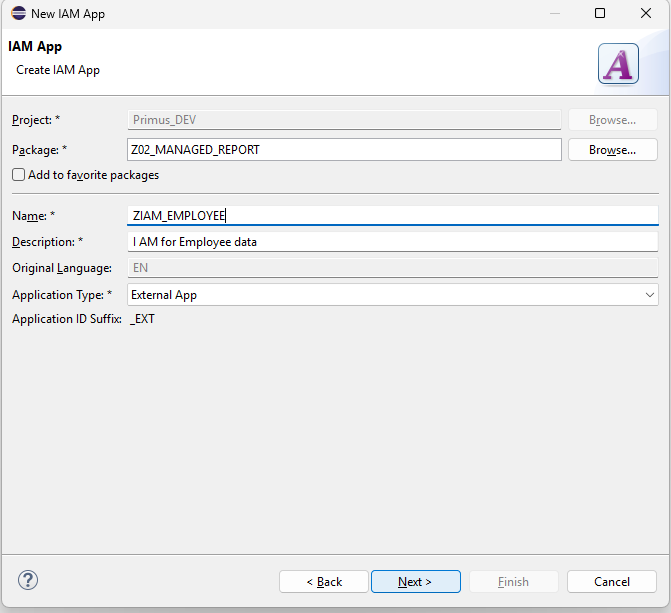
7.3 : Assign the Launchpad App Descriptor Item
Add the Launchpad App Descriptor Item you created in Step 6 to this IAM App. Then click Create a new Business Catalog and assign the app to it.
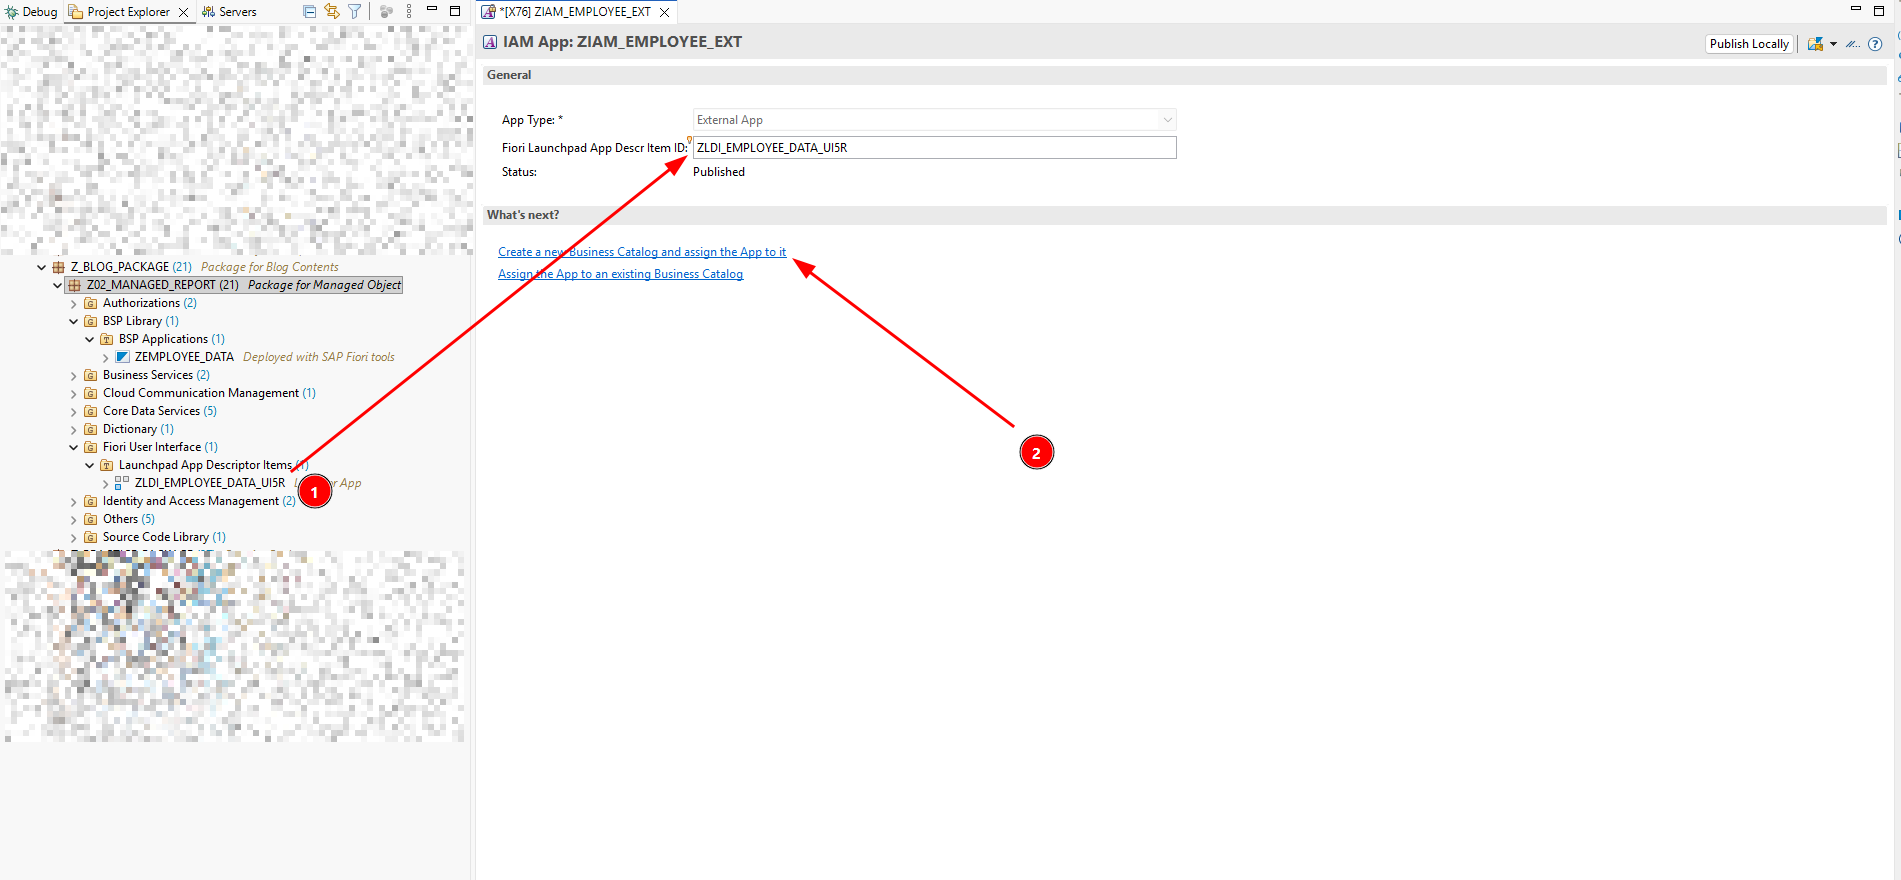
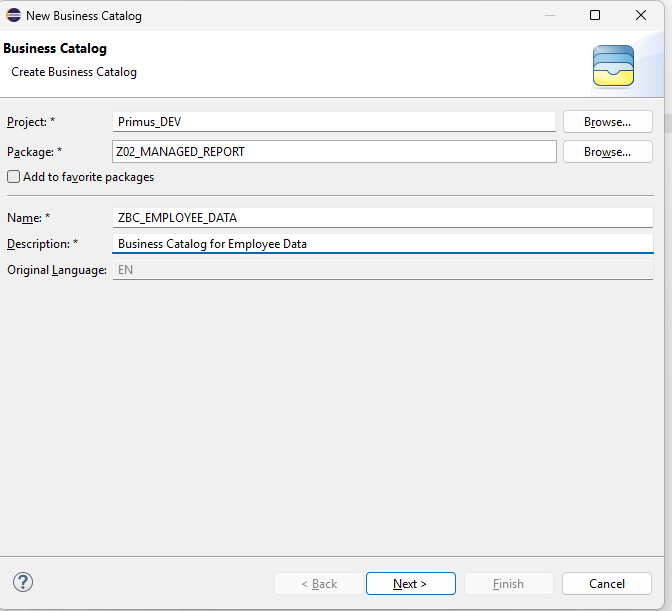
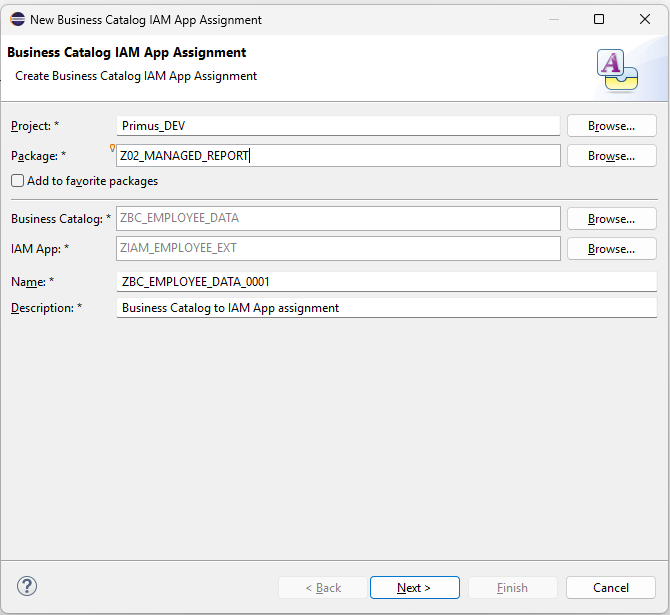
7.4 : Verify and Publish the IAM App
Once the Business Catalog is created, click on Apps at the bottom of the IAM App editor.
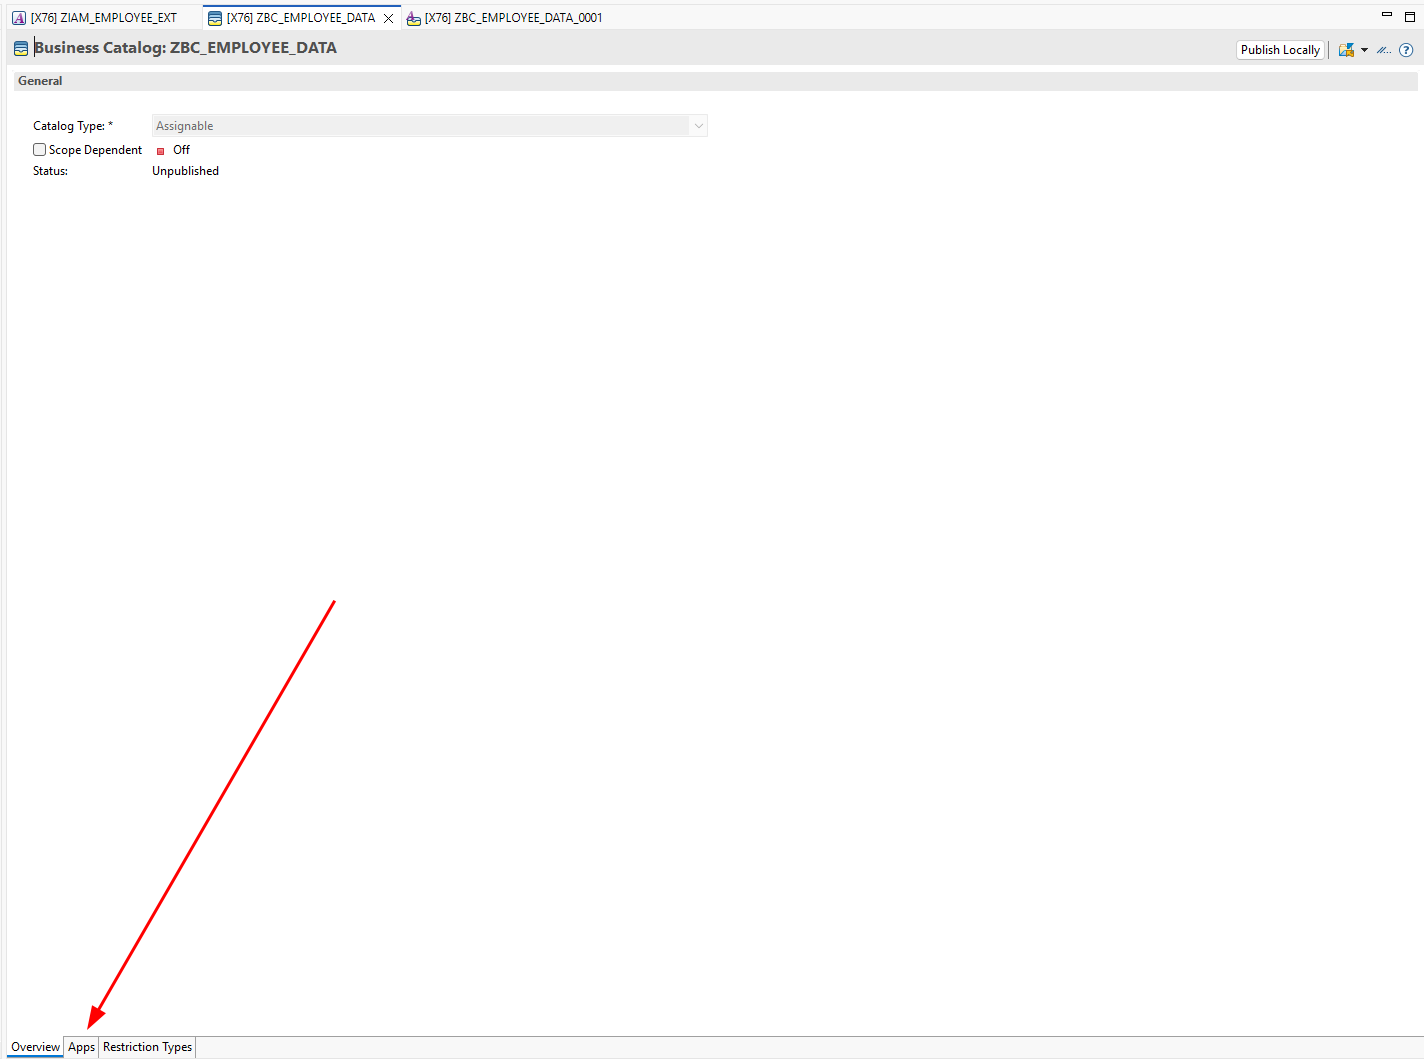
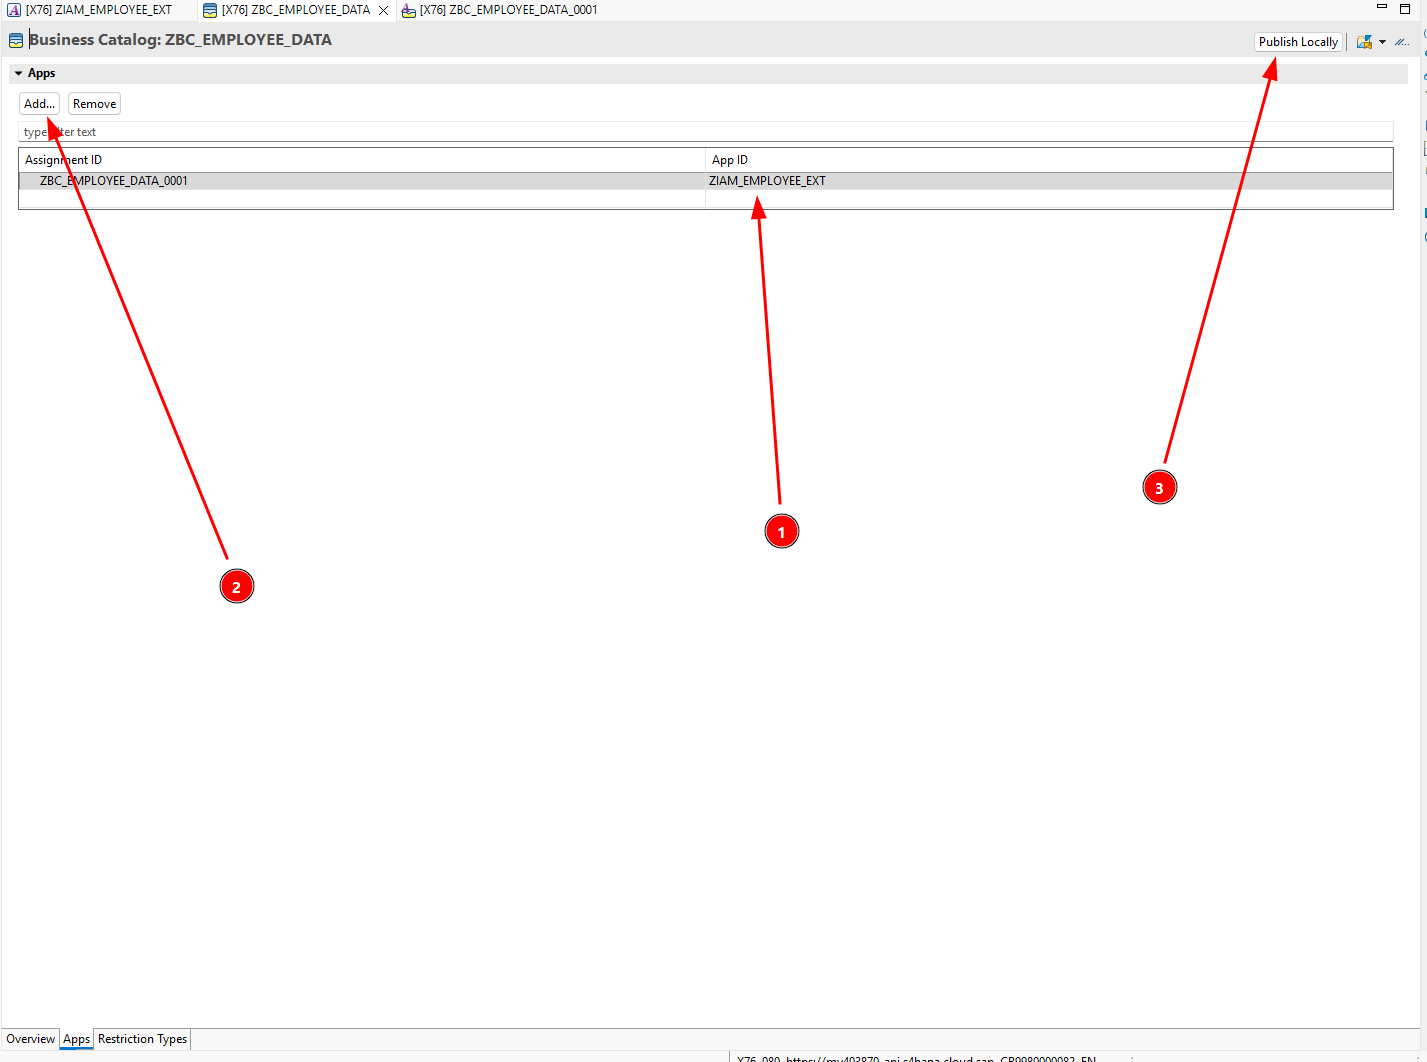
Verify that your IAM App appears in the list. If it does not, add it manually. Then click Publish Locally to activate the IAM App.
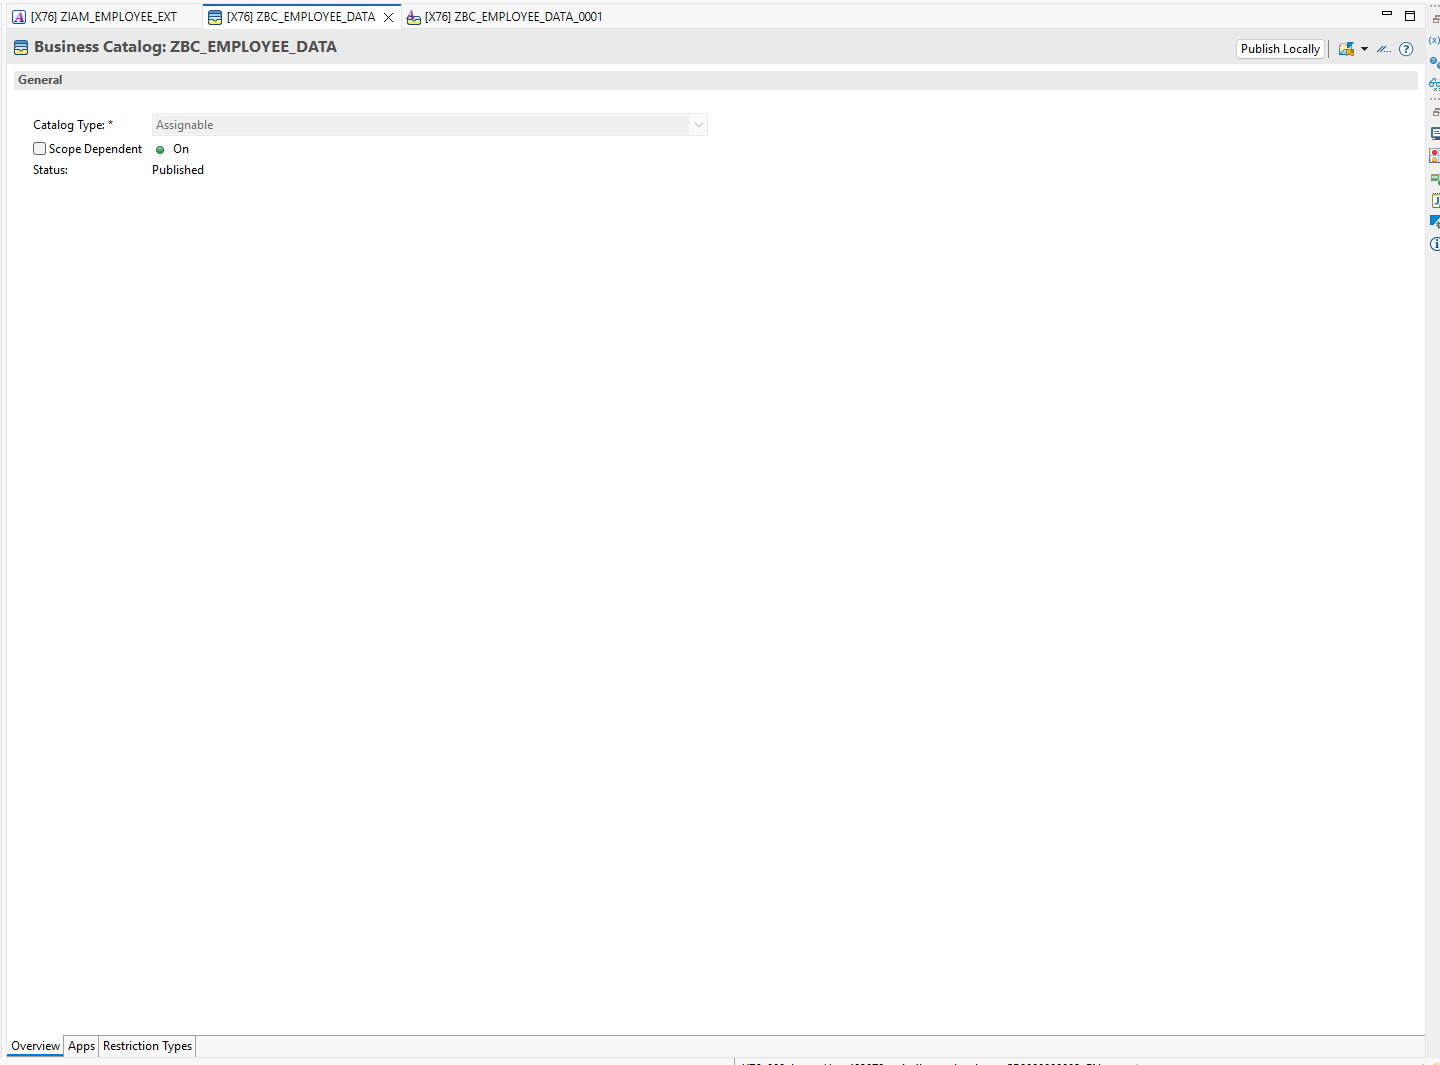
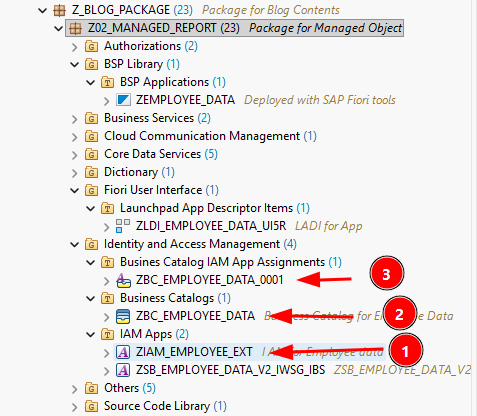
The following objects will be created as a result of publishing.
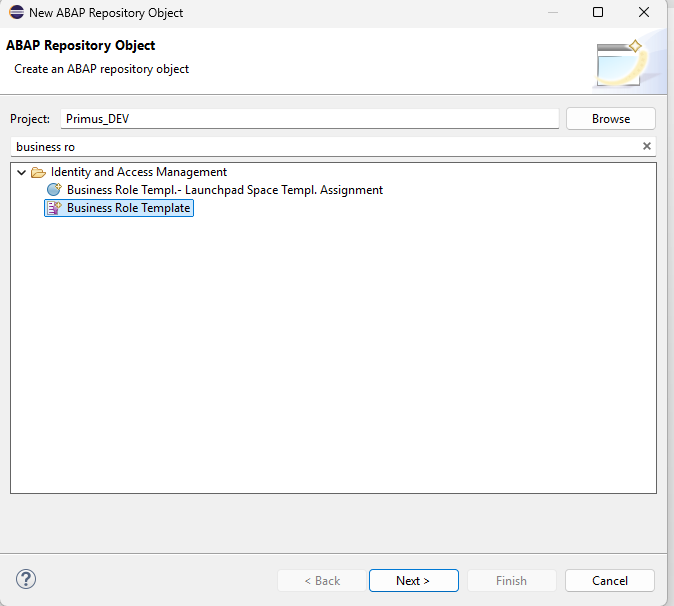
Step 8: Add a Business Role Template
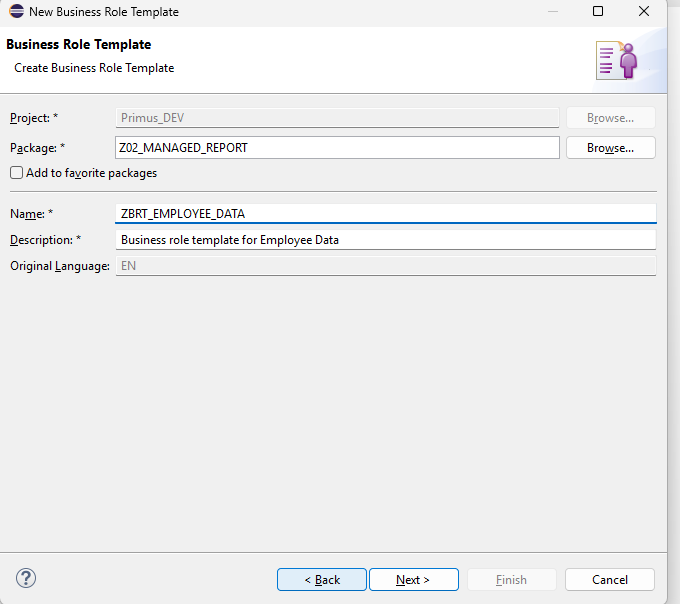
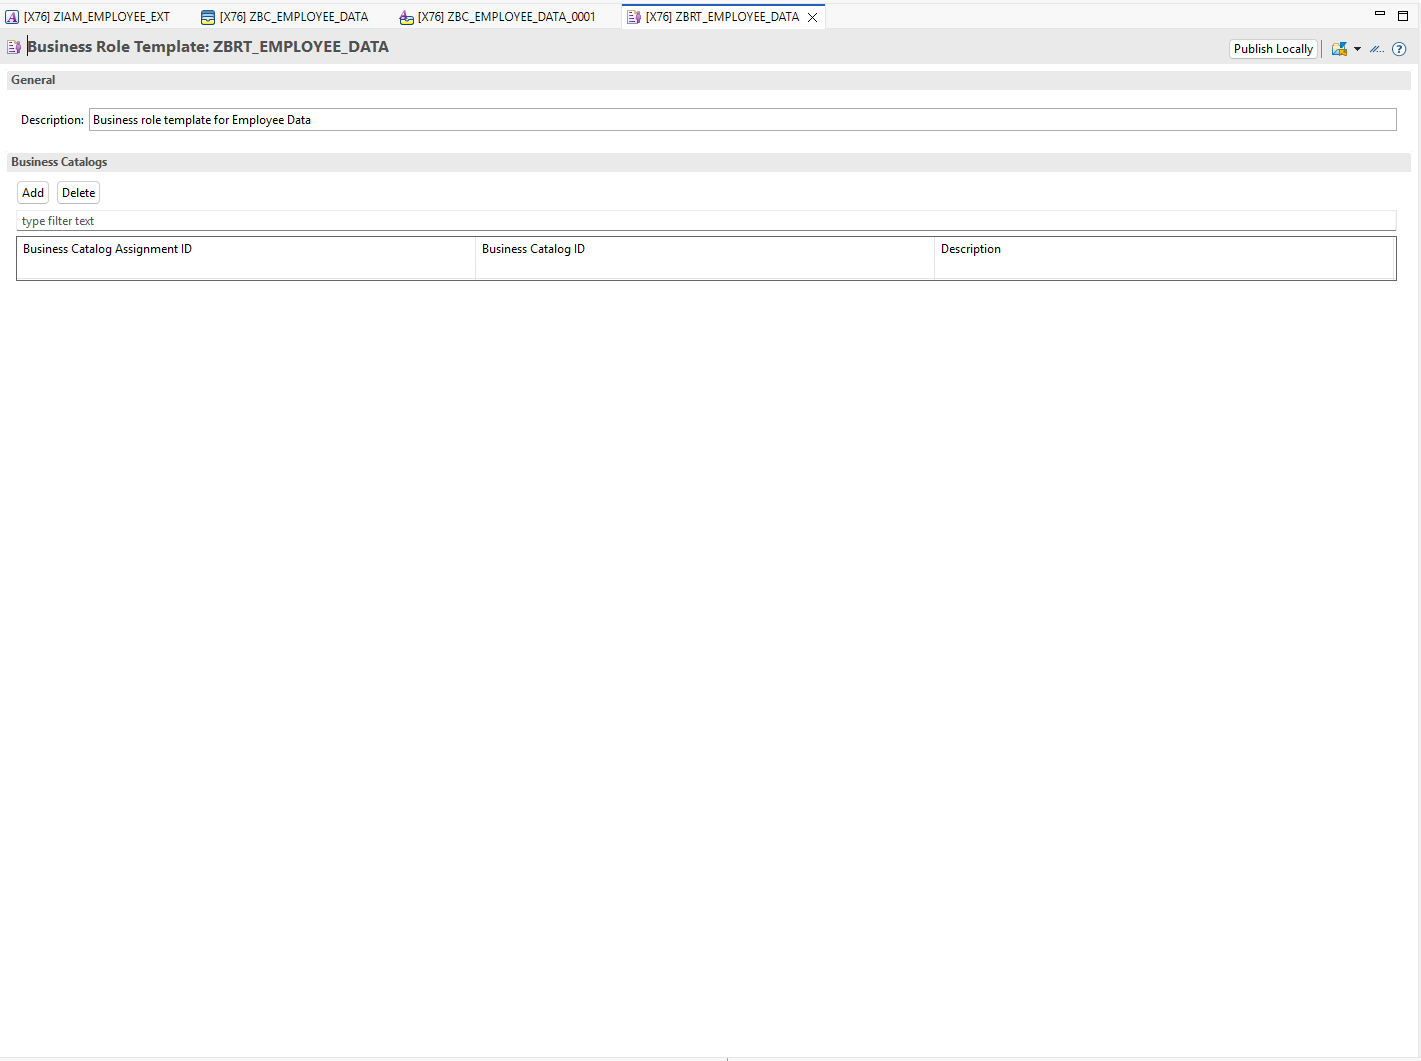
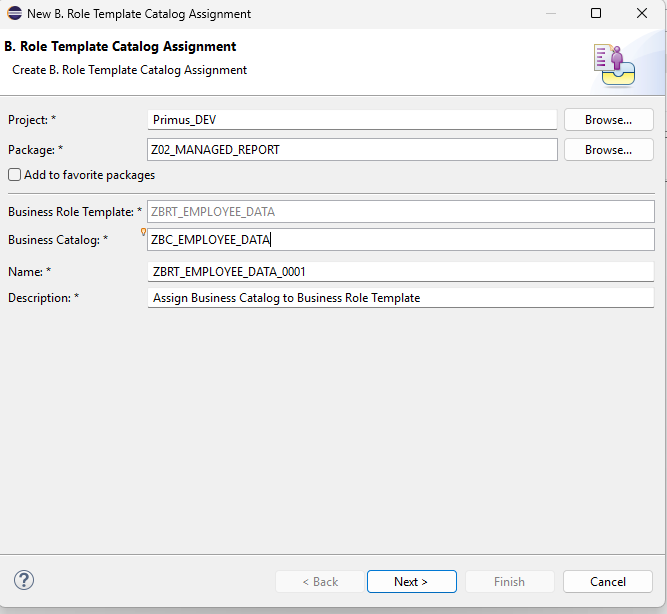
8.1 : Create the Business Role Template
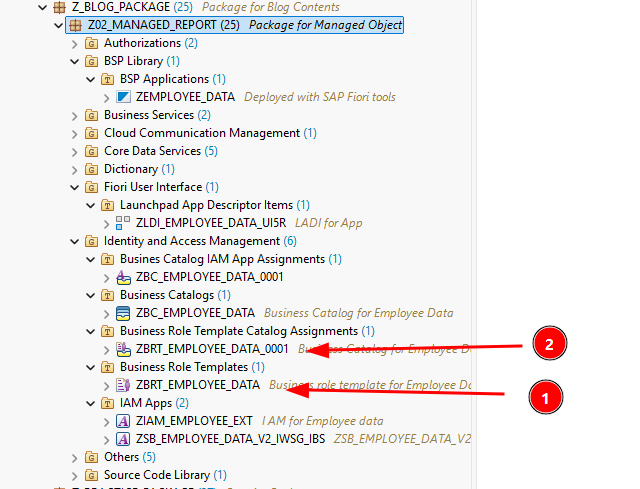
Create a new Business Role Template object in ADT and configure it appropriately.
Once completed, the following objects will be created in your package.
Step 9: Access the Application on the Tenant
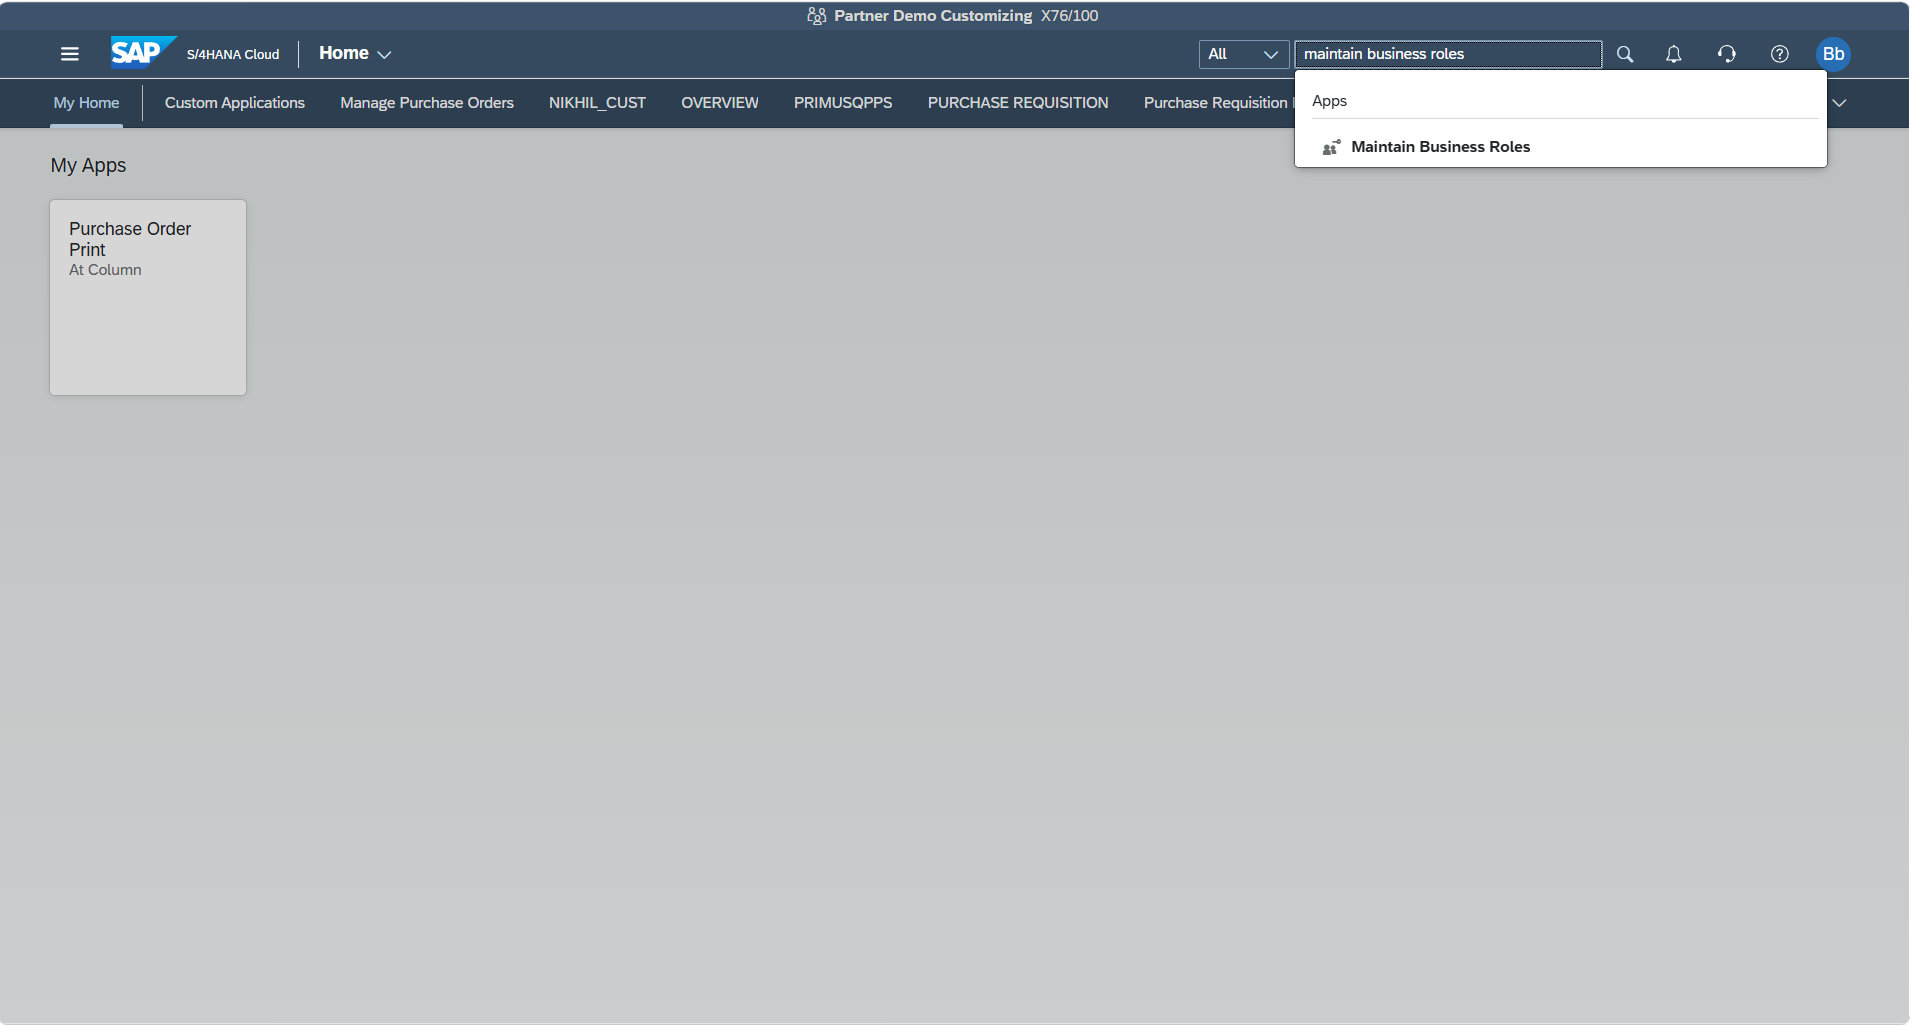
9.1 : Open Maintain Business Roles
Log in to your Customizing Tenant and search for the Maintain Business Roles app in the Fiori Launchpad.
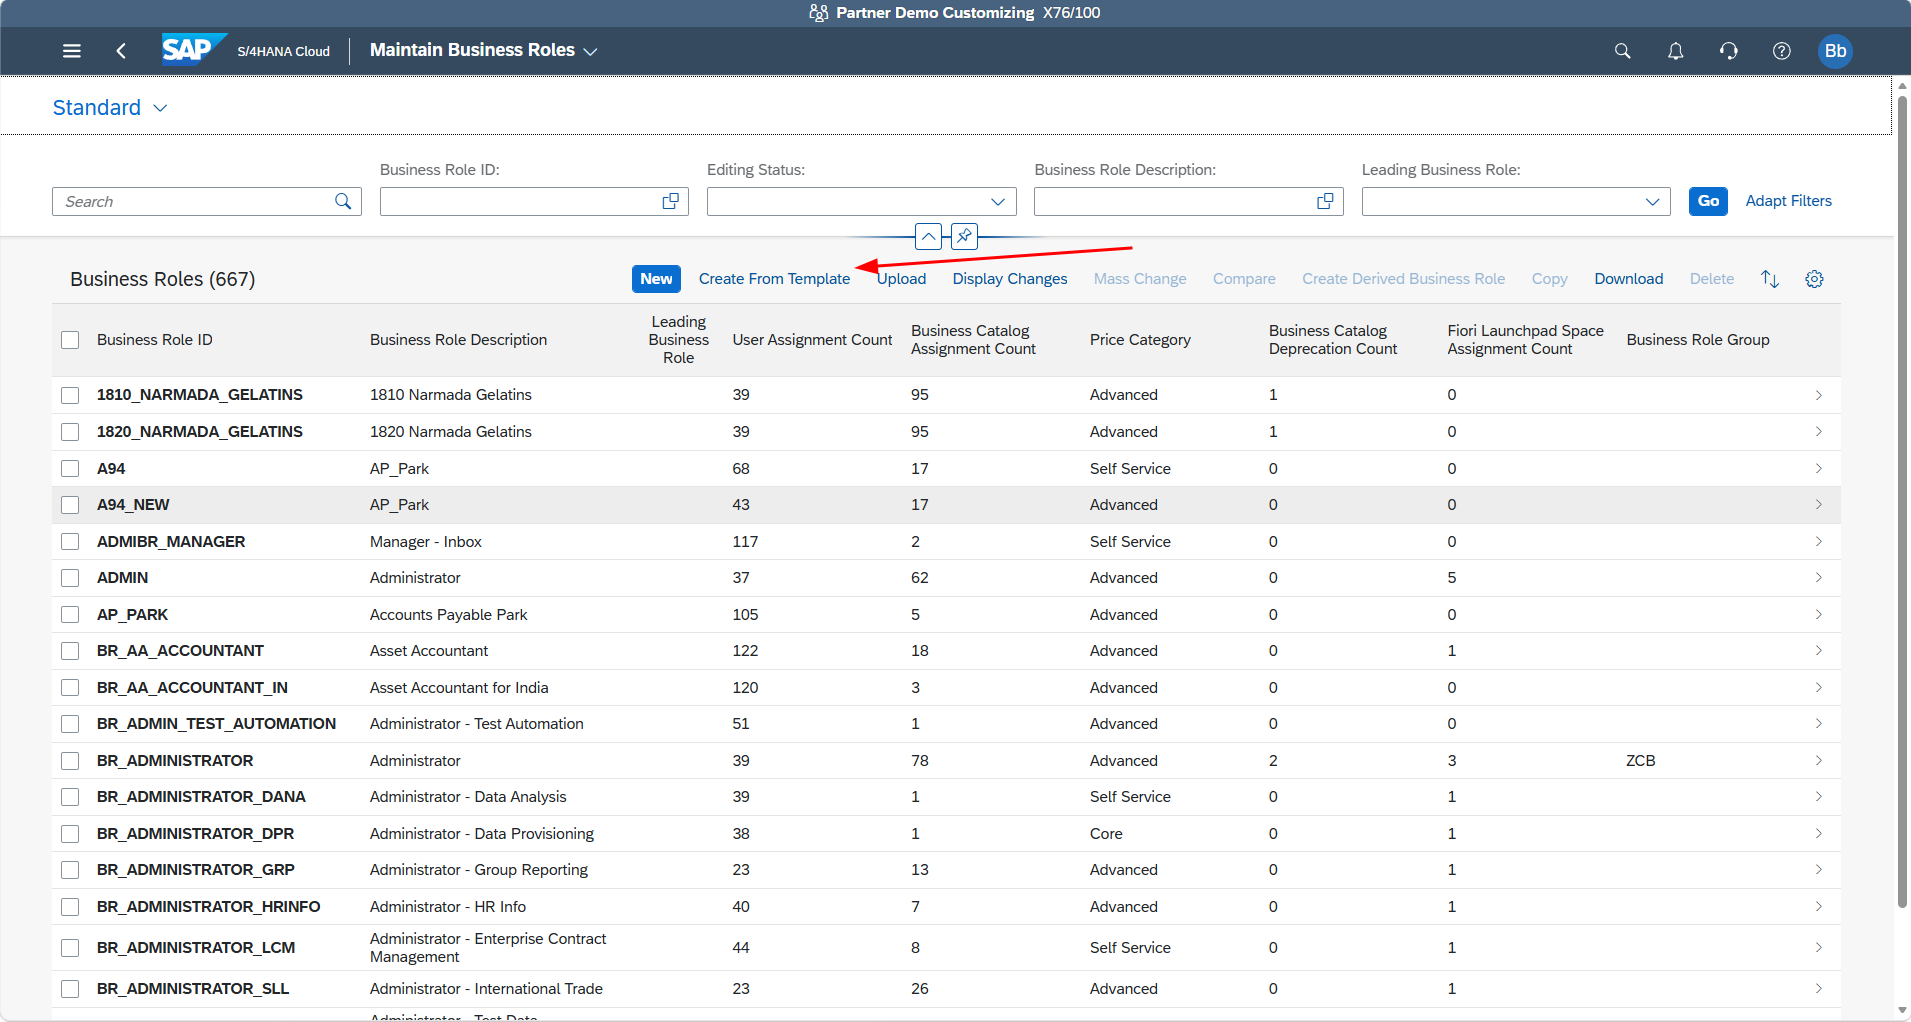
9.2 : Create a Business Role from the Template
Click Create from Template.
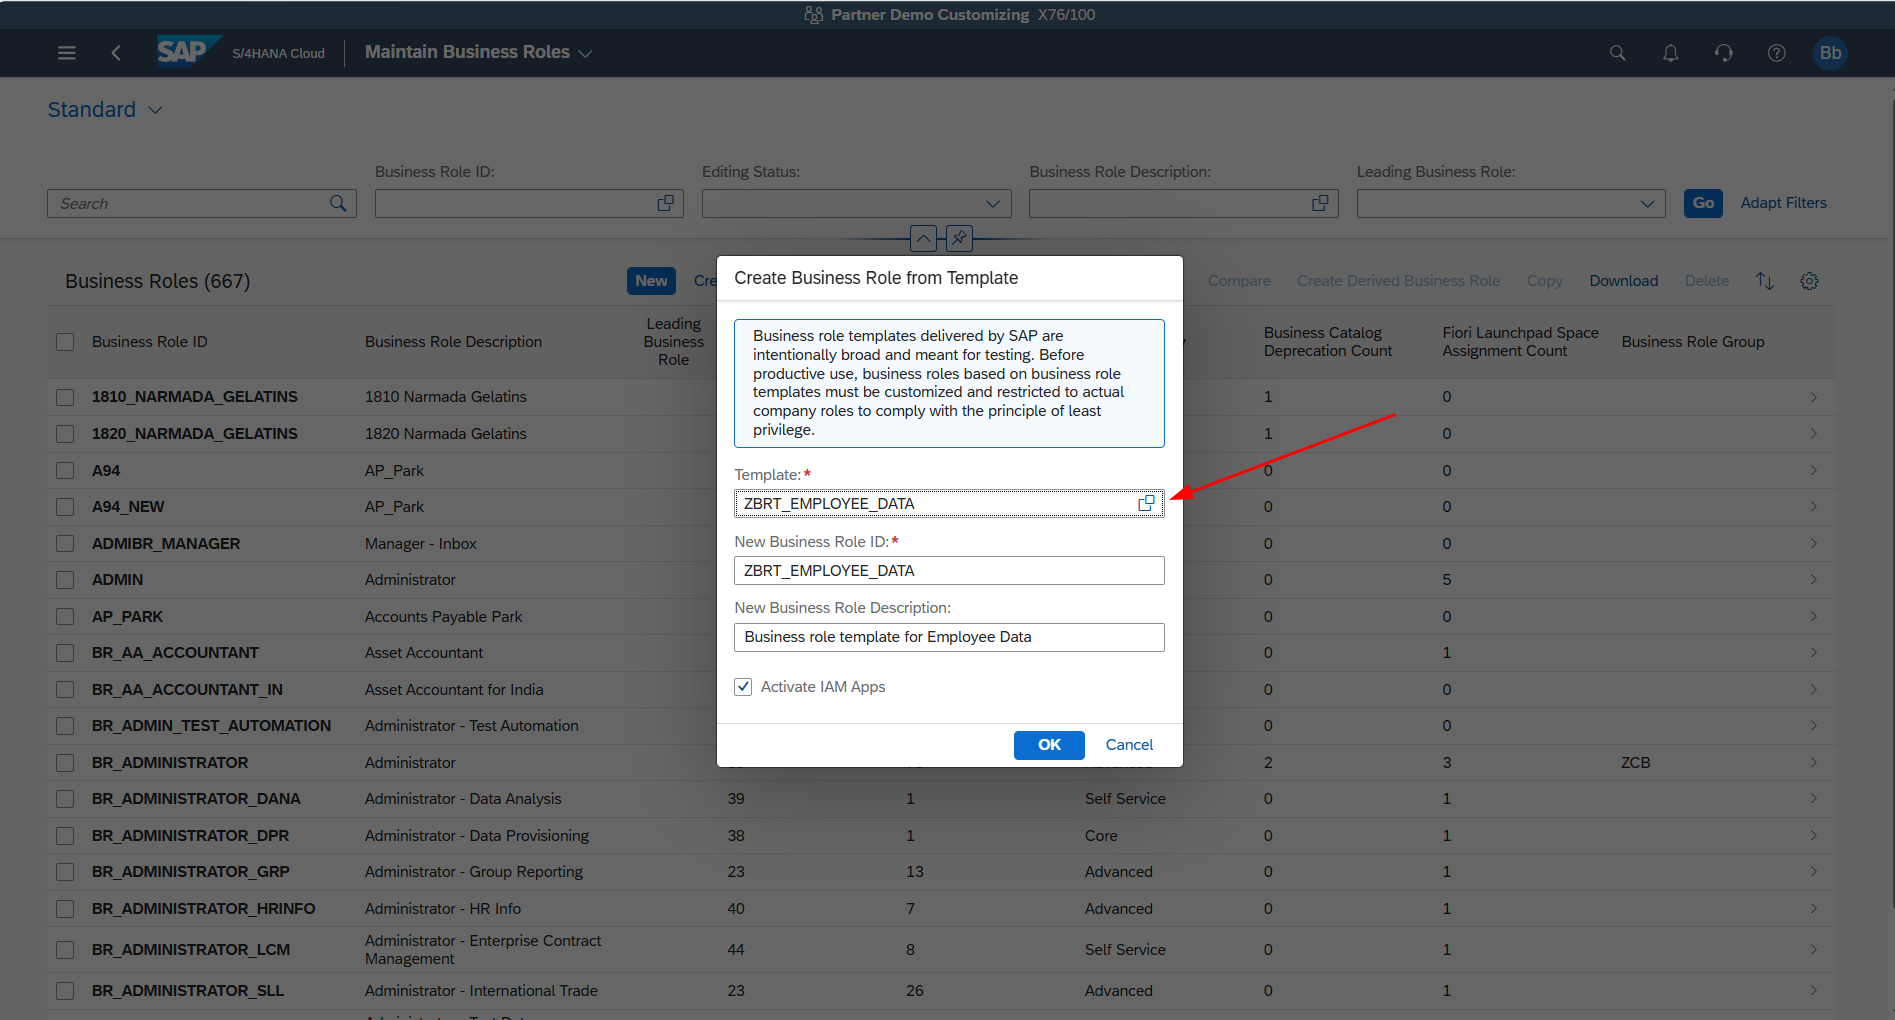
Search for the Business Role Template you created in Step 8 and click OK.
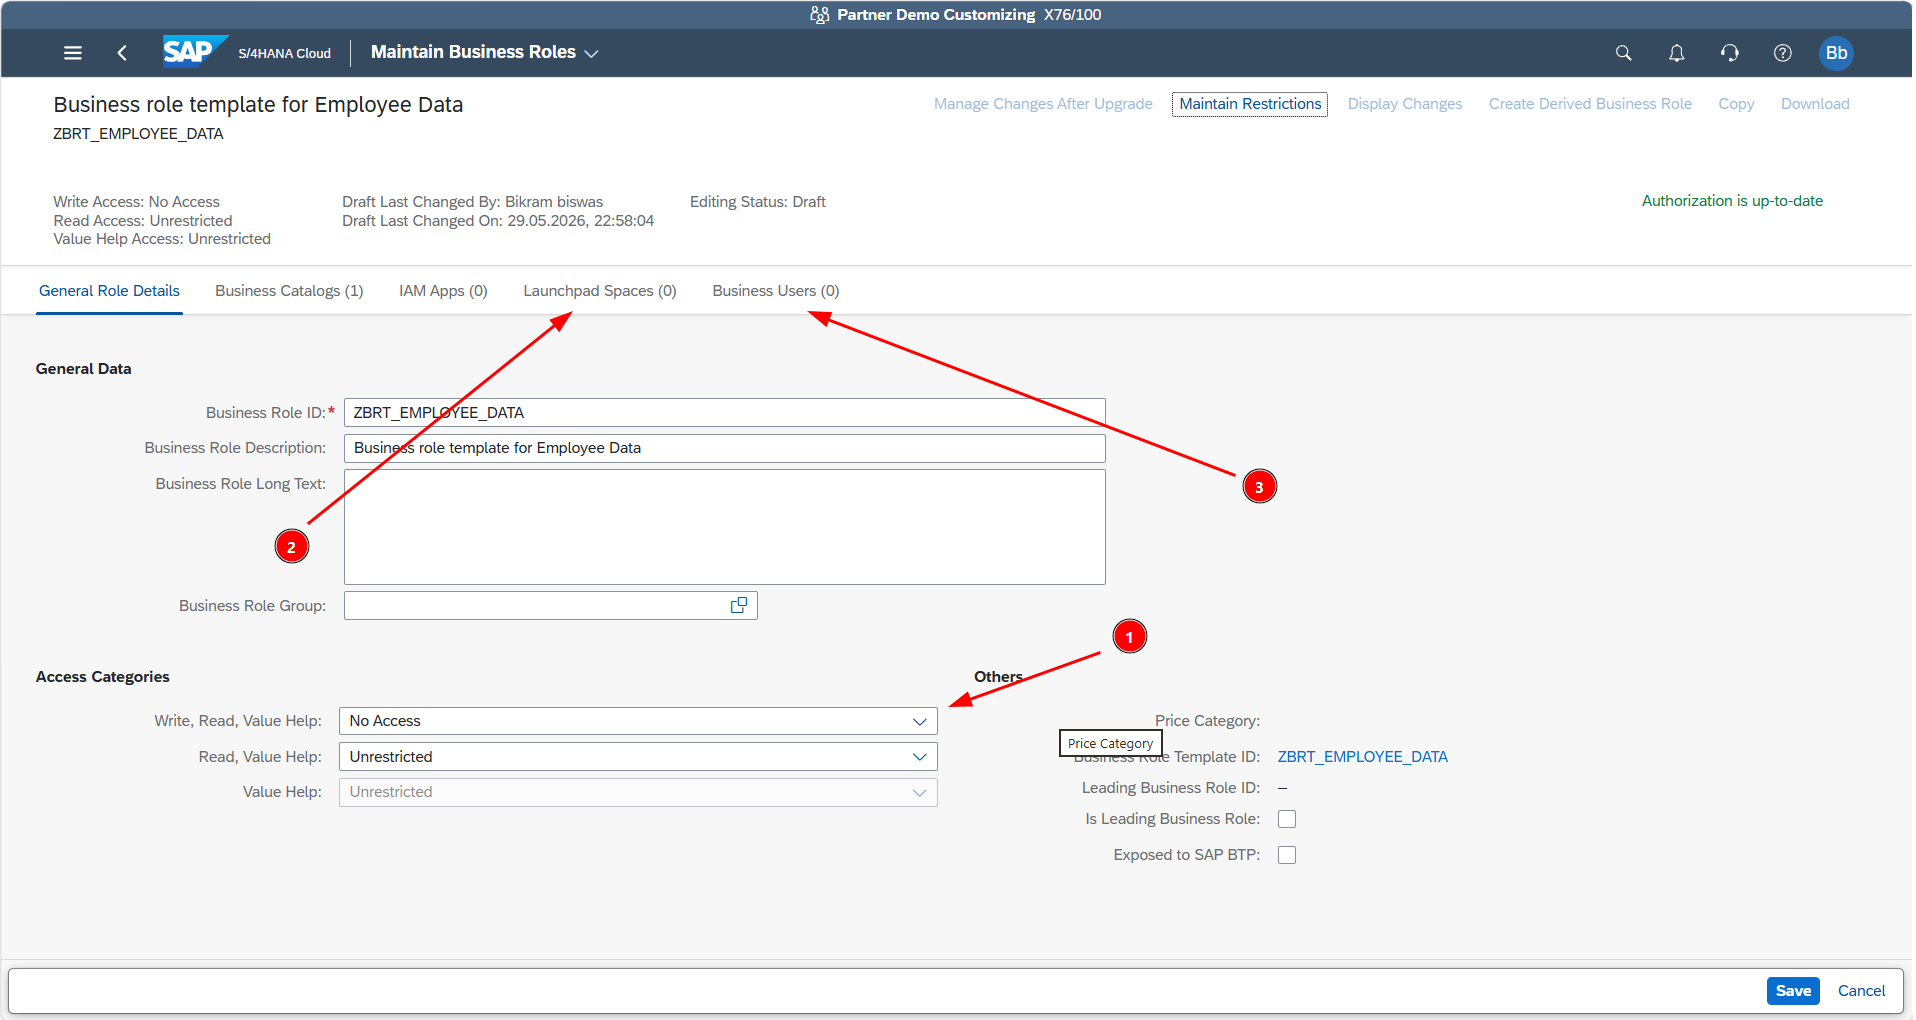
9.3 : Set Access Restrictions
Set the access level for Write, Read, and Value Help to Unrestricted.
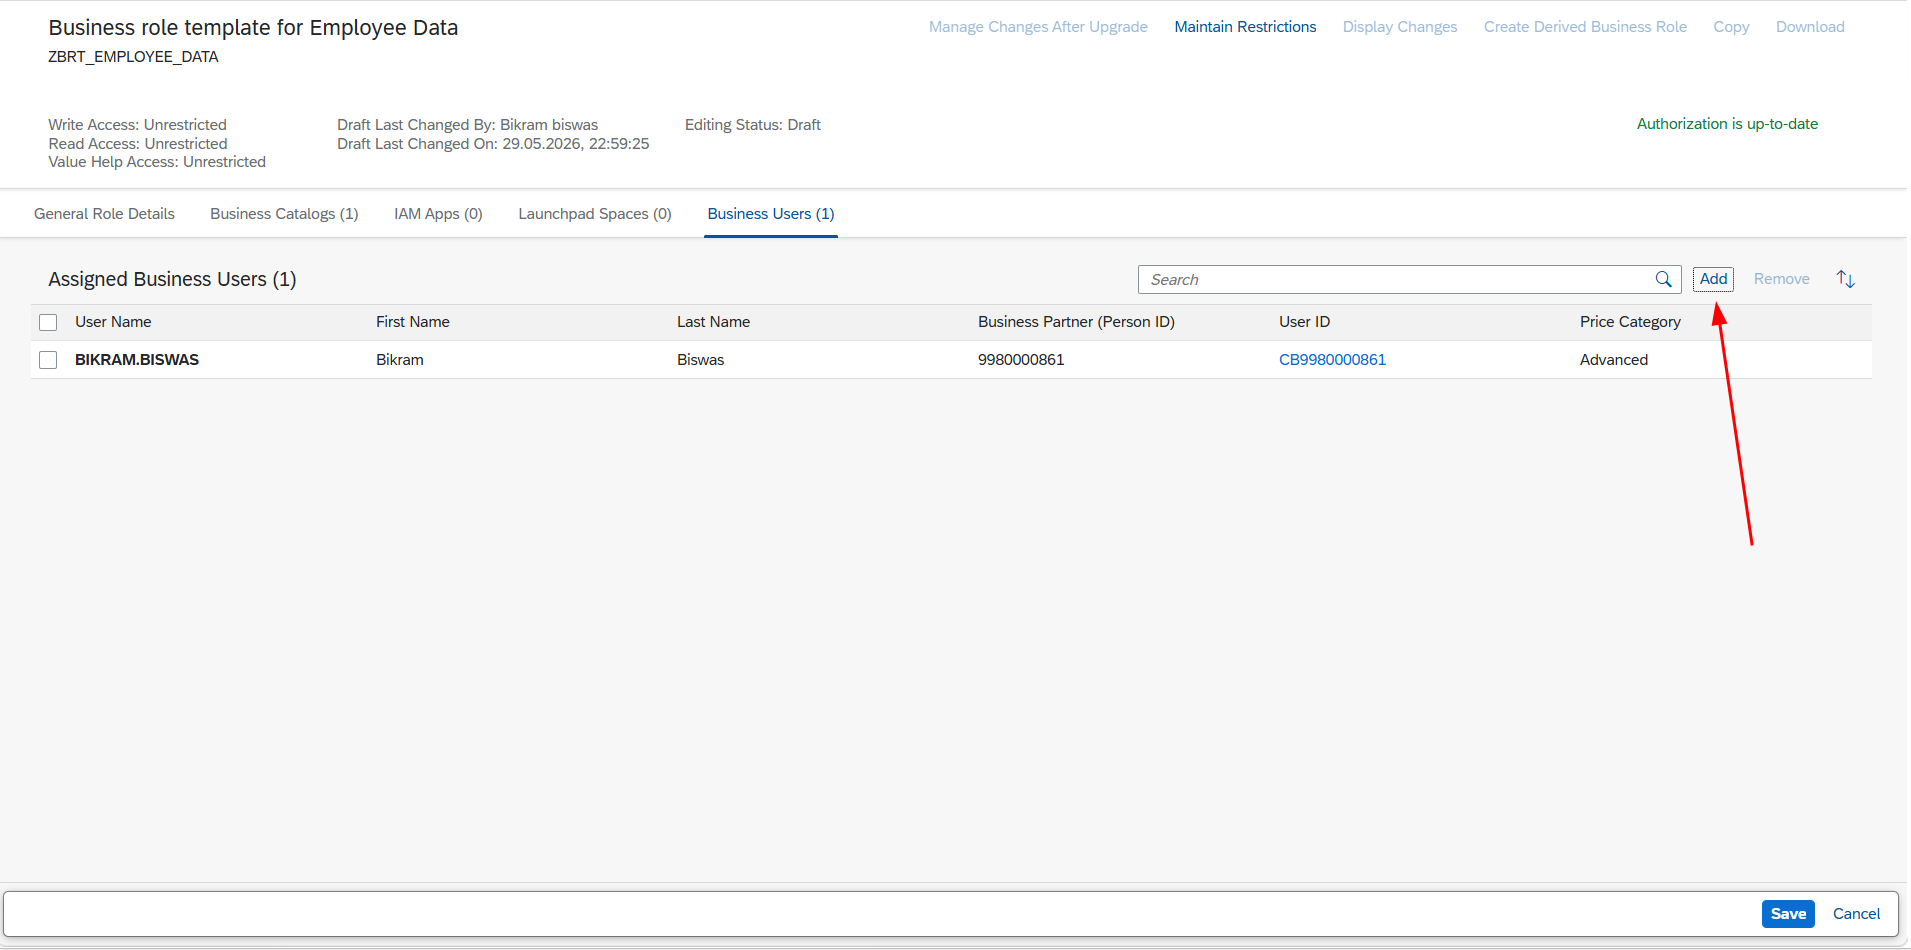
9.4 : Assign a Business User
Add the Business User who should have access to this application.
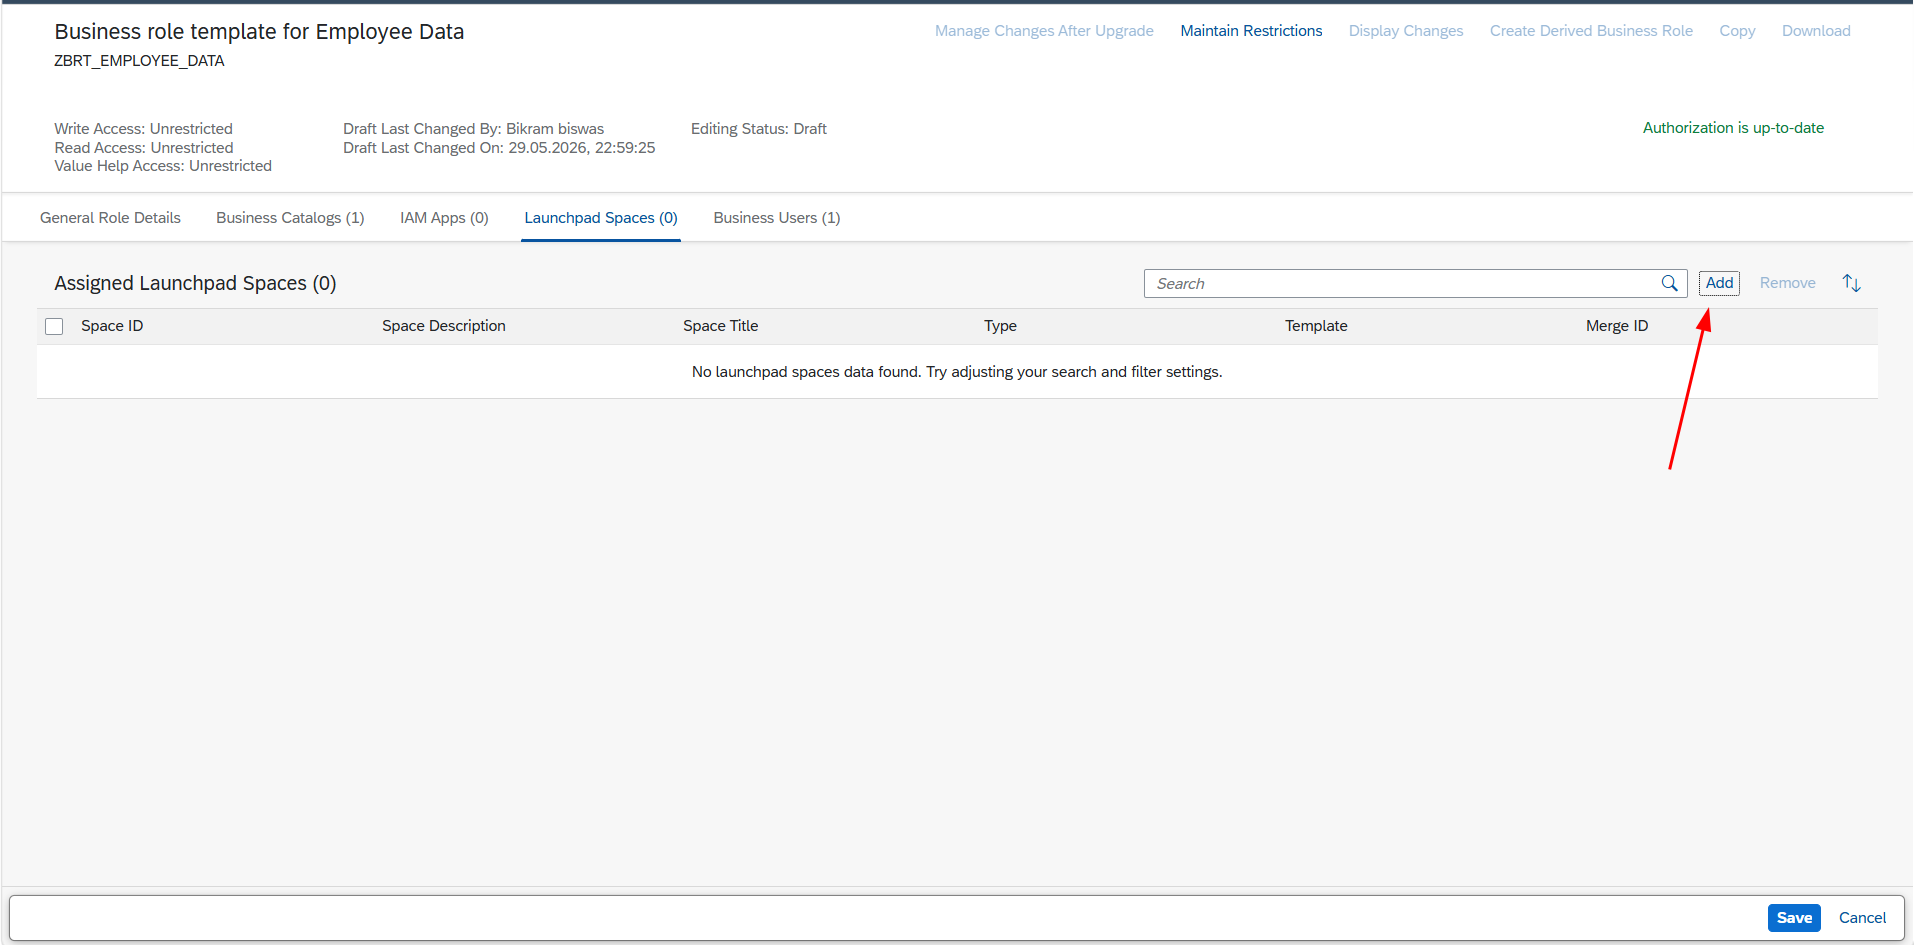
9.5 : Add a Launchpad Space
Navigate to the Launchpad Spaces tab and click Add new Launchpad Space.
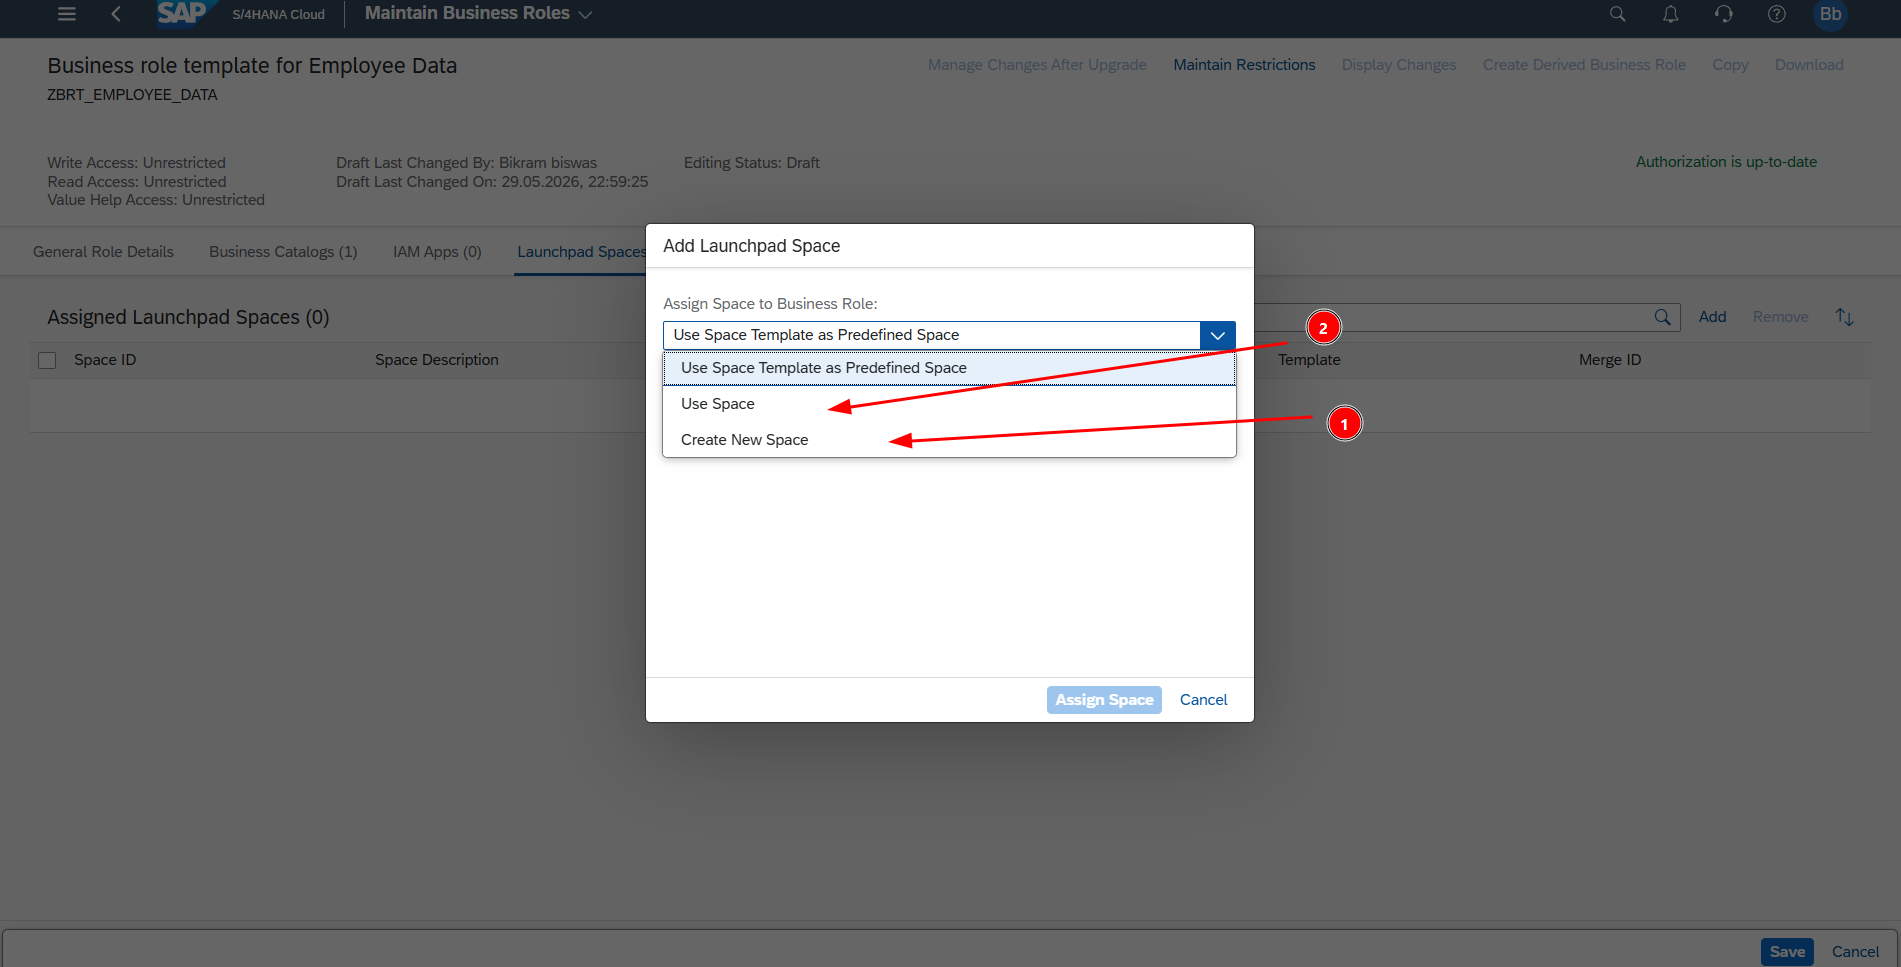
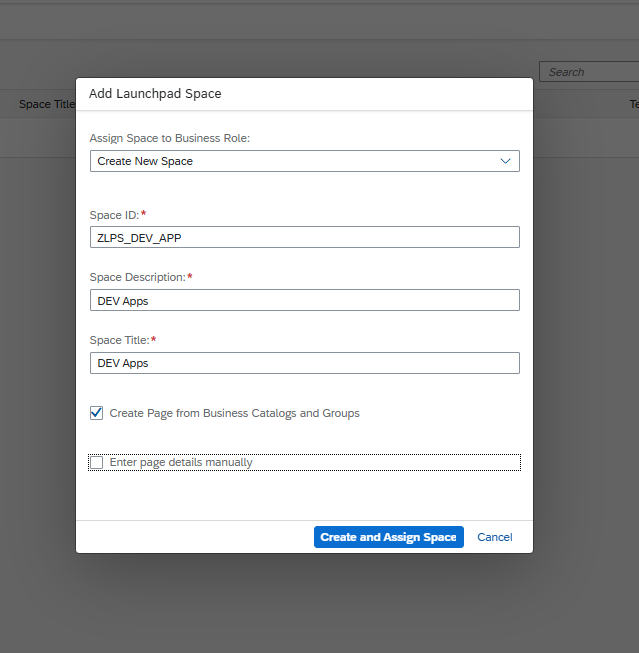
Select Use Space to assign an existing Launchpad Space, or select Create New Space to create one from scratch. We will create a new space in this example.
9.6 : Configure and Save the New Space
Fill in the Space ID, Space Description, and Space Title, then click Create and Assign Space.
Click Save to confirm all changes to the Business Role.
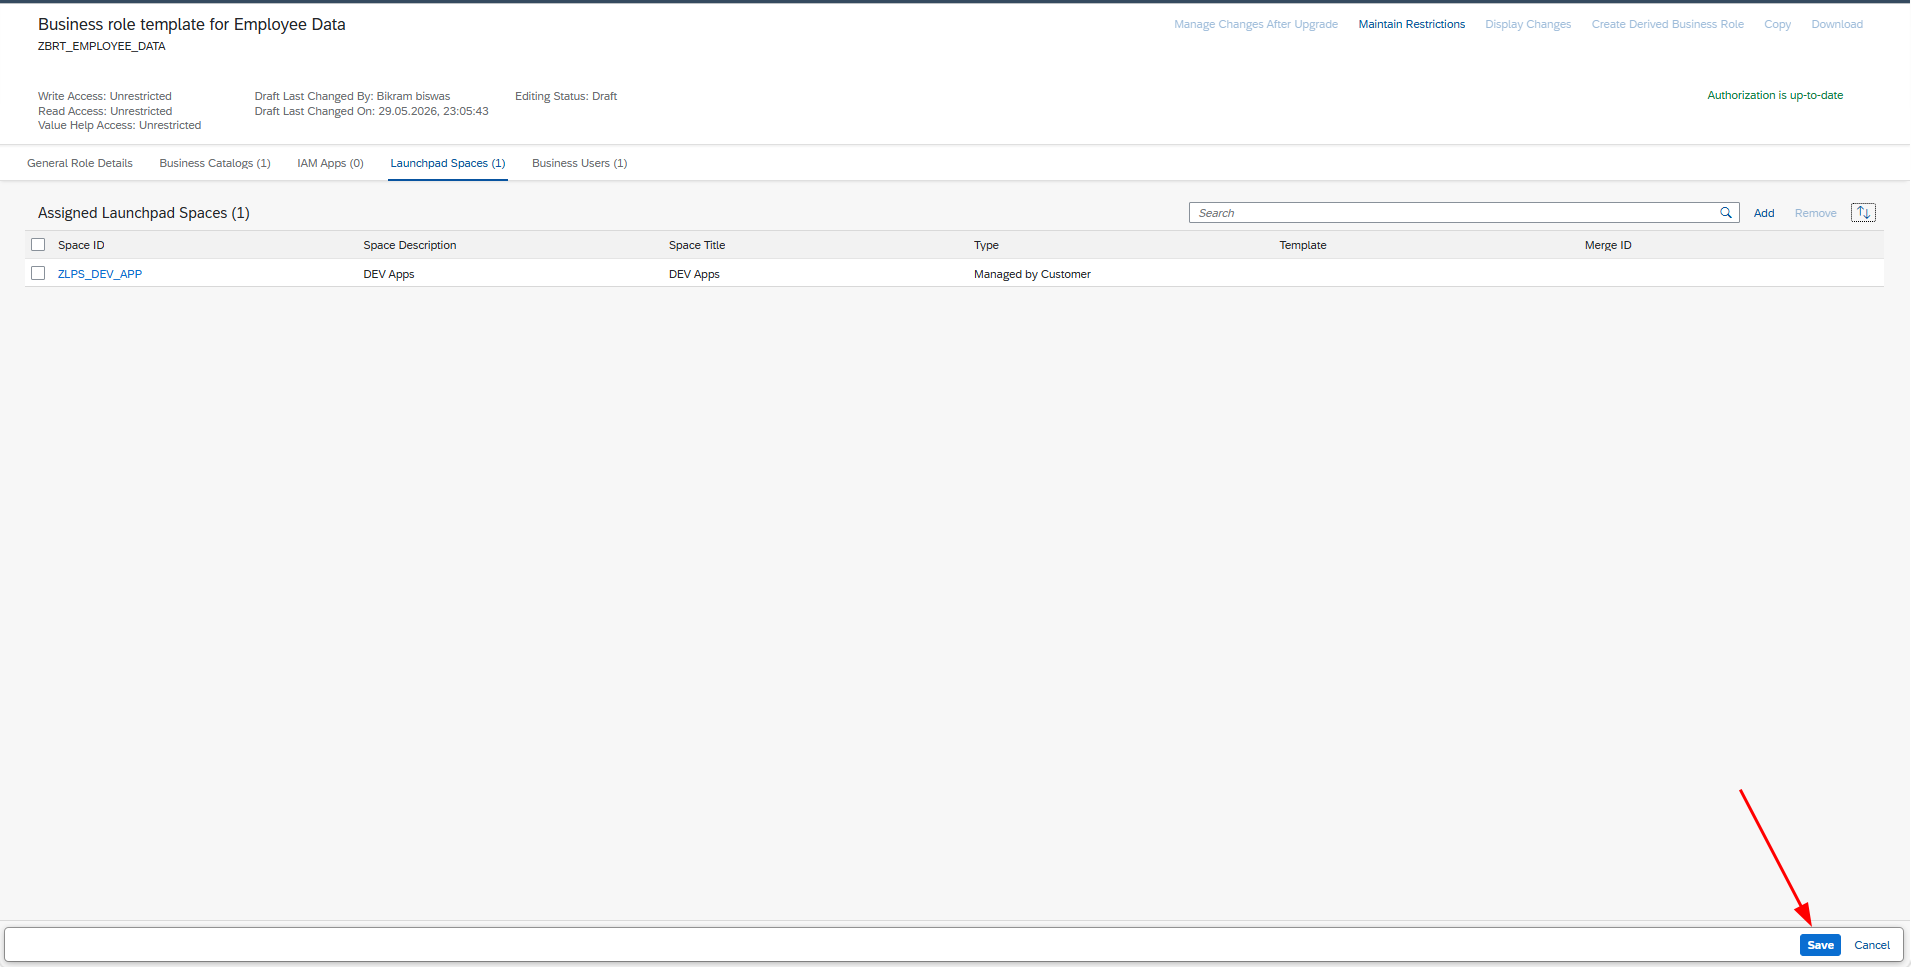
9.7 : Open the Launchpad Space
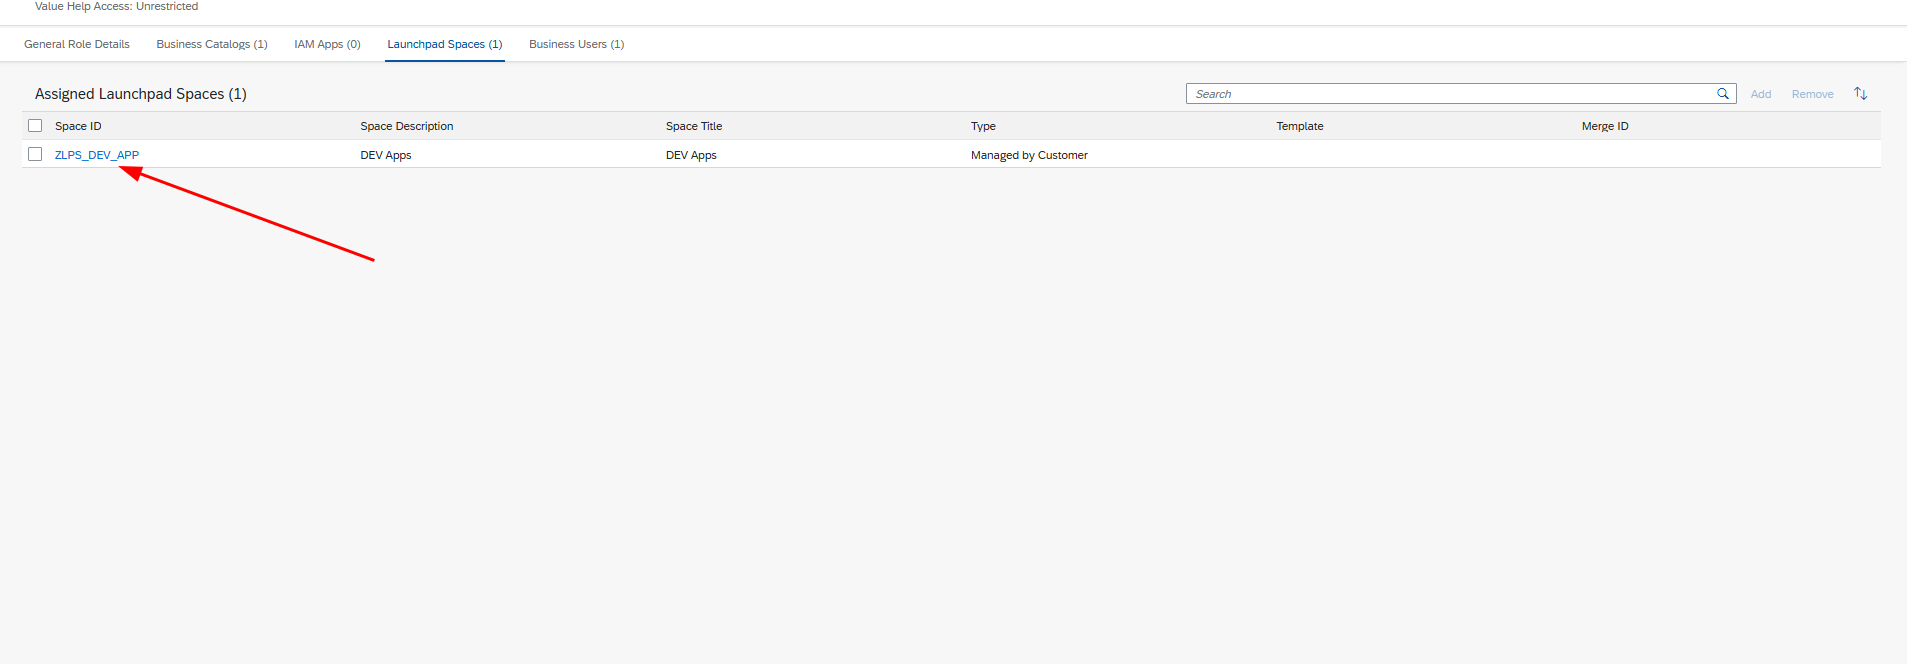
Click on the newly created Launchpad Space to open it.
9.8 : Open the Associated Page
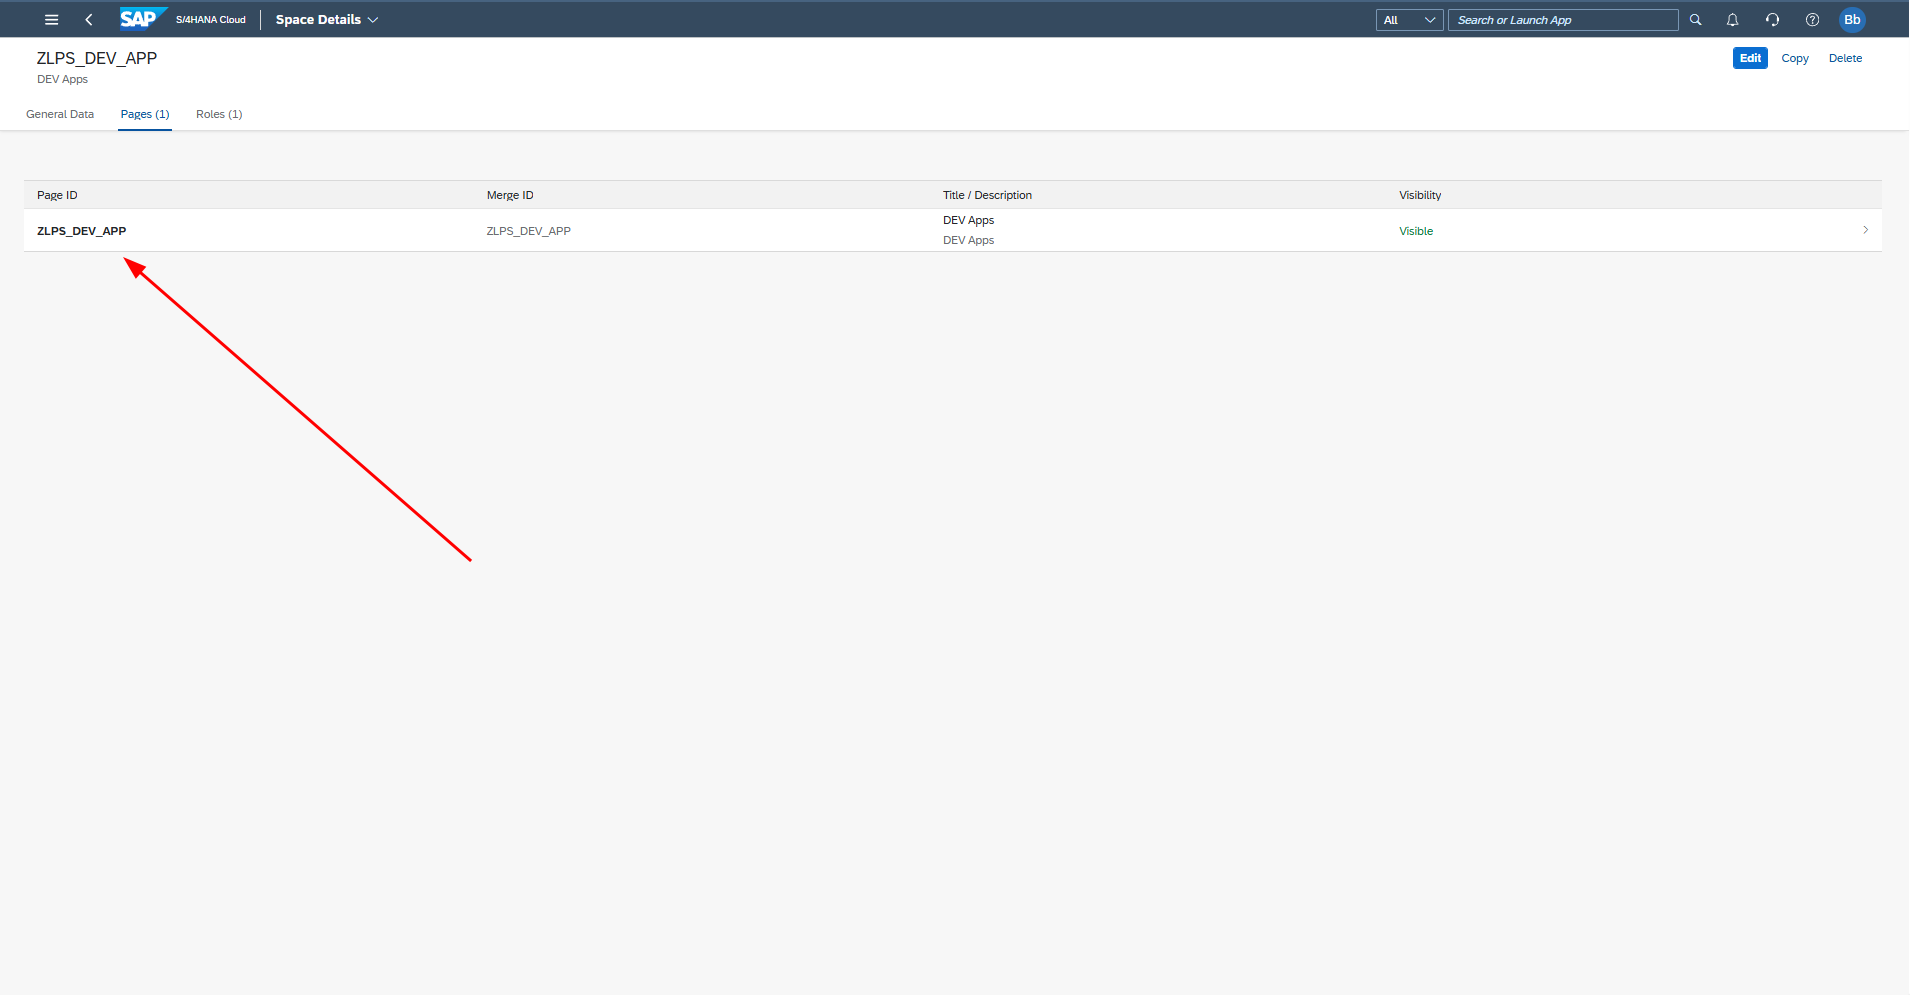
Click on the Page that was automatically created within the space.
9.9 : Add the Application to the Page
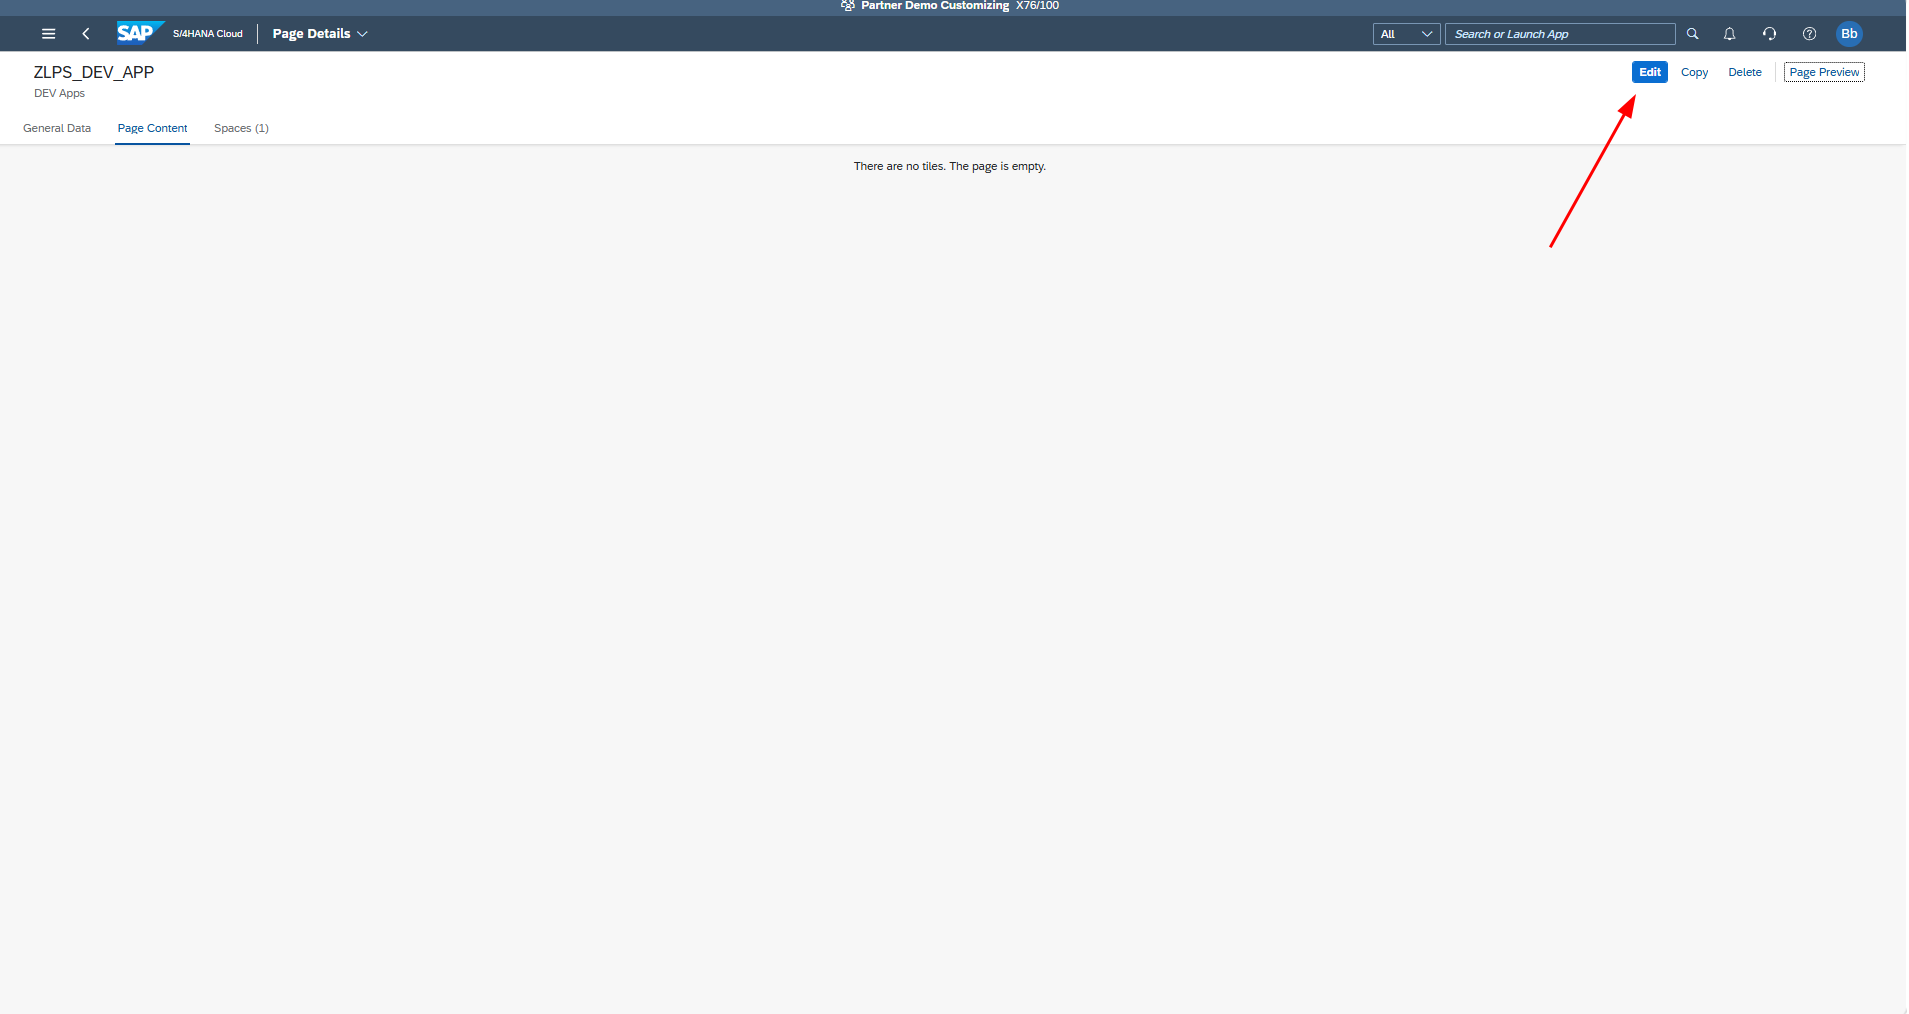
Click Add to add a new section to the page.
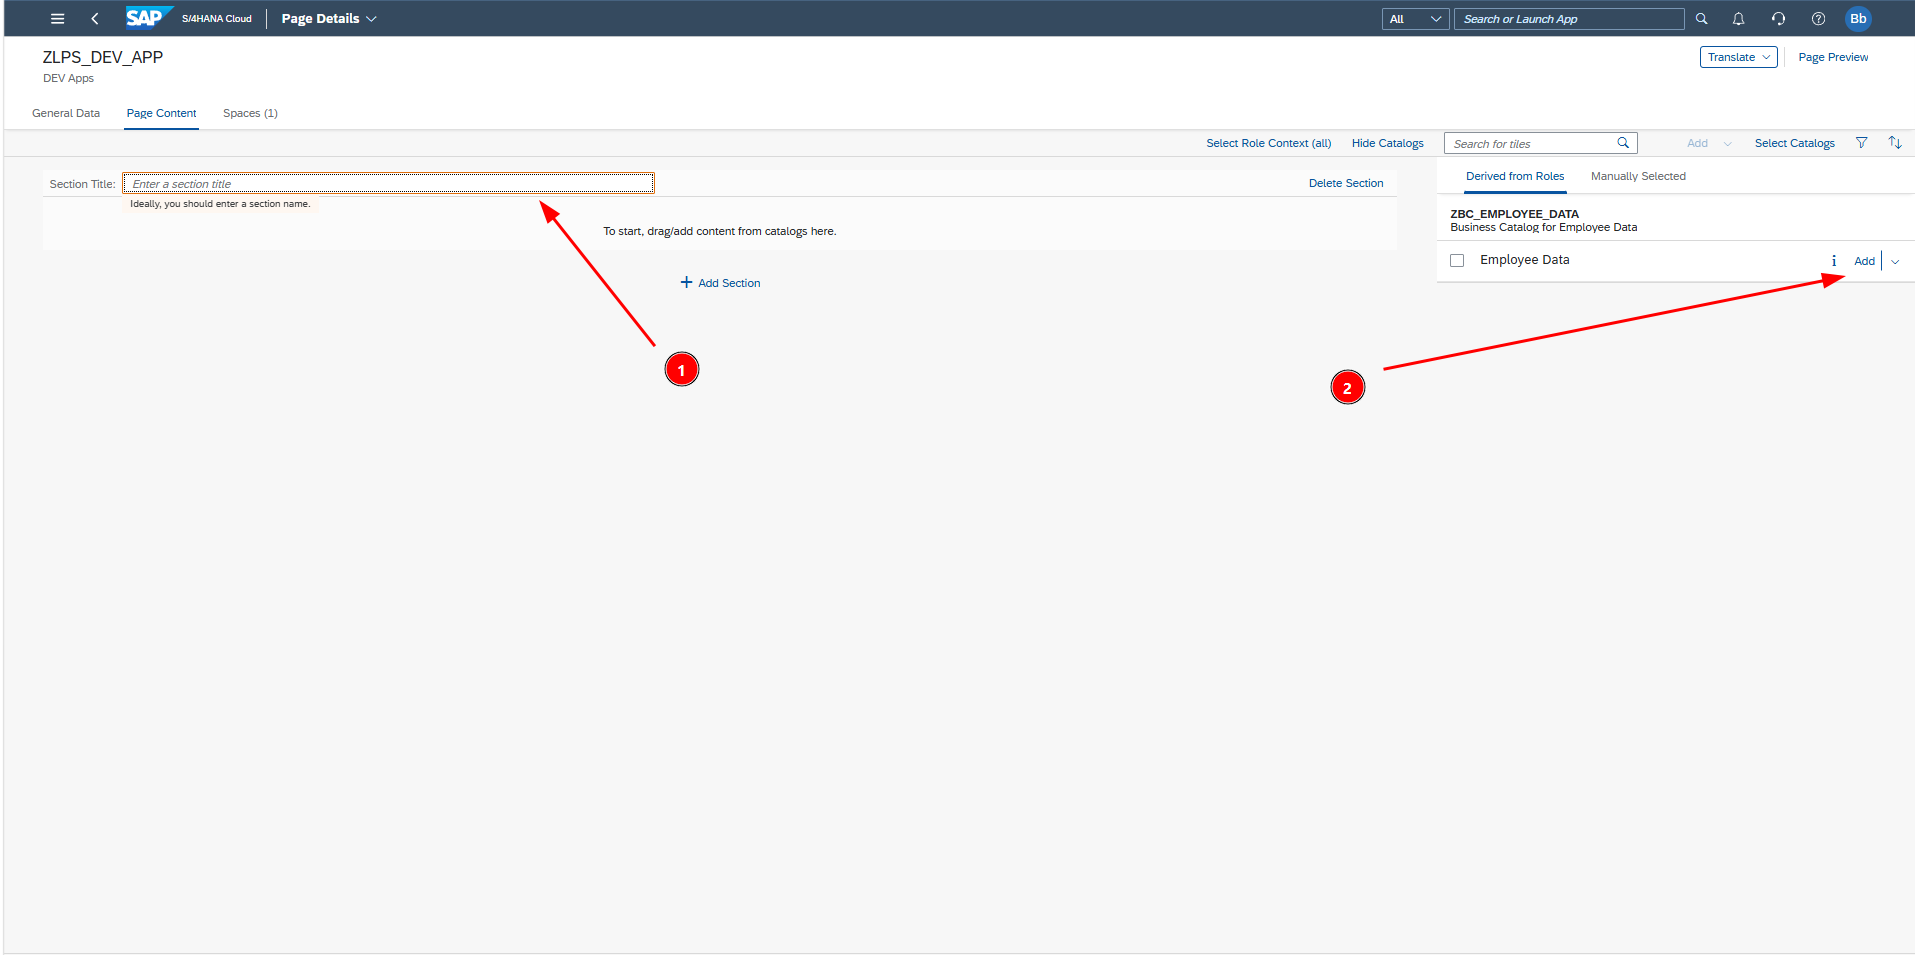
Provide a Section Title and then select your application from the right panel. Save the changes when done.
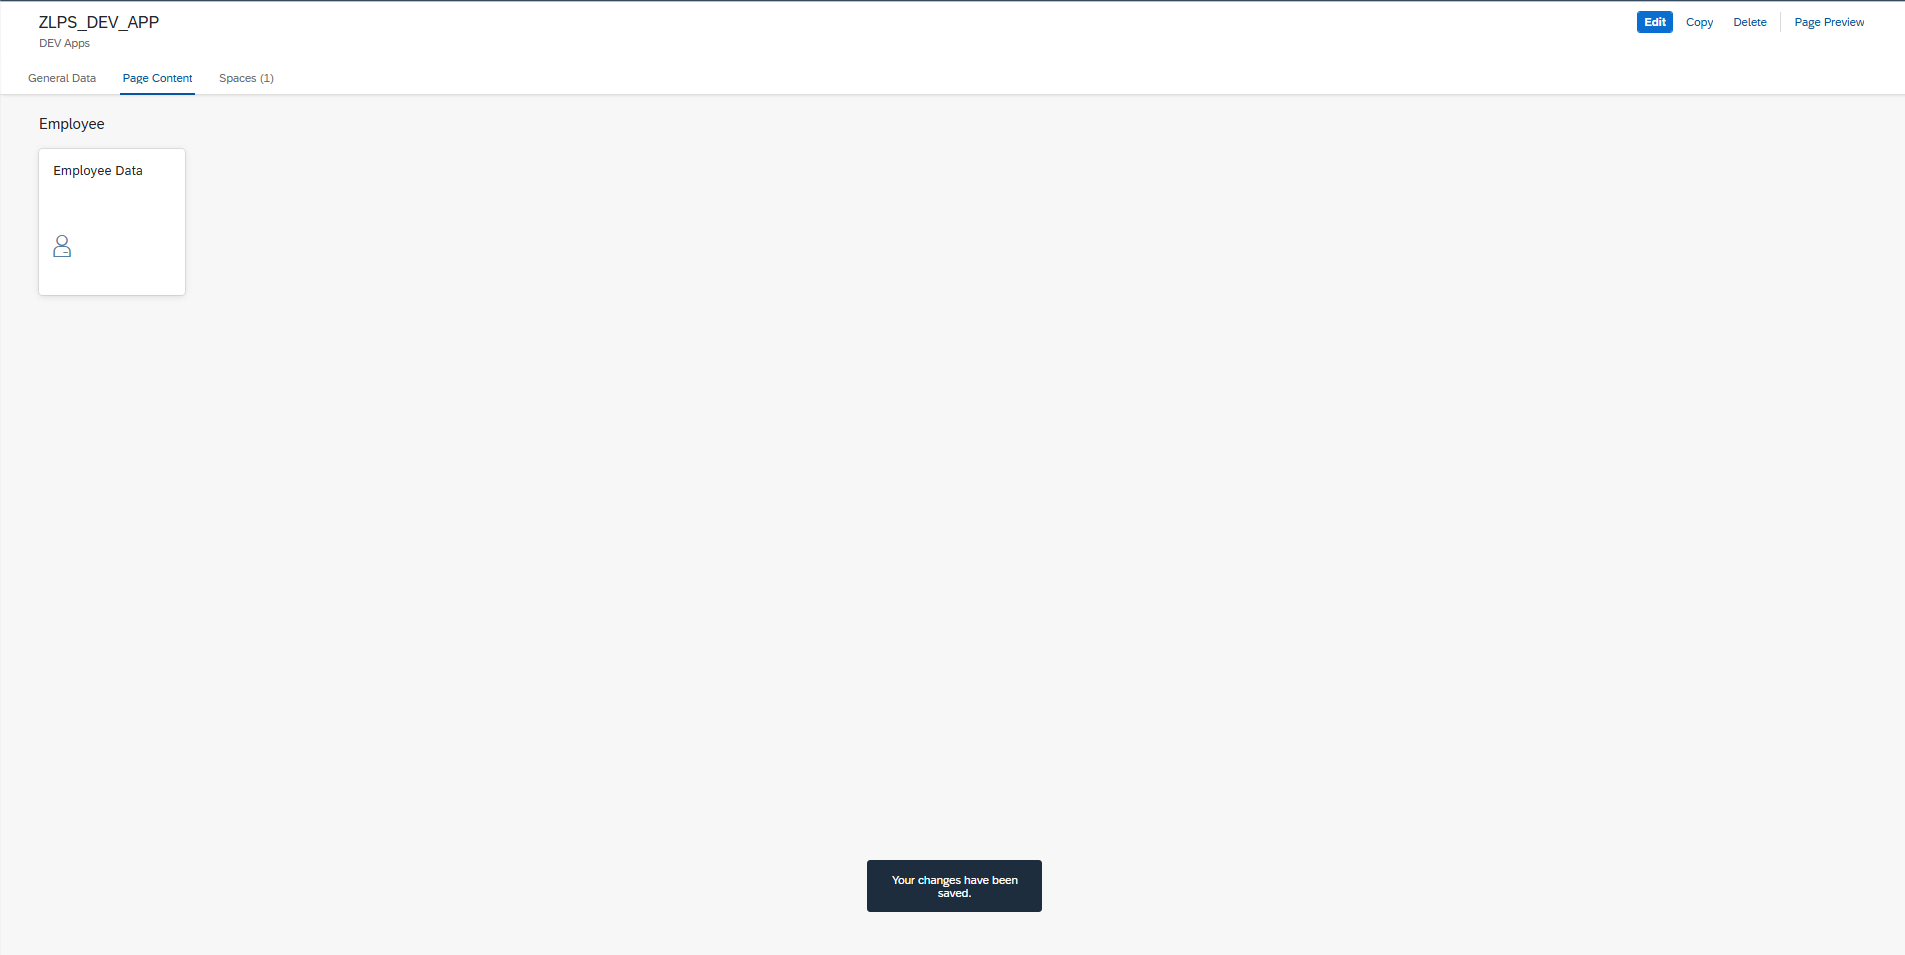
9.10 : Verify the Application in the Launchpad
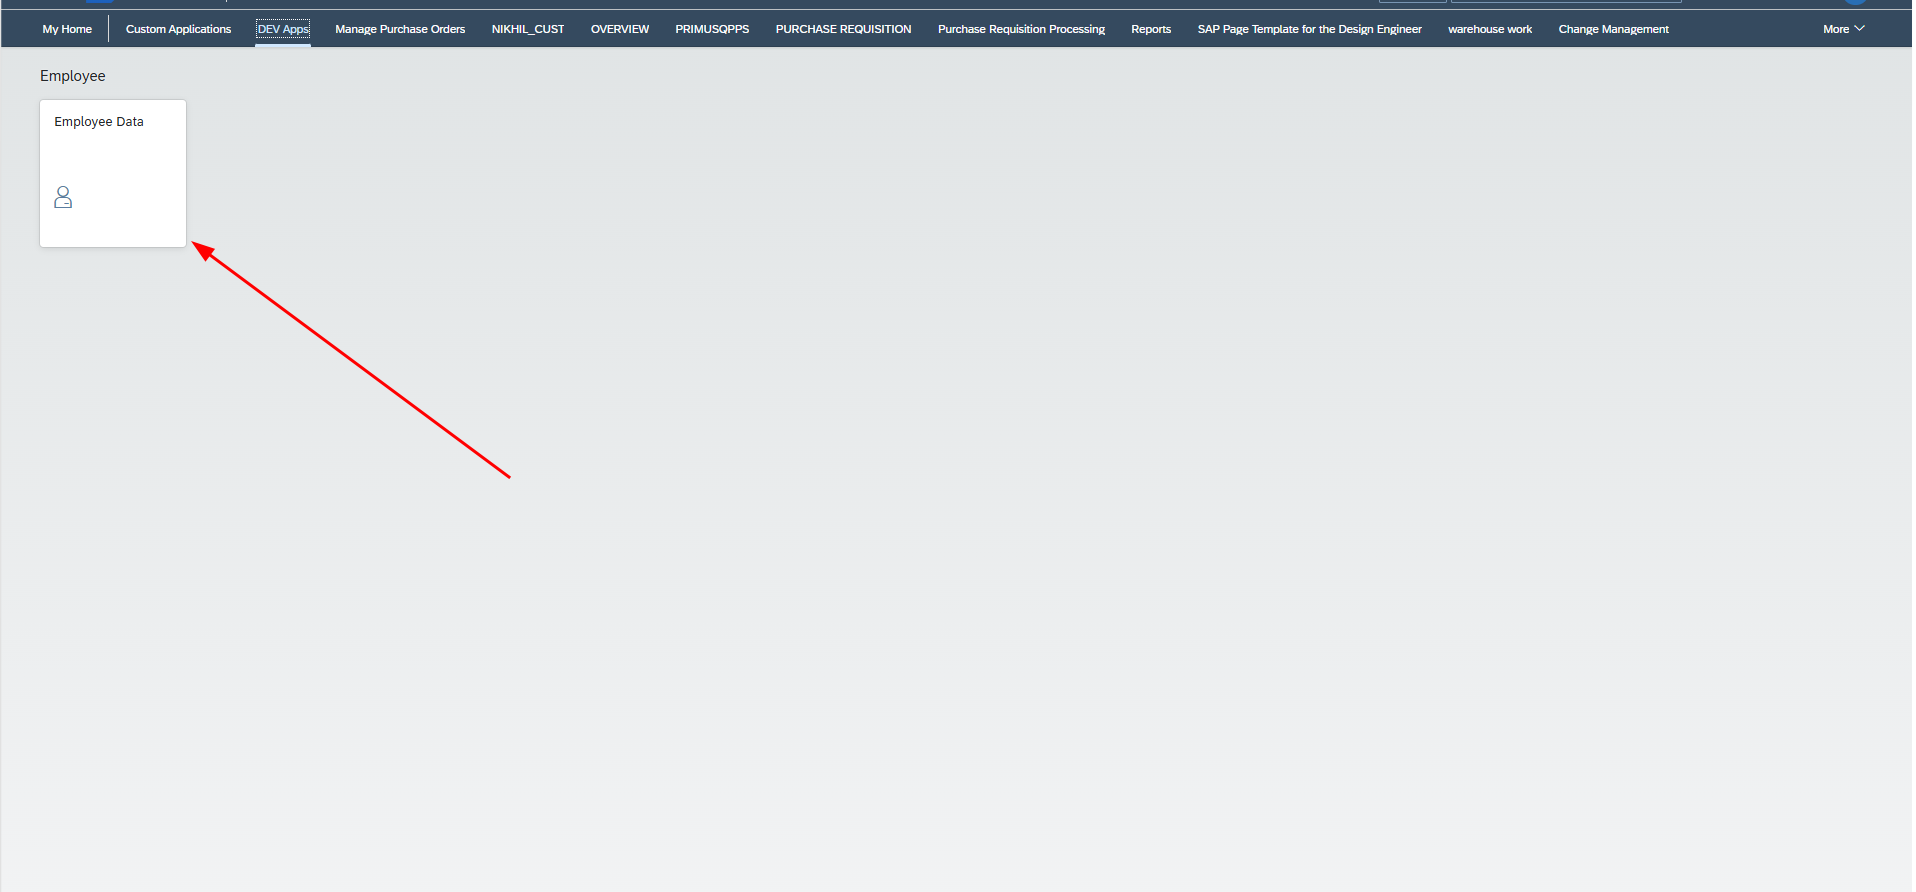
Refresh the page and navigate to the Home screen. You should now see the Launchpad Space you created.
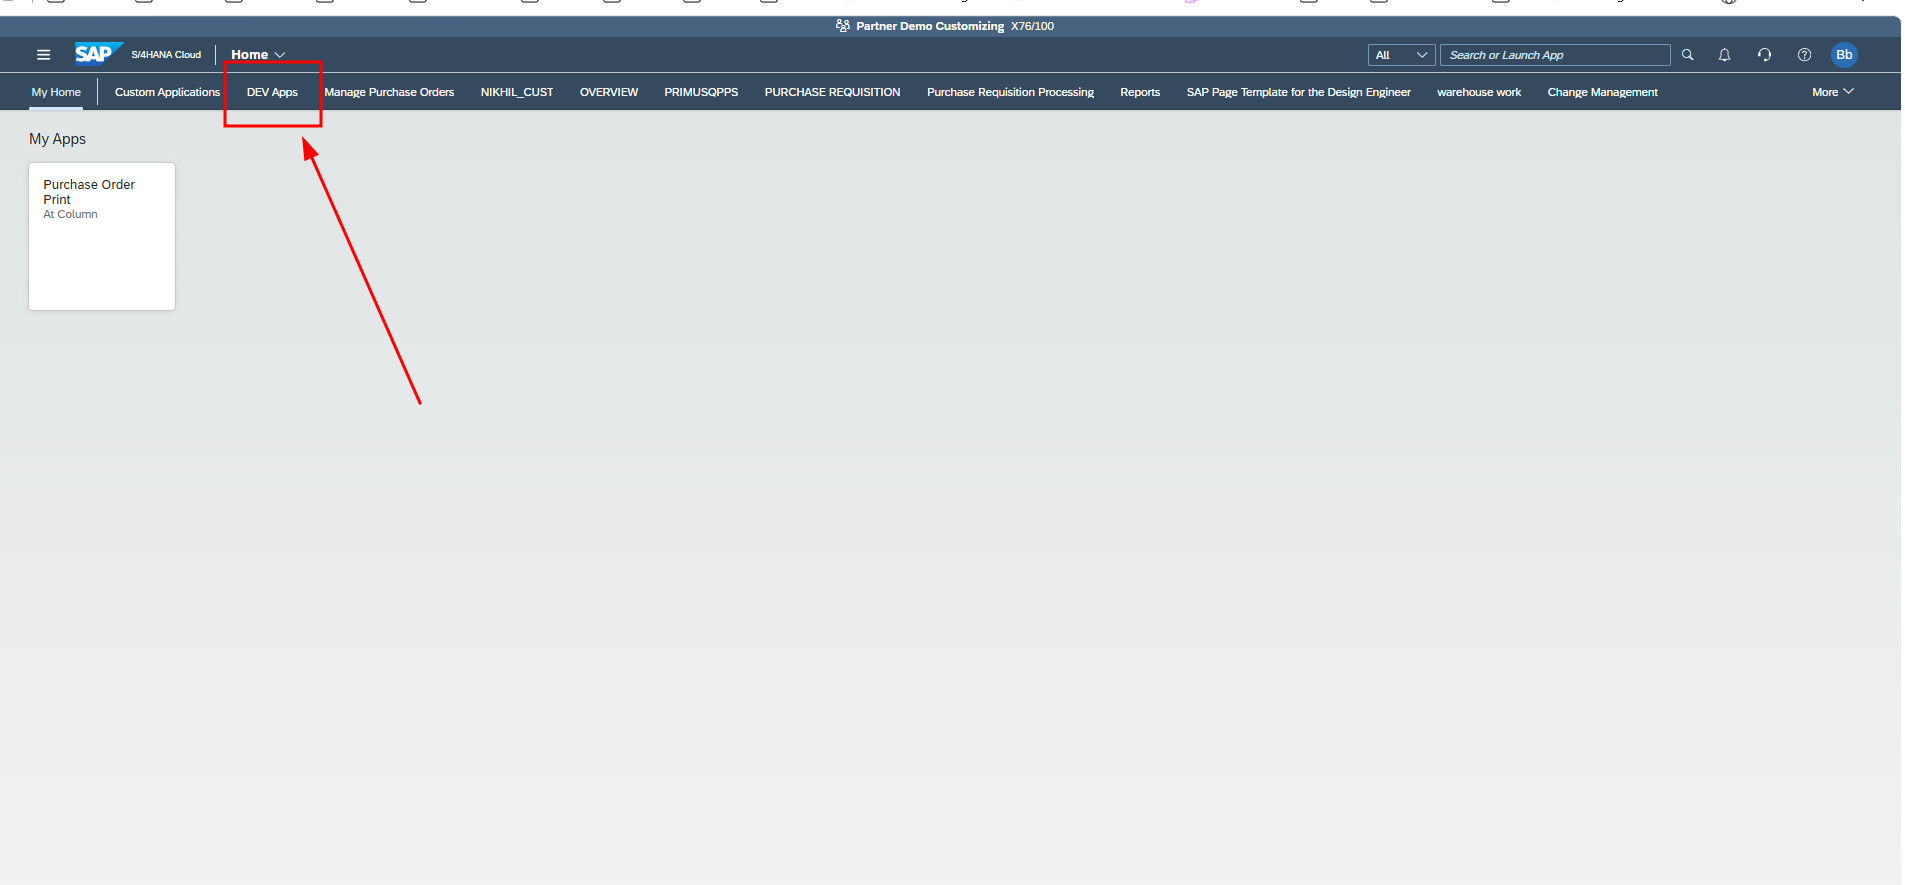
Click on it to find your deployed application tile.
Summary
We have successfully deployed a RAP Fiori Application end-to-end — from setting up VS Code and creating the application, to configuring the tile, IAM App, Business Role, and Launchpad Space. Your application is now live and accessible to authorized business users on the tenant.