Introduction
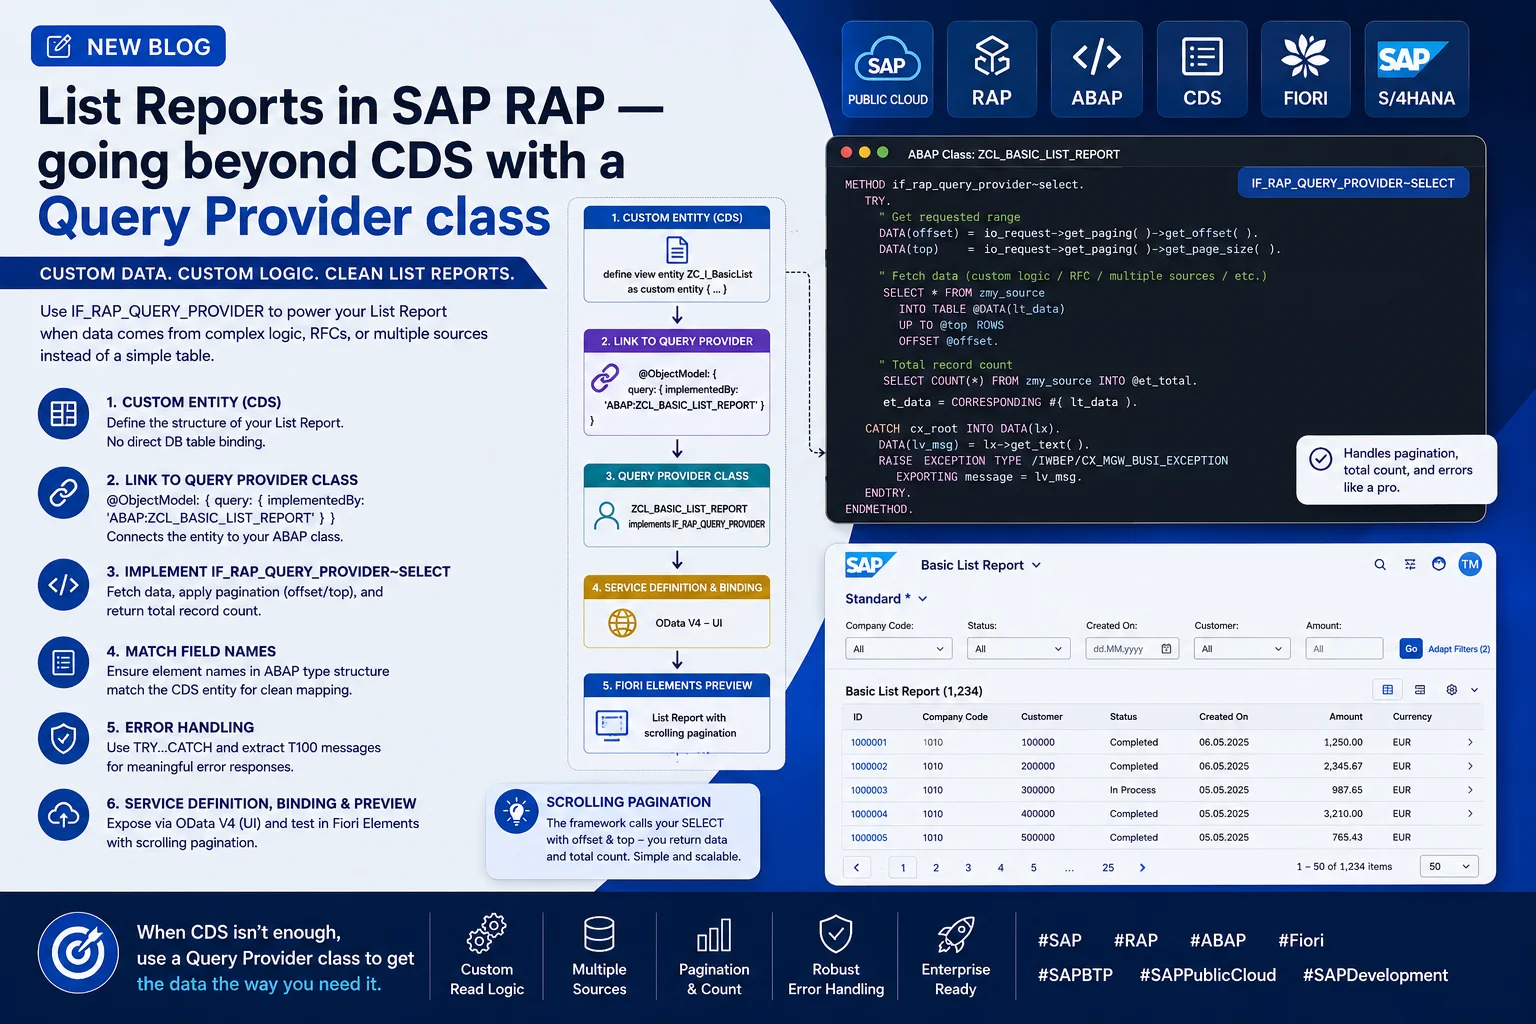
In the previous blog post, we built a Basic List Report using a Custom CDS View backed directly by a database table. In this post, we take it a step further by sourcing the data through an ABAP class instead — using the IF_RAP_QUERY_PROVIDER interface to implement custom read logic, including pagination and error handling.
This approach is useful whenever your List Report needs to pull data from somewhere other than a simple table — for example, from a CDS view with business logic applied, an RFC, or a combination of sources — while still exposing it through the standard RAP / Fiori Elements List Report UI.
By the end of this guide, you'll have:
- A Custom Entity (CDS) that defines the report's structure
- An ABAP class implementing
IF_RAP_QUERY_PROVIDERto supply the data - A Service Definition and Service Binding exposing the entity as an OData service
- A working Fiori Elements List Report preview
Prerequisites
- Access to an SAP S/4HANA Public Cloud (or equivalent ABAP Cloud) development system
- ABAP Development Tools (ADT) in Eclipse
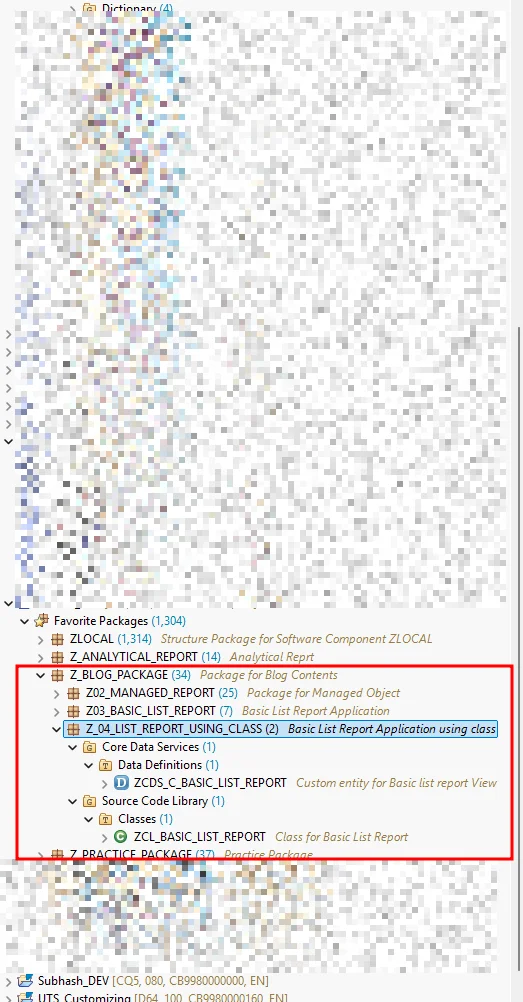
- A development package already set up (we'll create one below)
- Basic familiarity with CDS views and ABAP classes
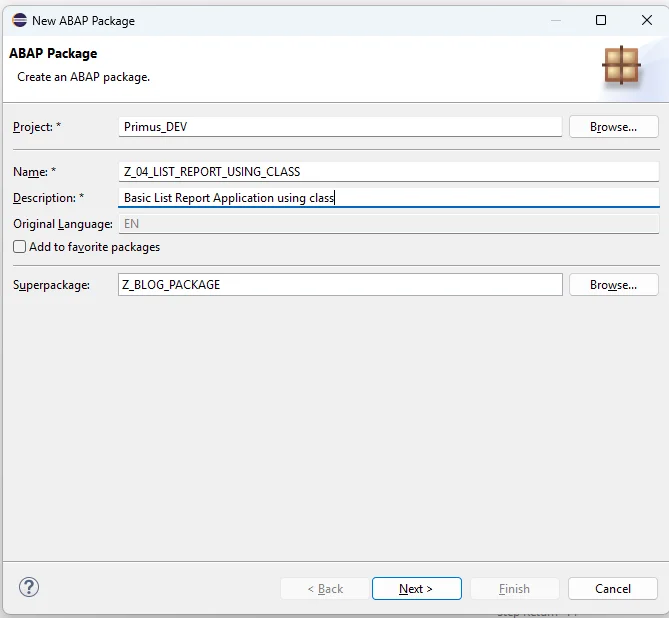
Step 1: Create the ABAP Package
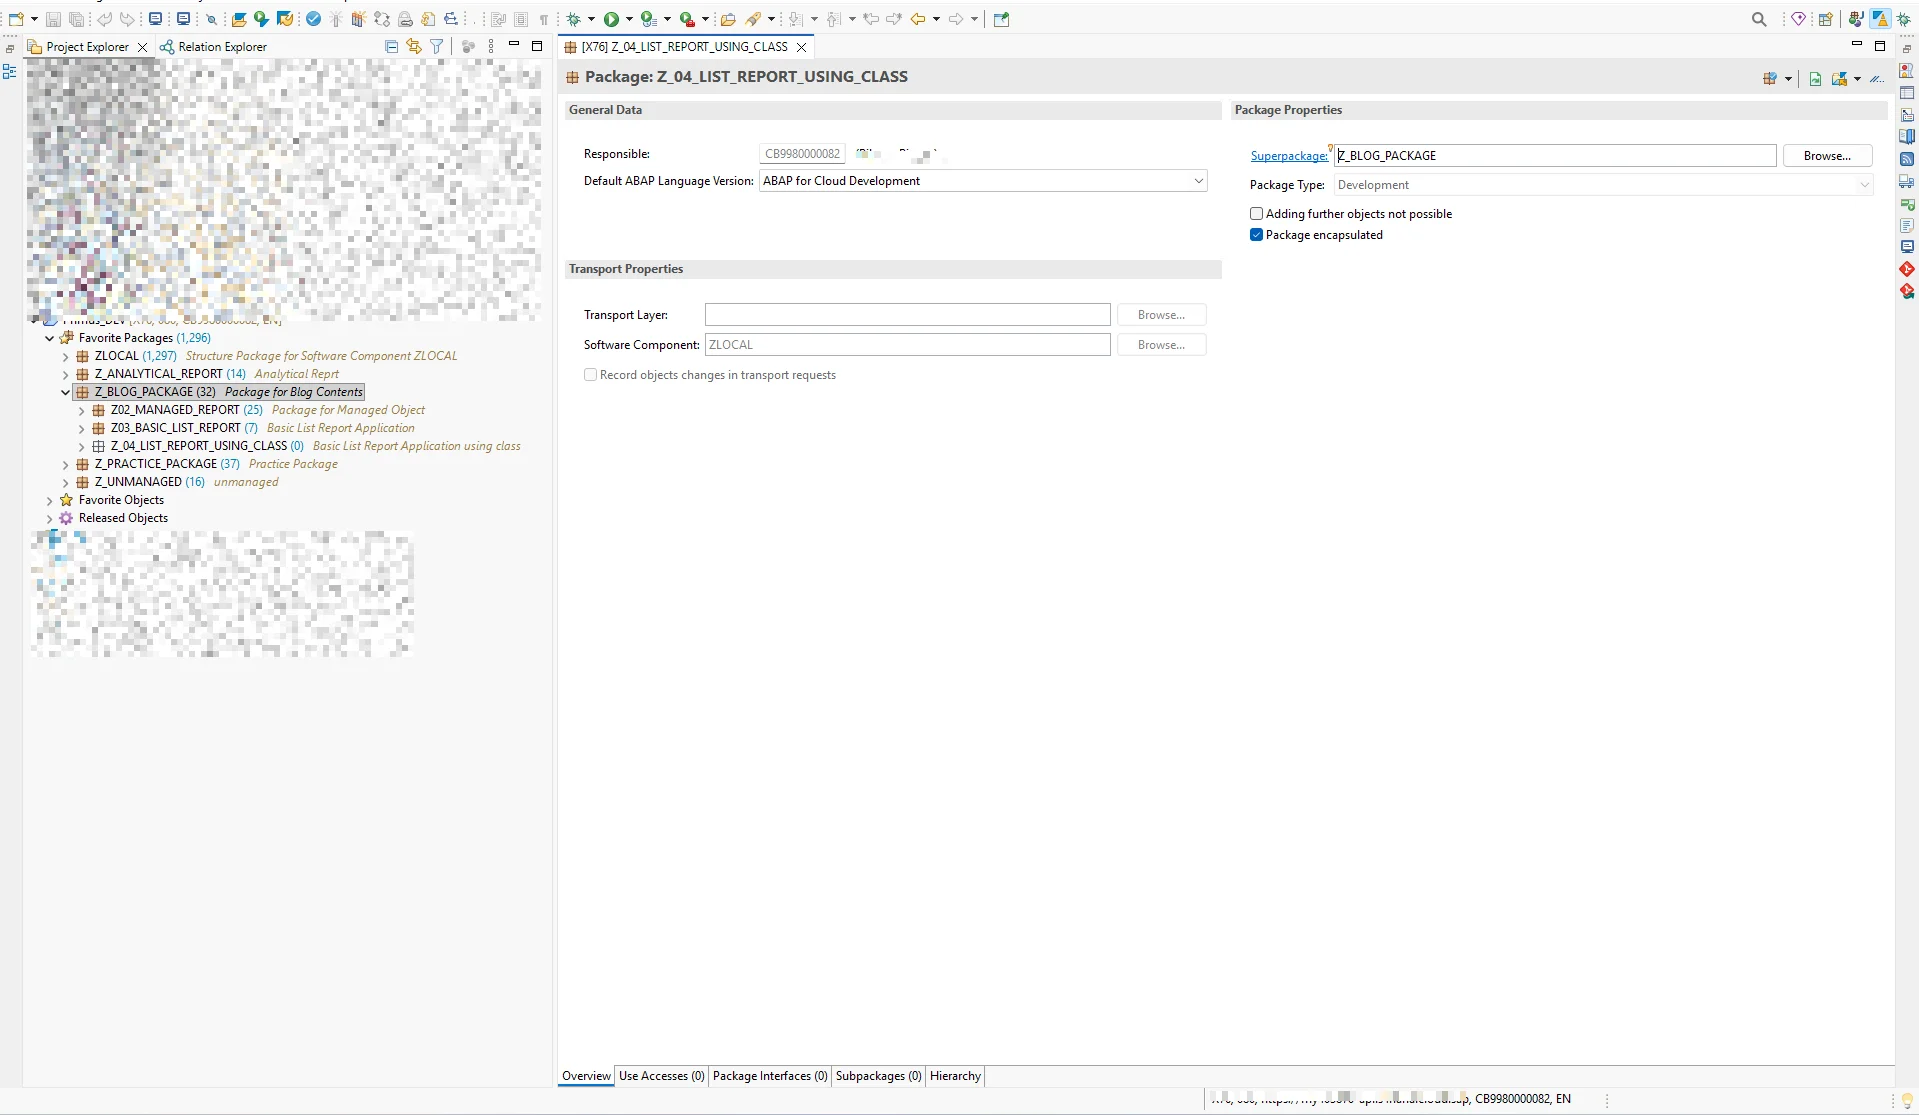
As always, we start by creating a package to hold our development objects.
Step 2: Create the Custom Entity
Inside our package, we'll create a Custom Entity — this is a CDS artifact that defines the shape of the data our List Report will consume, without being tied directly to a database table.
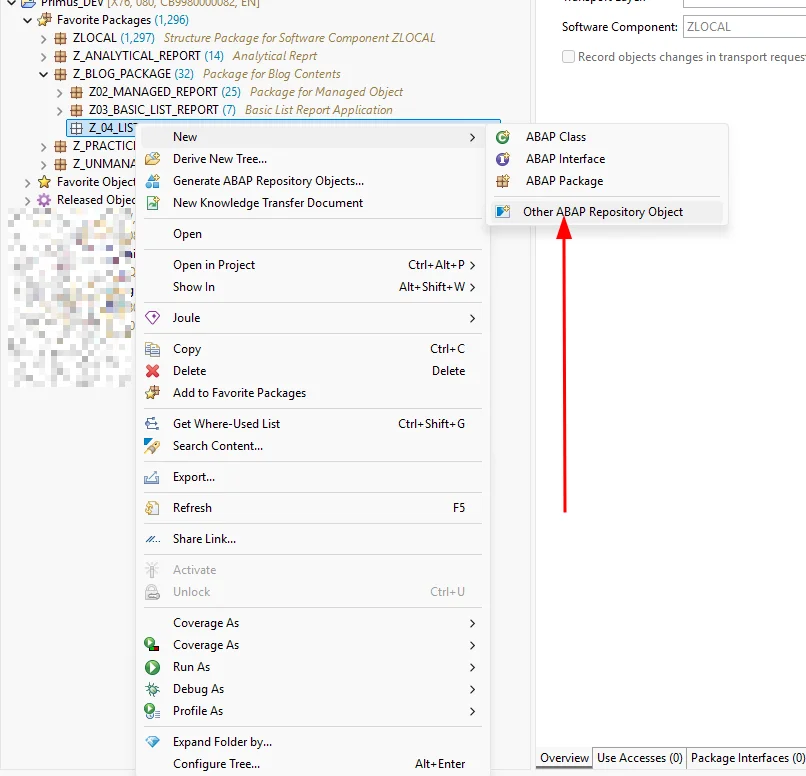
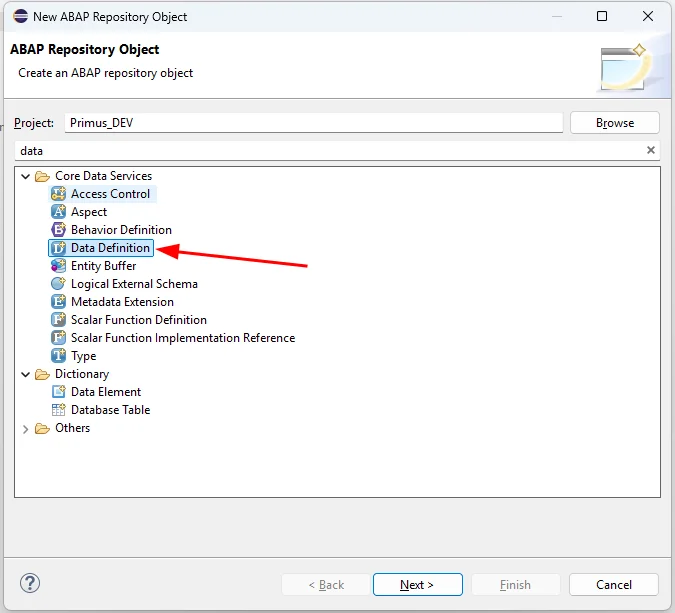
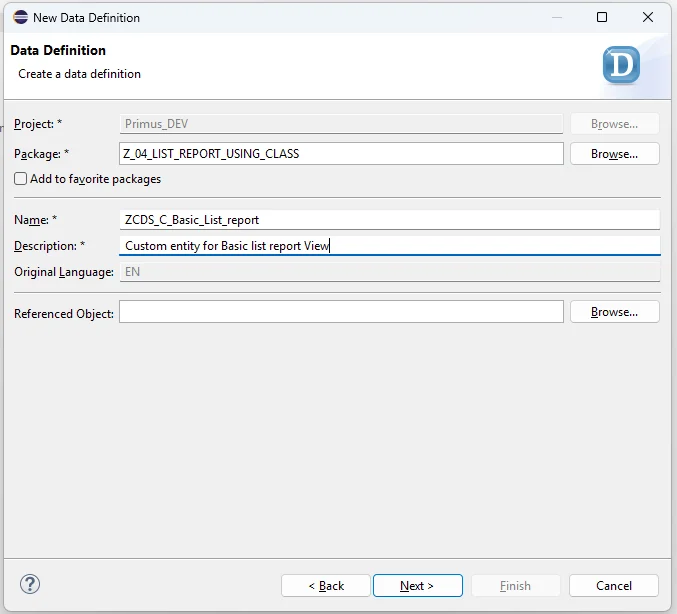
When you create a new Data Definition, ADT offers several templates. Select Custom Entity (creation) → defineCustomEntityWithParameters.
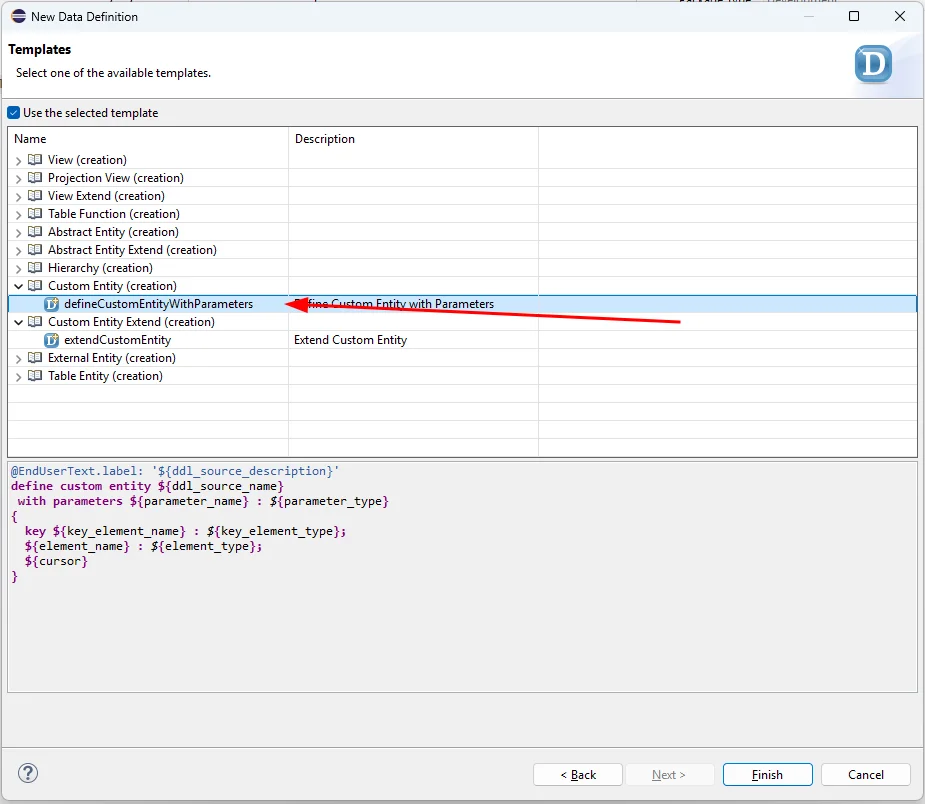
This template generates some boilerplate (including optional parameters) that we don't need for this use case.
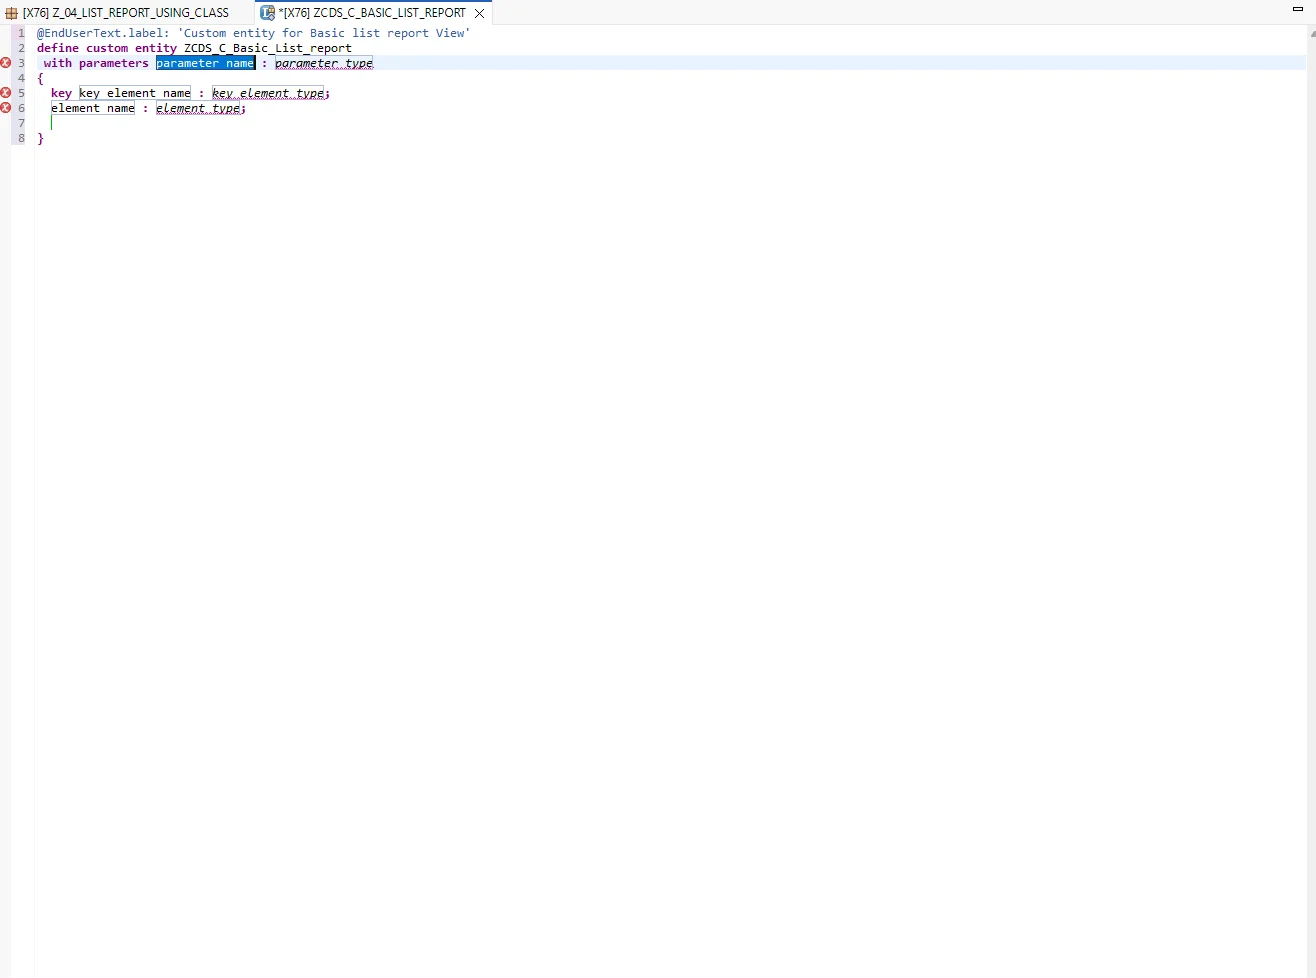
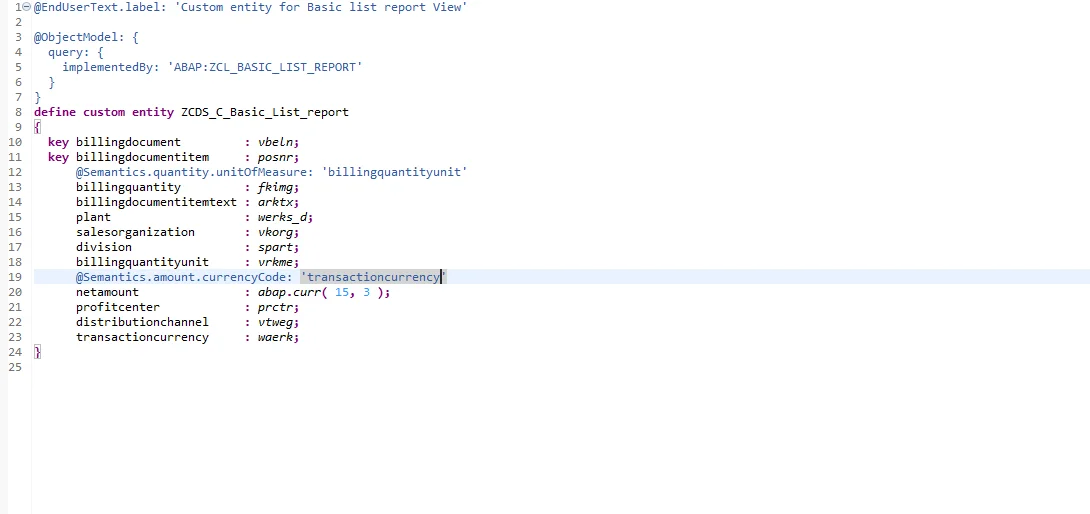
For our purposes, we only need the bare structure shown below:
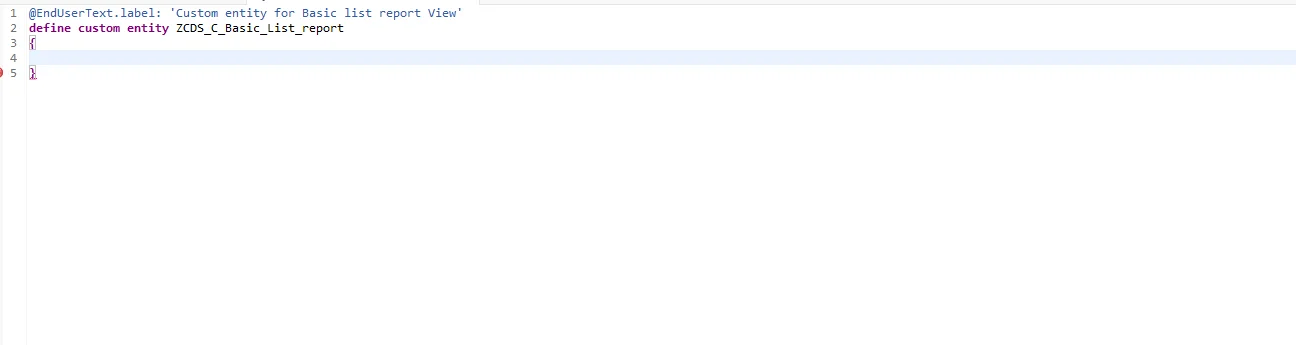
Link the Entity to Its Query Provider Class
Next, we add the following annotation, which tells the CDS custom entity which ABAP class contains the logic to retrieve its data:
@ObjectModel: {
  query: {
    implementedBy: 'ABAP:ZCL_BASIC_LIST_REPORT'
  }
}
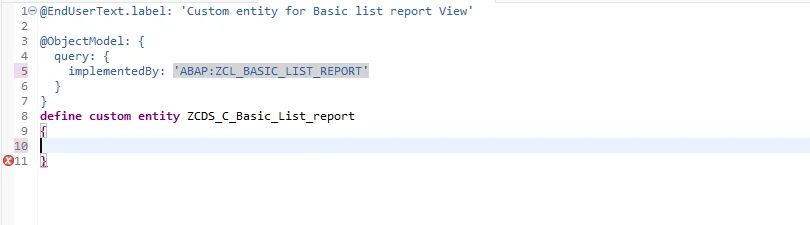
Step 3: Create the Query Provider Class
Alongside the Custom Entity, we now create the ABAP class referenced in the annotation above — this class will implement the actual data-retrieval logic used by the CDS entity.
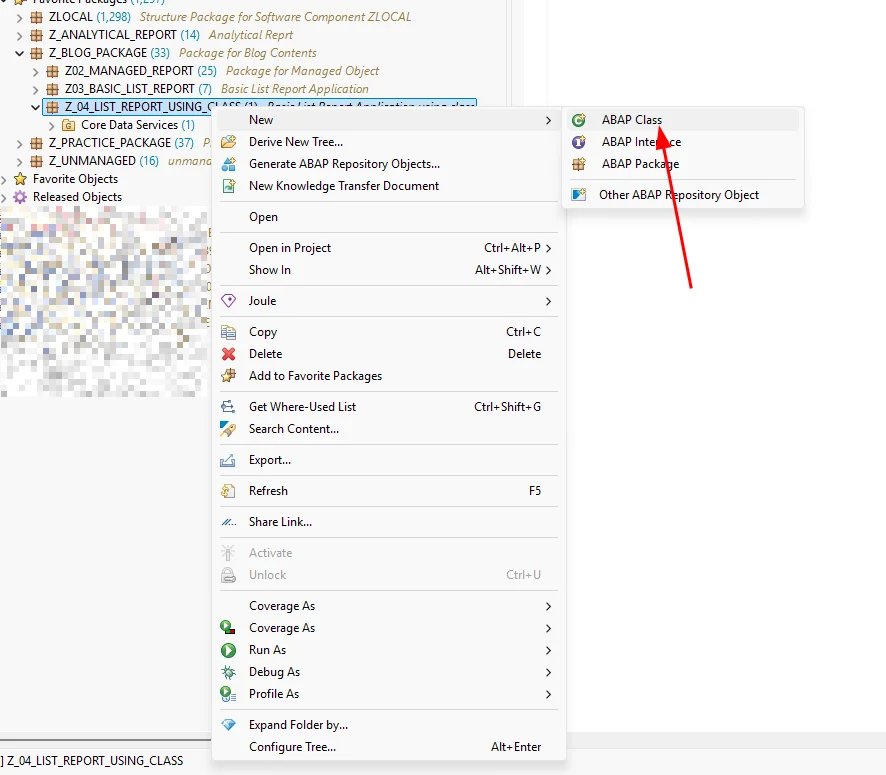
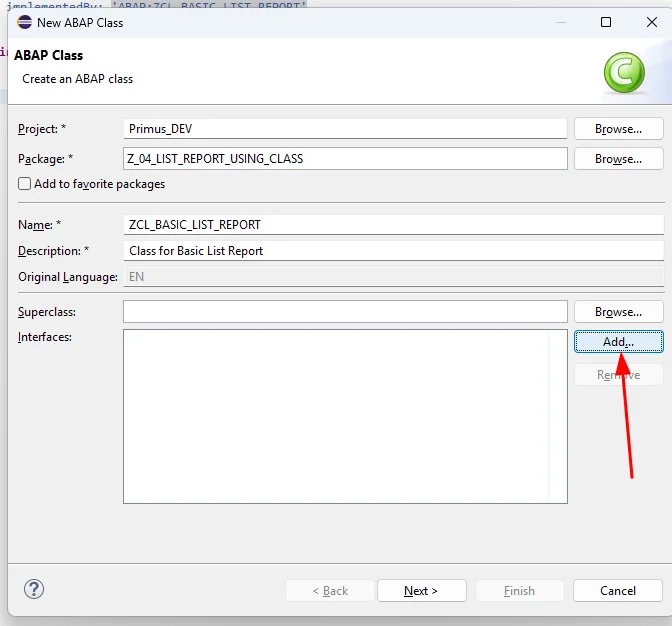
Click Add and search for the IF_RAP_QUERY_PROVIDER interface. This interface is required for any class that supplies data to a RAP custom entity.
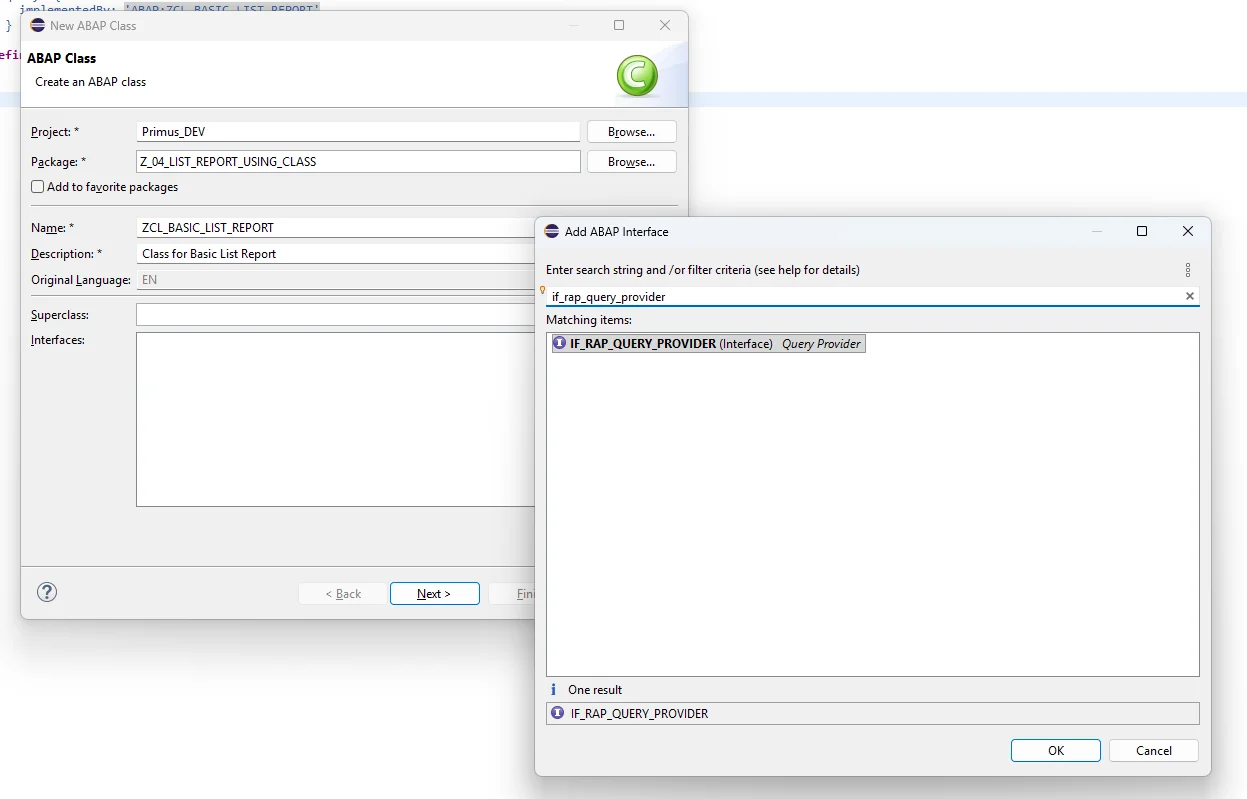
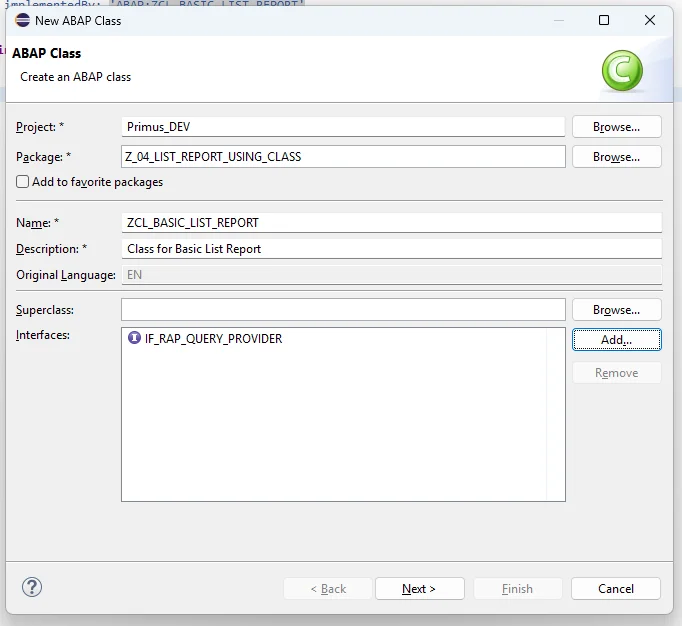
Once created, the class skeleton looks like this:
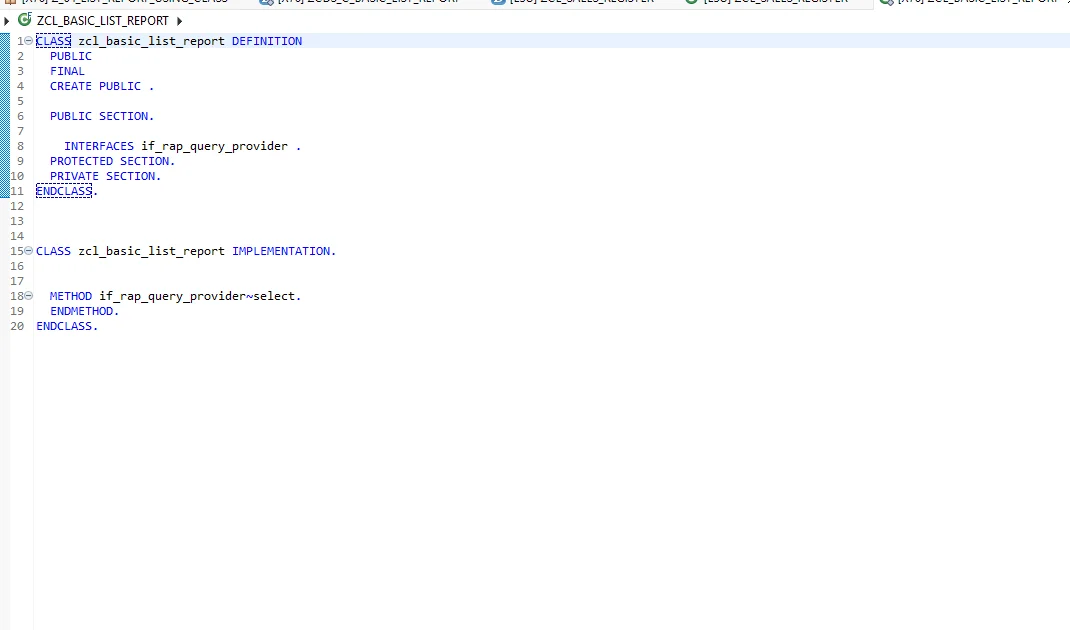
Define the Output Structure
Now declare a type structure representing one row of the report output, along with an internal table of that type, in the public section of the class definition.
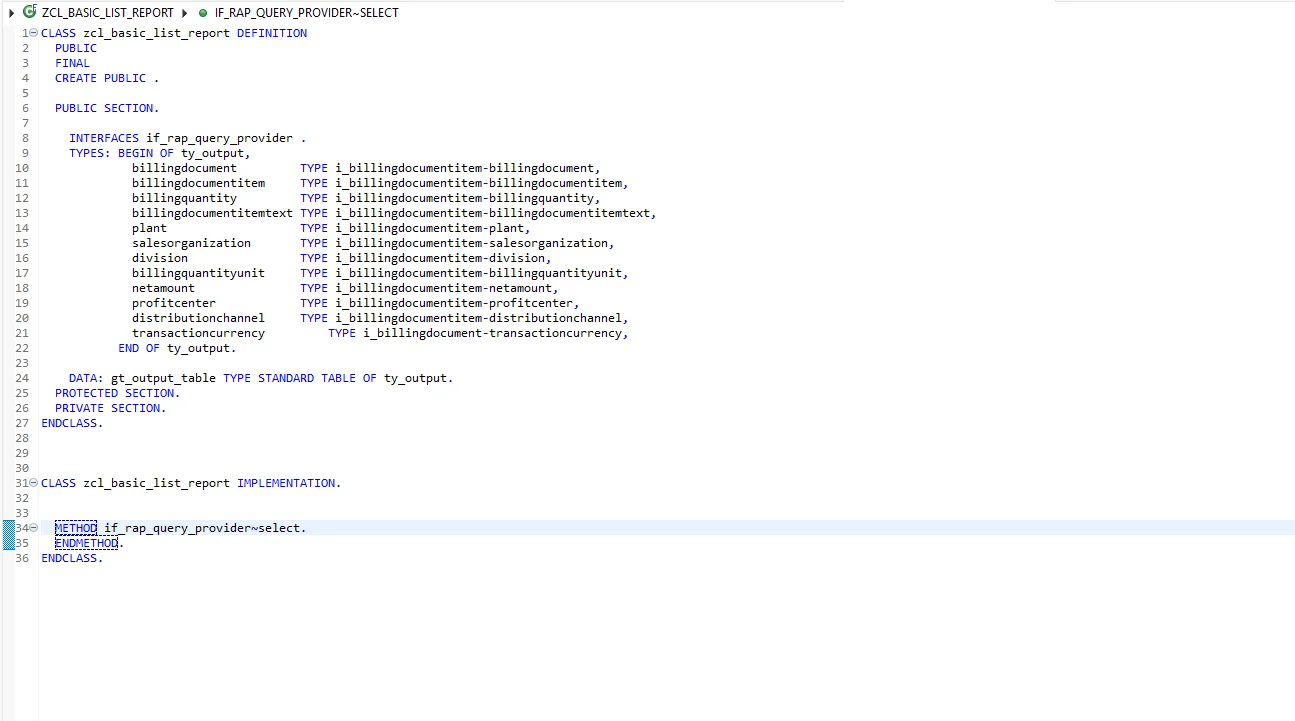
Important: Use the exact same element names in the Custom Entity's CDS definition as you used in the ABAP type structure — this keeps the field mapping between the class and the CDS entity consistent.
Add Error Handling
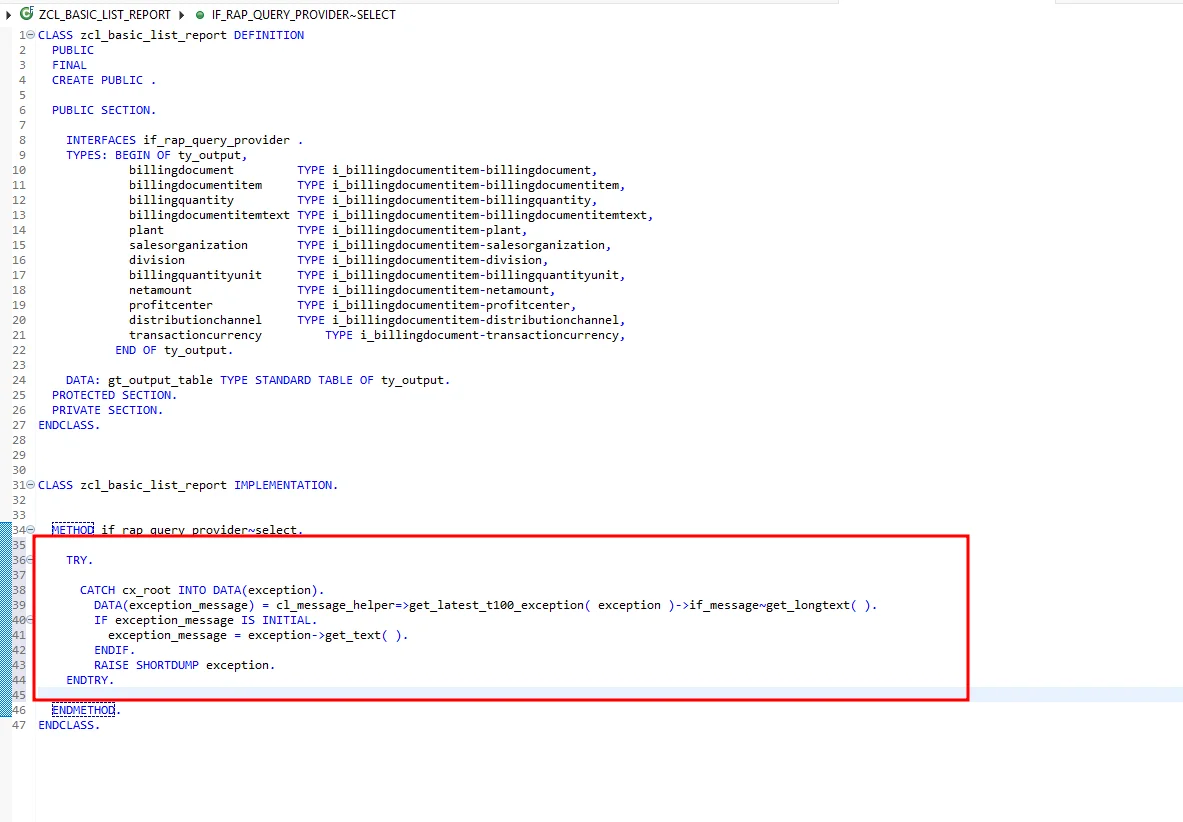
Before writing the business logic itself, wrap it in a TRY...CATCH block so any unexpected exceptions are handled gracefully rather than causing an unhandled dump.
Step 4: Implement the SELECT Method
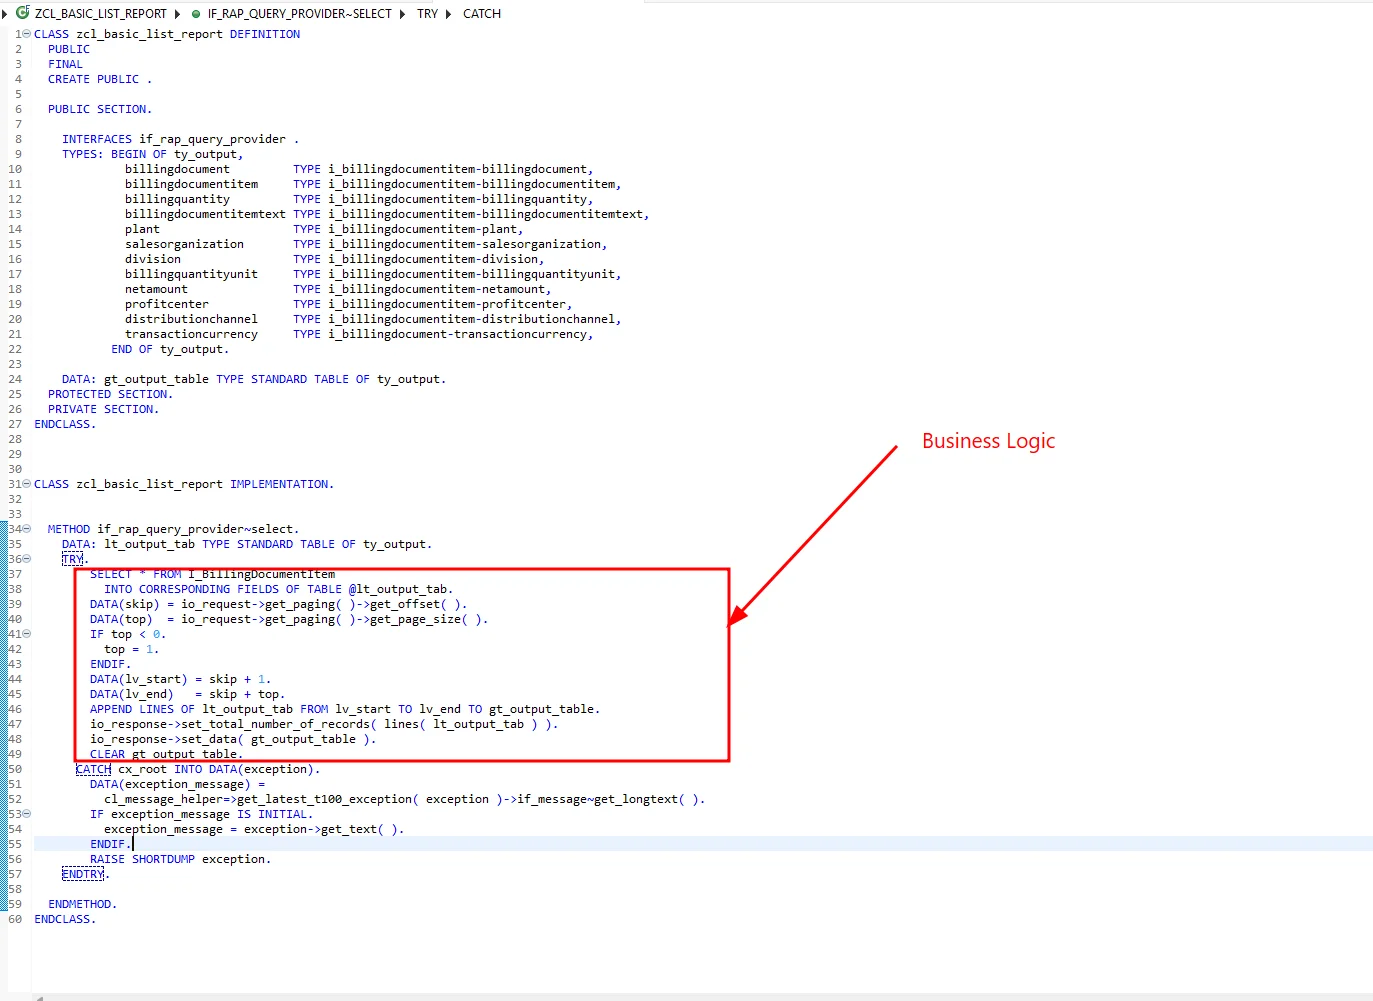
This is the heart of the class — the IF_RAP_QUERY_PROVIDER~SELECT method. It fetches the data, applies pagination based on what the UI requests, and returns both the current page of records and the total record count.
METHOD if_rap_query_provider~select.
    "----------------------------------------------------------------
    " Local table to hold the full (unpaged) result set fetched
    " from the database, before we slice out the requested page.
    "----------------------------------------------------------------
    DATA: lt_output_tab TYPE STANDARD TABLE OF ty_output.
    TRY.
        "--------------------------------------------------------------
        " STEP 1: Fetch data
        " Selects all rows from I_BillingDocumentItem into lt_output_tab.
        " NOTE: SELECT * + INTO CORRESPONDING FIELDS is convenient but
        " not the most performant option — consider selecting only the
        " fields defined in ty_output for large datasets.
        "--------------------------------------------------------------
        SELECT * FROM I_BillingDocumentItem
          INTO CORRESPONDING FIELDS OF TABLE @lt_output_tab.


        "--------------------------------------------------------------
        " STEP 2: Read paging info requested by the consumer
        " - offset : how many records to skip (for page N)
        " - top    : how many records to return (page size)
        "--------------------------------------------------------------
        DATA(skip) = io_request->get_paging( )->get_offset( ).
        DATA(top)  = io_request->get_paging( )->get_page_size( ).

        " Safety check: if no page size was requested (-1), default to 1
        " to avoid returning the entire table by accident.
        IF top < 0.
          top = 1.
        ENDIF.

        " Convert offset/top into 1-based start and end line numbers
        " for the APPEND LINES OF ... FROM ... TO ... statement.
        DATA(lv_start) = skip + 1.
        DATA(lv_end)   = skip + top.


        "--------------------------------------------------------------
        " STEP 3: Slice out only the requested page of records
        " from the full result set and place it into gt_output_table.
        "--------------------------------------------------------------
        APPEND LINES OF lt_output_tab
          FROM lv_start TO lv_end
          TO gt_output_table.


        "--------------------------------------------------------------
        " STEP 4: Report the TOTAL record count (unpaged!) so the
        " consumer/UI knows how many pages exist and keeps paging.
        " IMPORTANT: this must be based on lt_output_tab (full set),
        " NOT gt_output_table (which only holds the current page).
        "--------------------------------------------------------------
        io_response->set_total_number_of_records( lines( lt_output_tab ) ).

        " Return only the current page's data to the consumer.
        io_response->set_data( gt_output_table ).

        " Reset the output buffer so it doesn't carry over into the
        " next call (important for multiple/parallel query executions).
        CLEAR gt_output_table.

      CATCH cx_root INTO DATA(exception).

        "--------------------------------------------------------------
        " Error handling: try to get a proper T100 message text first,
        " fall back to the generic exception text if not available.
        "--------------------------------------------------------------
        DATA(exception_message) =
          cl_message_helper=>get_latest_t100_exception( exception )->if_message~get_longtext( ).

        IF exception_message IS INITIAL.
          exception_message = exception->get_text( ).
        ENDIF.

        " Re-raise as a short dump so the error surfaces clearly.
        RAISE SHORTDUMP exception.

    ENDTRY.

  ENDMETHOD.
With the business logic in place, the completed method looks like this:
Note: Re-raising as a short dump is a simple way to surface errors during development. In a production scenario, you'd typically want to raise a proper RAP exception or business-relevant message instead, so the UI can display a meaningful error to the end user.
Step 5: Create the Service Definition
With the Custom Entity and its query provider class in place, we now create a Service Definition to expose the entity as an OData service.
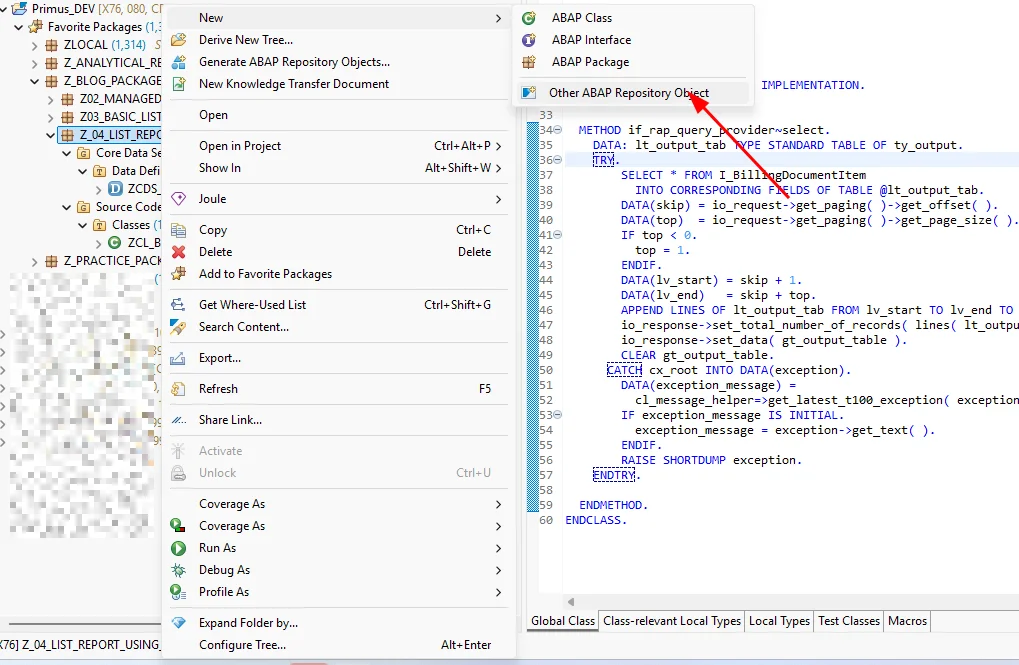
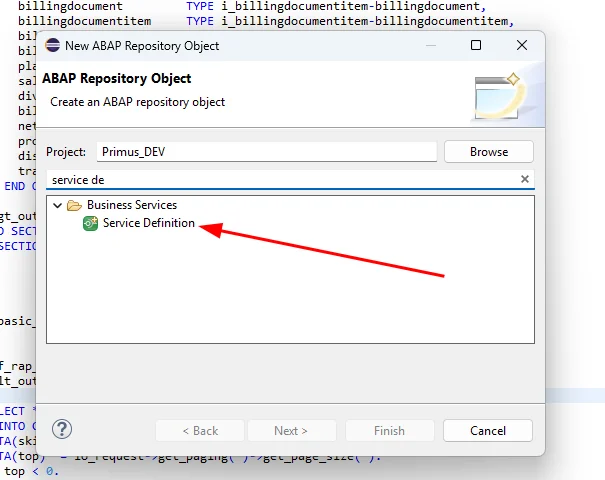
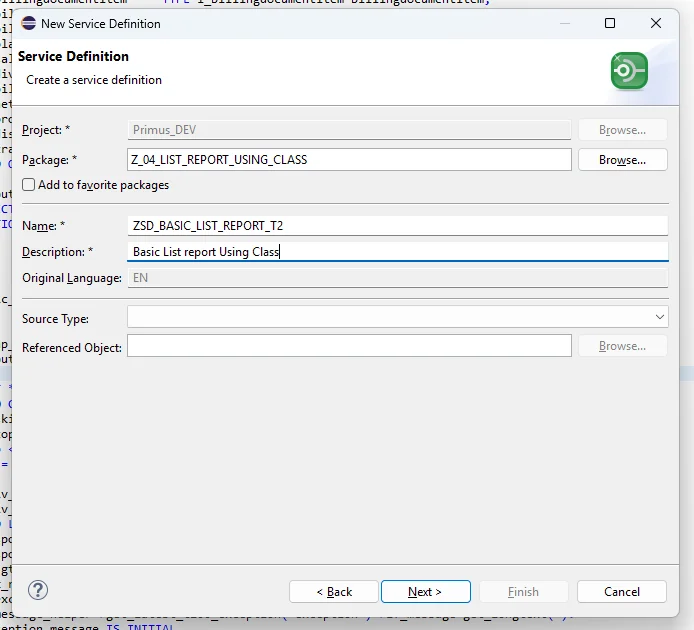
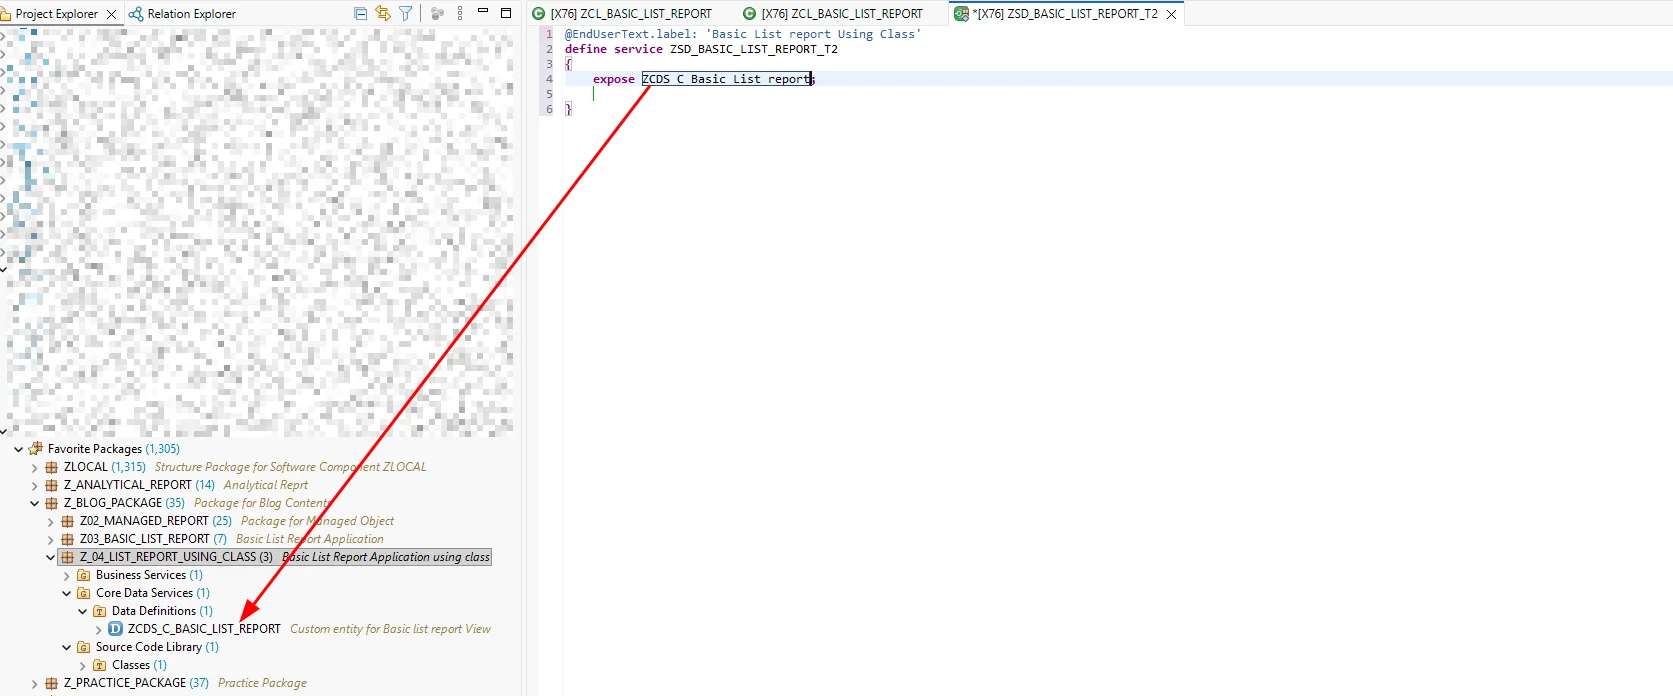
Expose the Custom Entity within the Service Definition using the expose keyword:
Step 6: Create the Service Binding
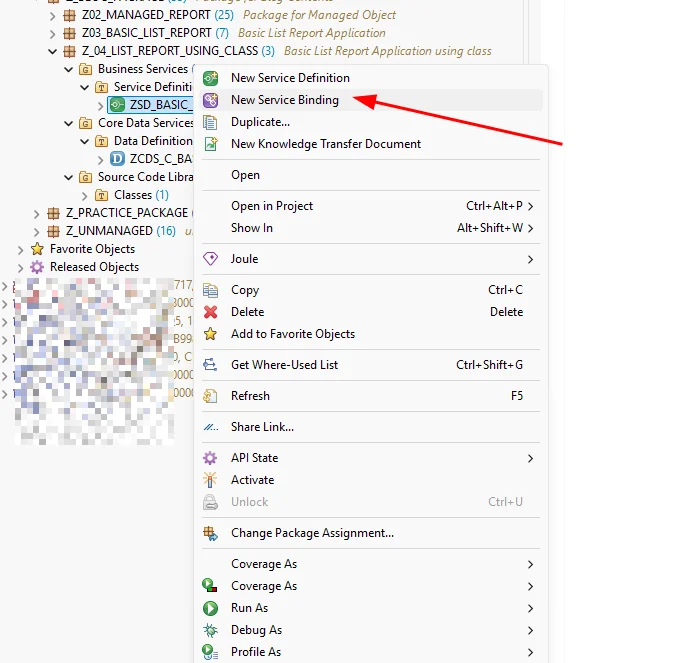
Right-click the Service Definition you just created and select New Service Binding.
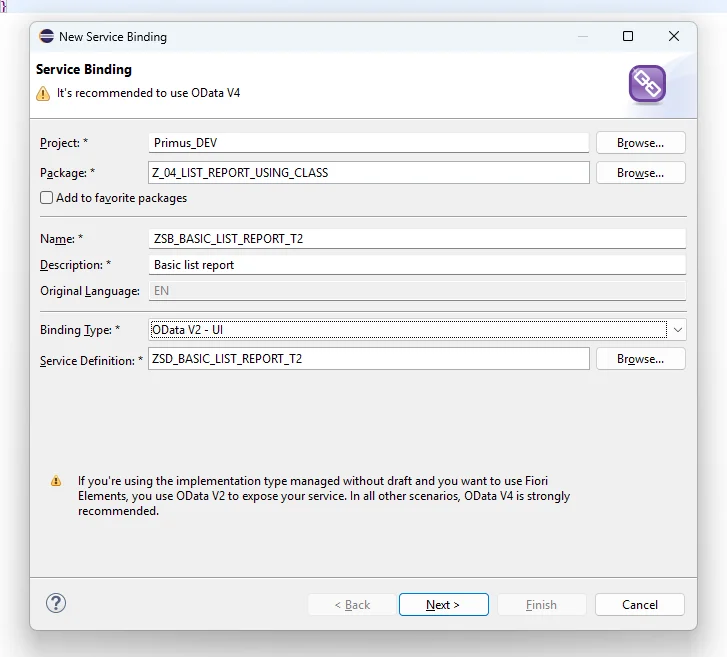
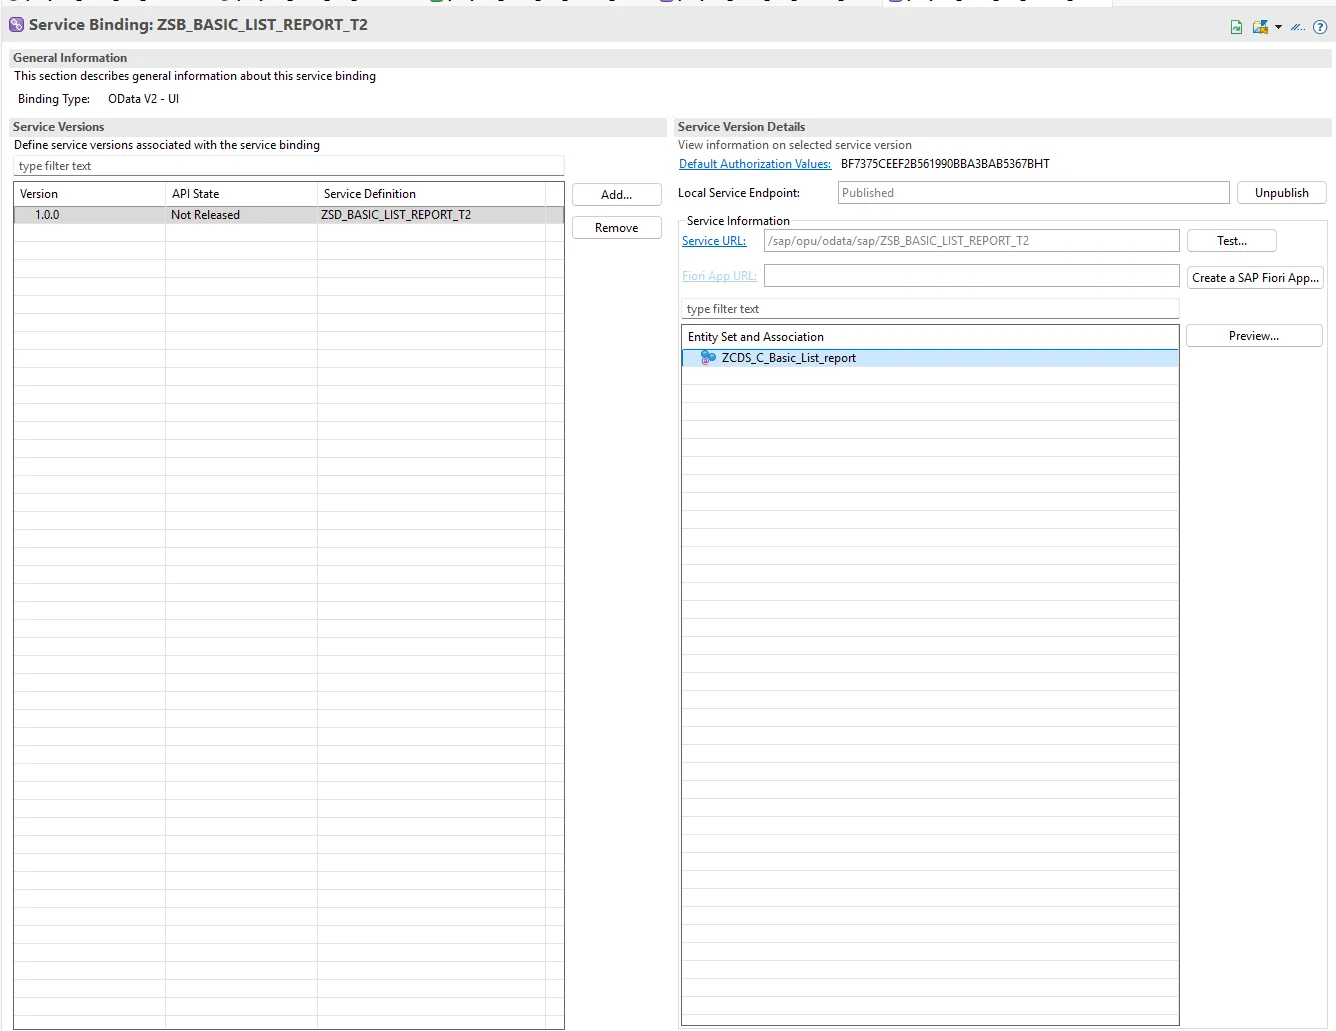
Activate and then Publish the Service Binding.
Step 7: Preview the Application
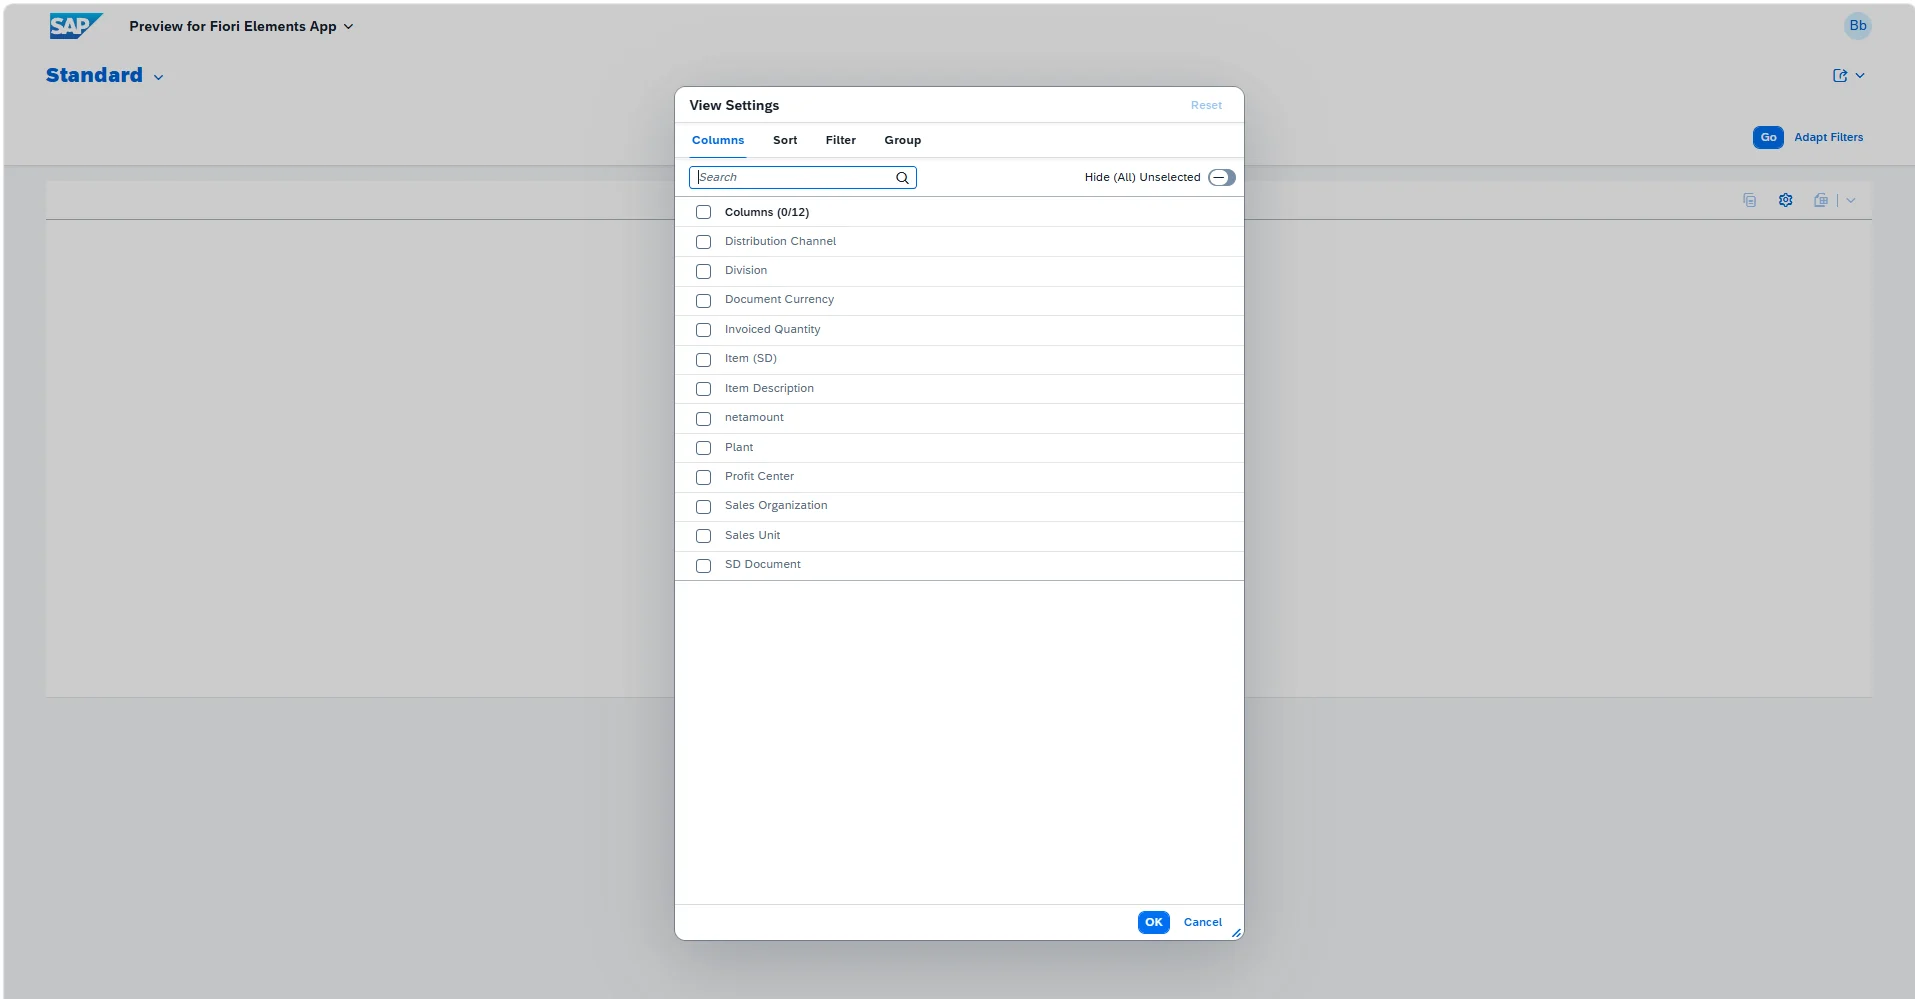
Once published, click Preview to see how the application looks. Initially, no columns are selected, so the table appears empty.
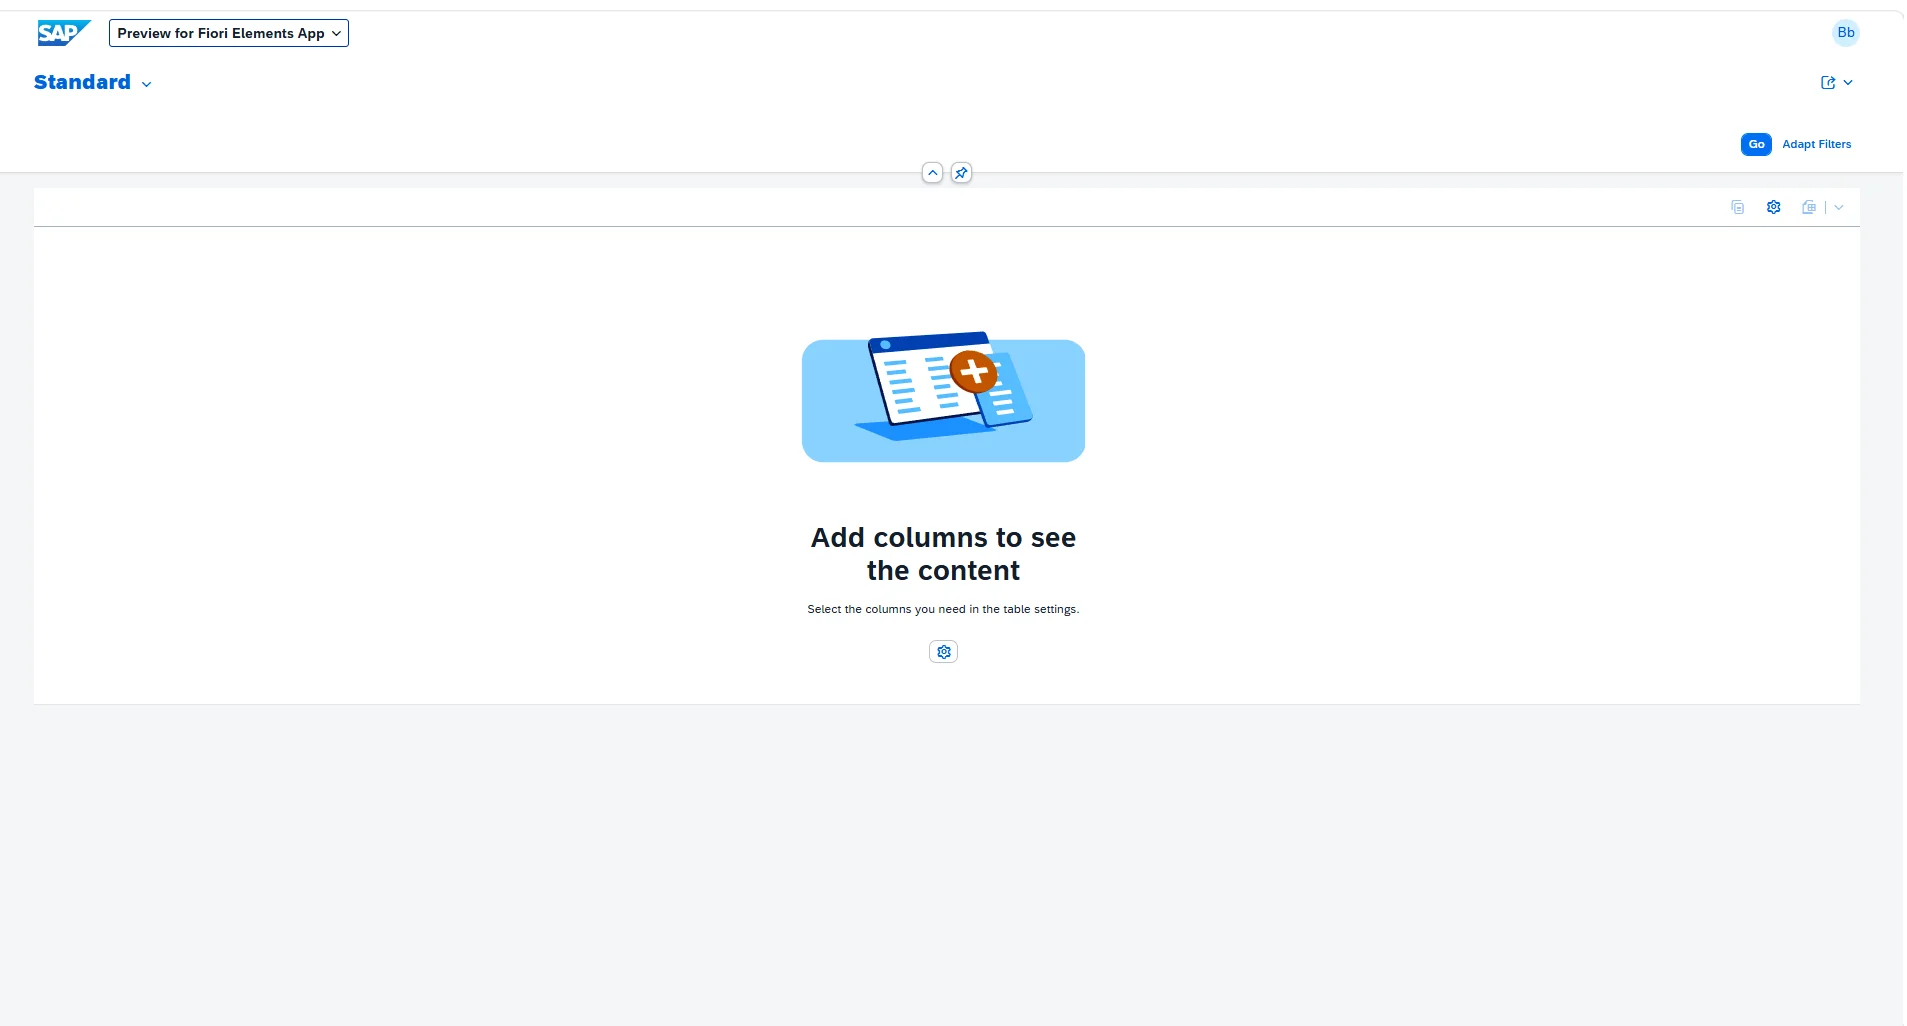
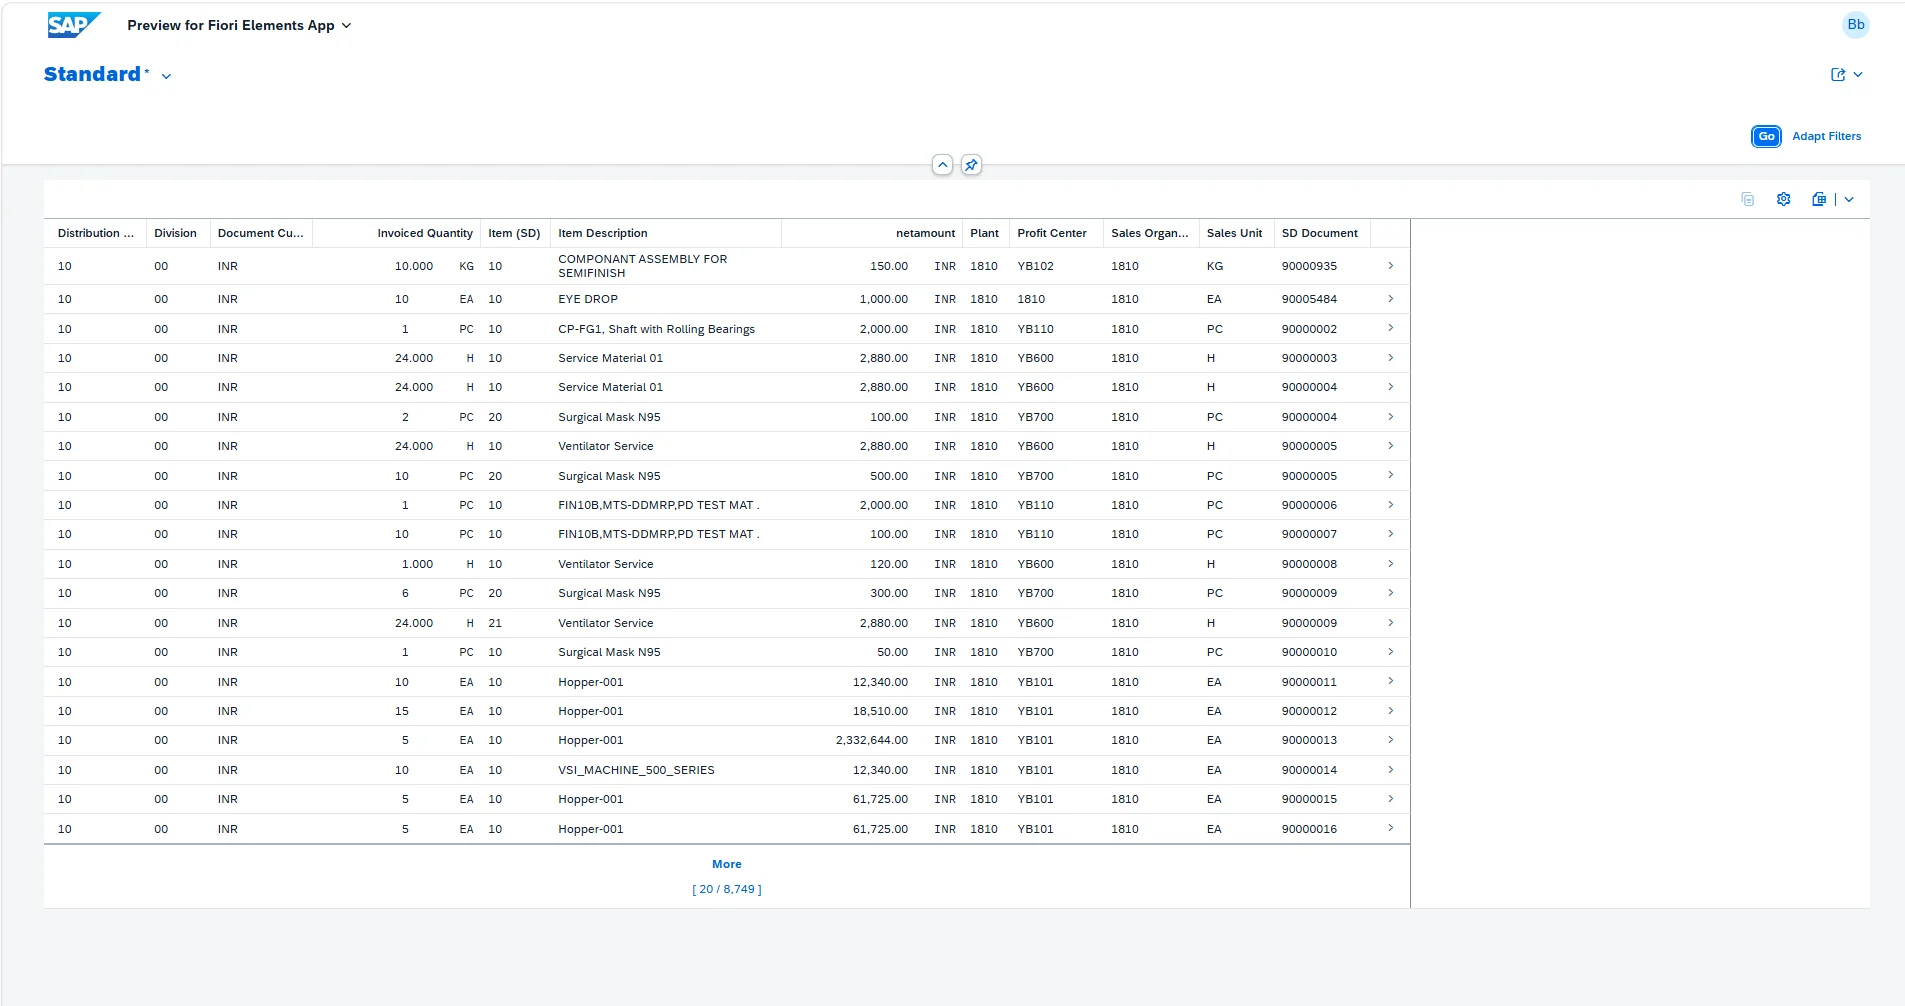
Select the columns you want and click Go — the data will appear in paginated format, with additional records loading automatically as you scroll.
Bonus: Setting Default Columns
If you'd like specific columns to appear automatically on every reload — instead of requiring the user to select them manually each time — add the relevant UI annotations (e.g., @UI.lineItem) to the Custom CDS entity.
For Deployment Process Refer SAP RAP App Deployemnt in SAP S/4HANA Public Cloud .