Introduction
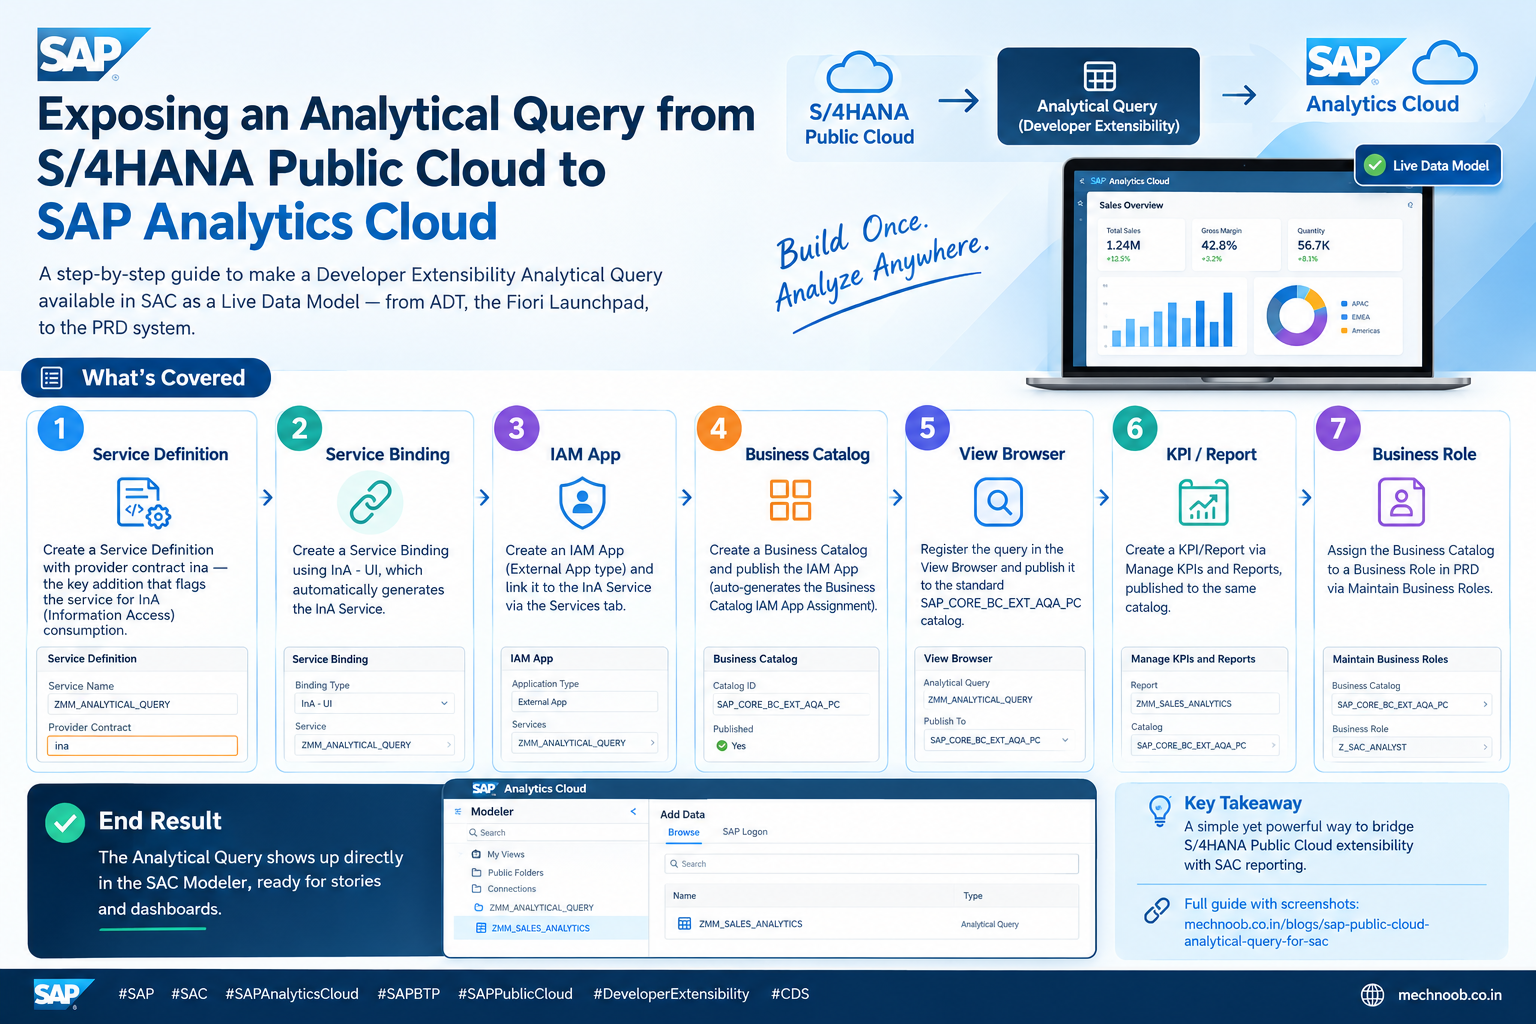
In this post, we'll walk through how to expose an Analytical Query — created using Developer Extensibility in SAP S/4HANA Public Cloud — so that it becomes available in SAP Analytics Cloud (SAC) as a Live Data Model.
This requires a few setup steps across Eclipse (ADT), the SAP Fiori Launchpad, and the PRD system. By the end, your Analytical Query will be accessible directly in the SAC Modeler.
The Starting Point
We begin with an Analytical Query CDS view that has already been created in Developer Extensibility. This is the view we'll be working with throughout this guide.
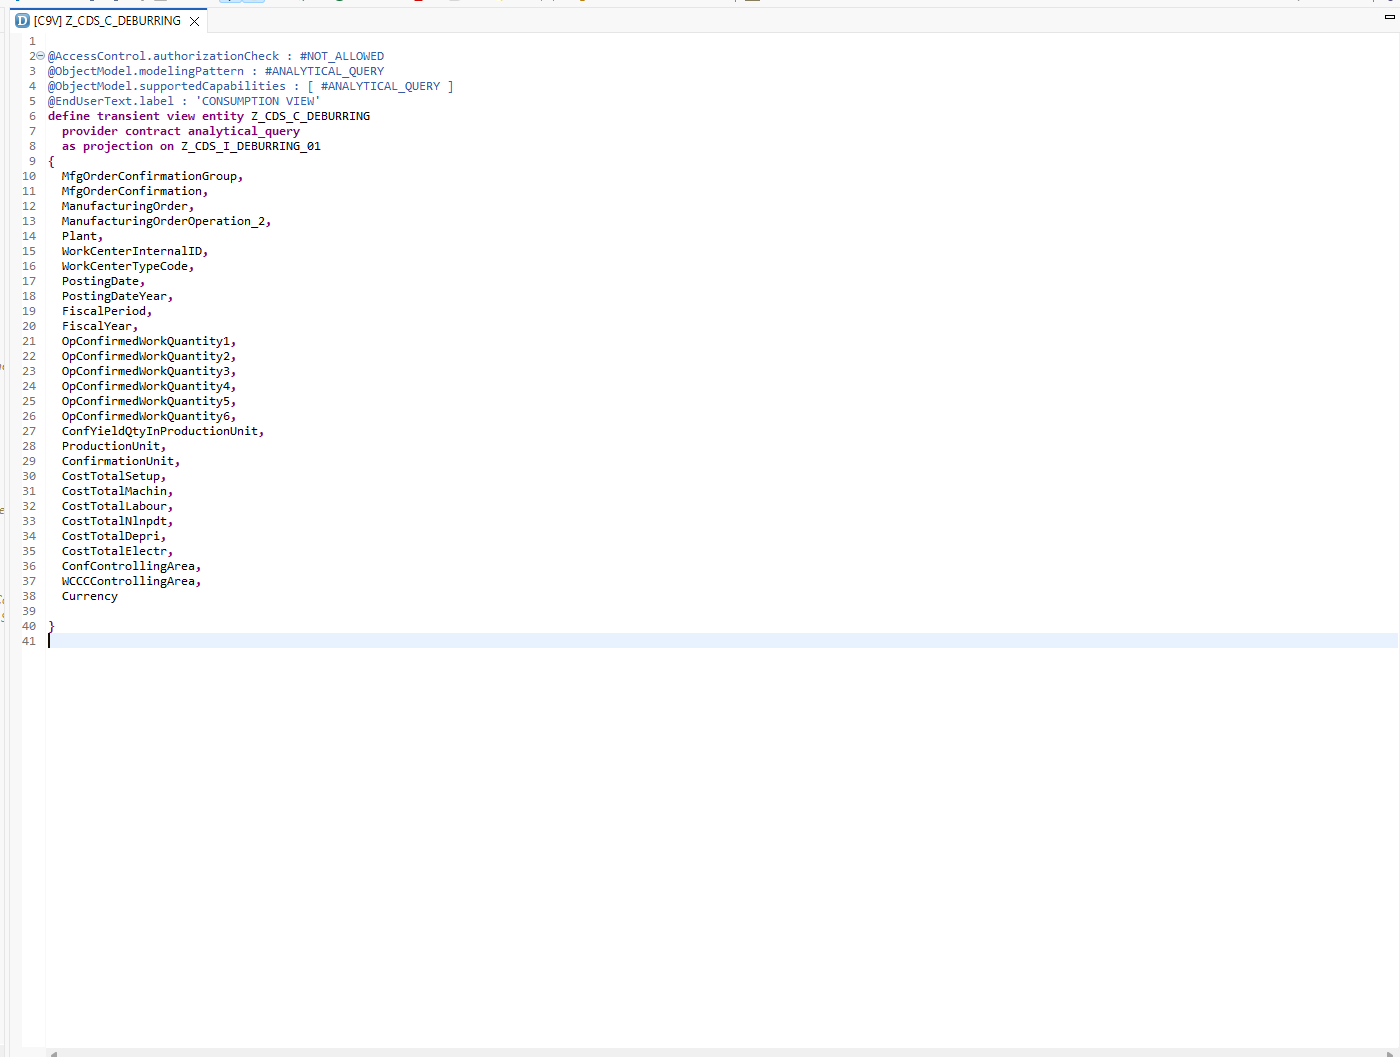
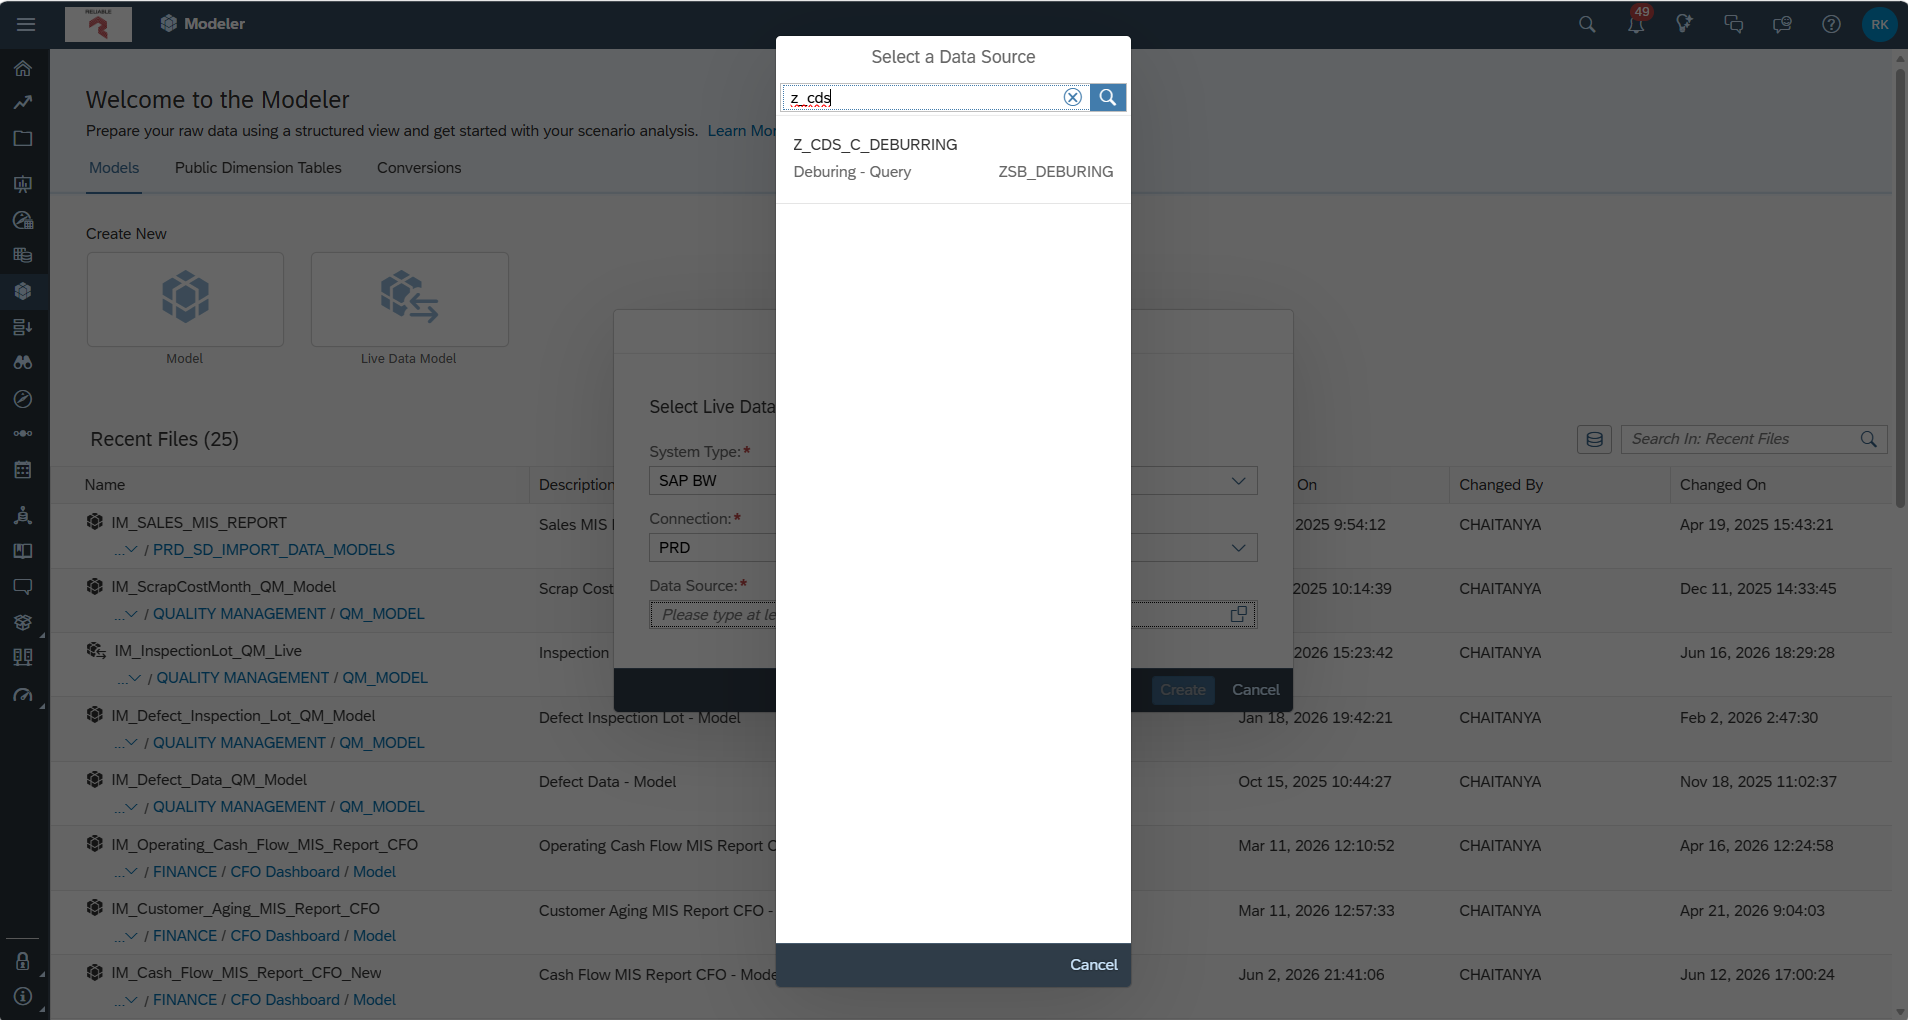
If you navigate to SAC right now and try to create a Live Data Model, searching for this CDS view will return no results.
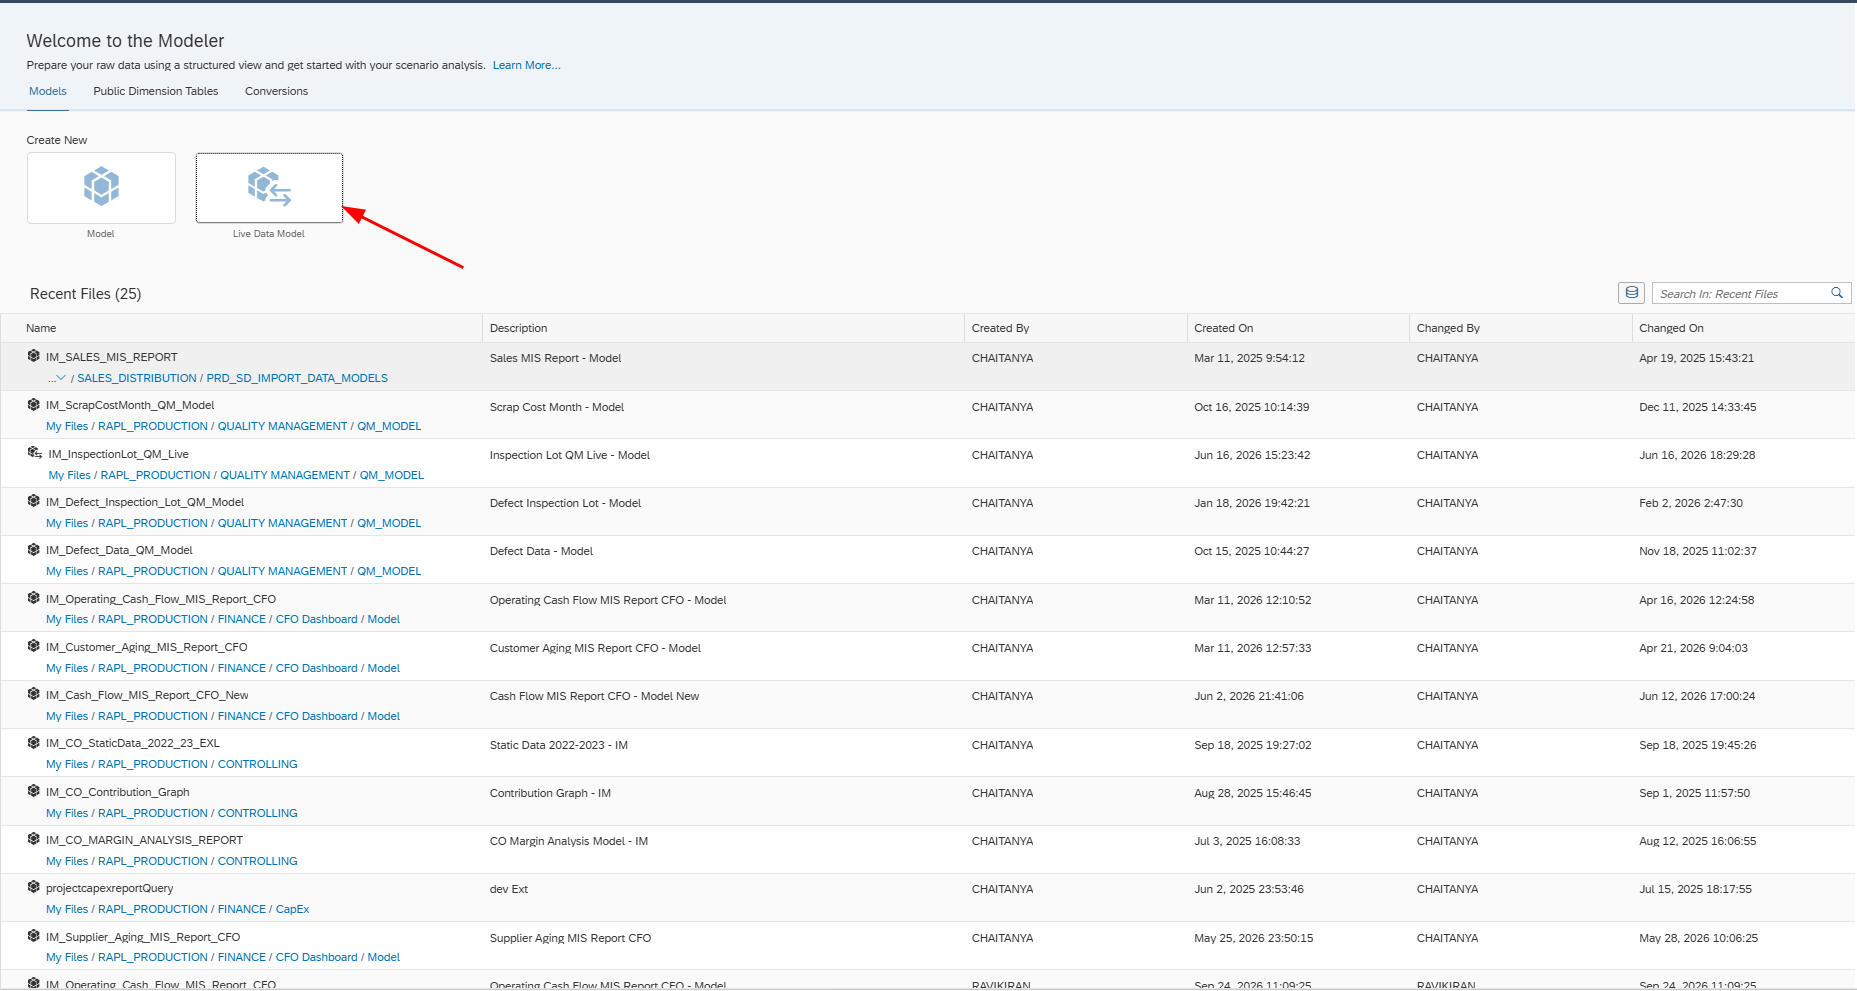
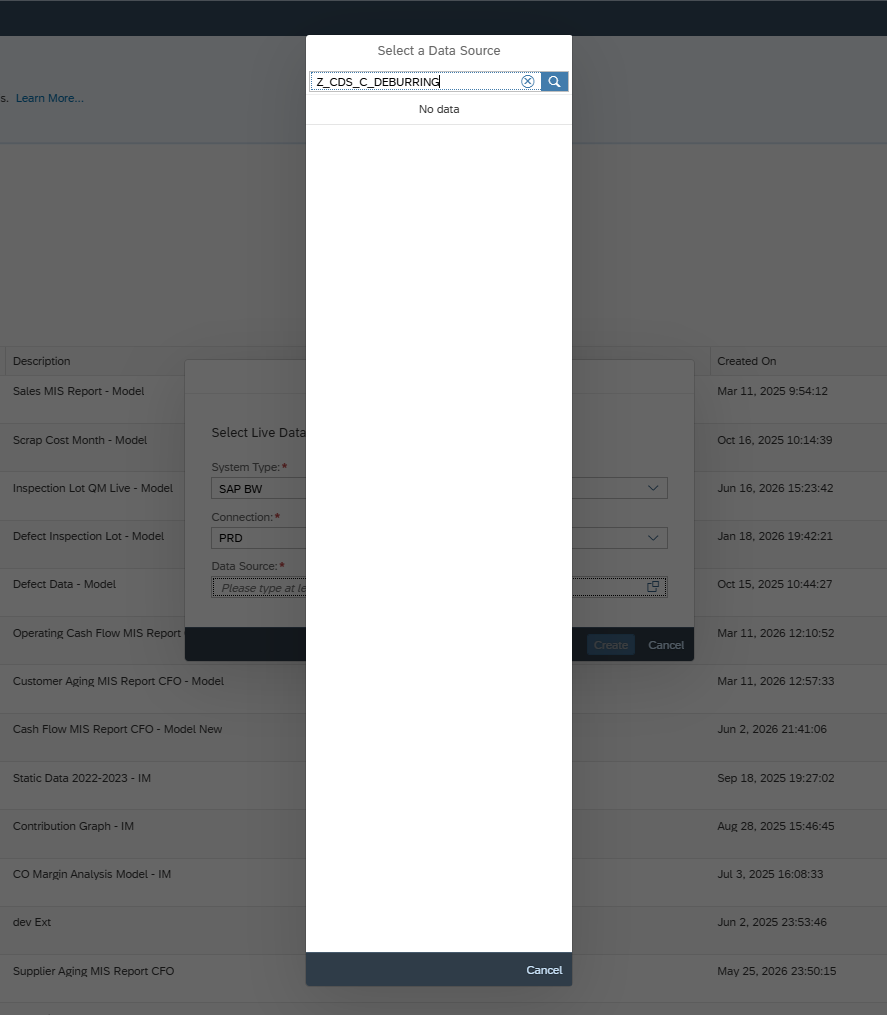
This is expected — the CDS view hasn't been exposed as an InA (Information Access) service yet. To make it visible in SAC, we need to create a Service Definition and a Service Binding using the InA protocol.
Step 1: Create a Service Definition
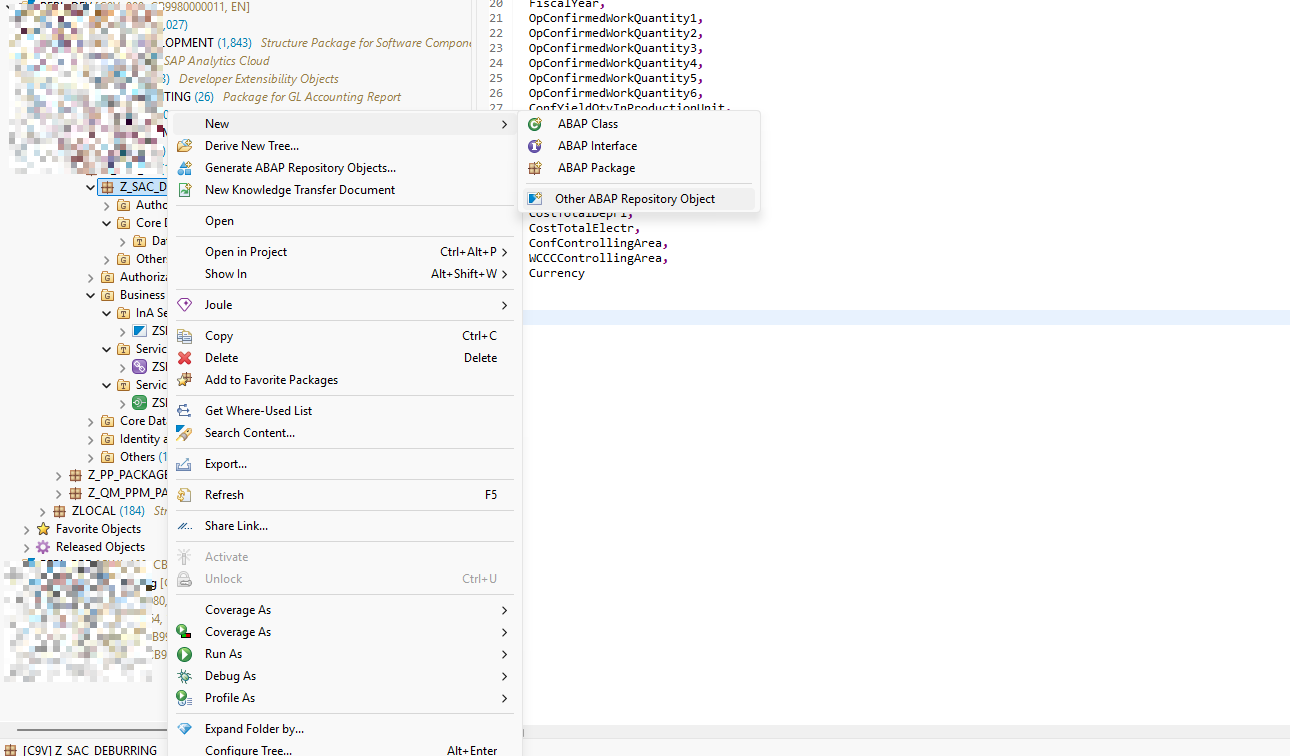
In Eclipse (ADT), navigate to your package and create a new Service Definition.
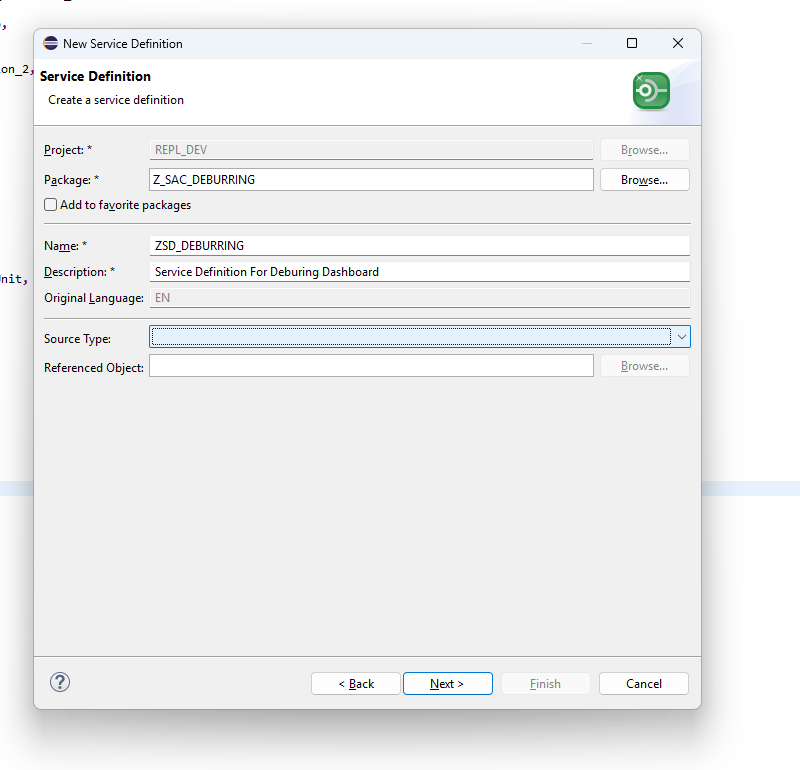

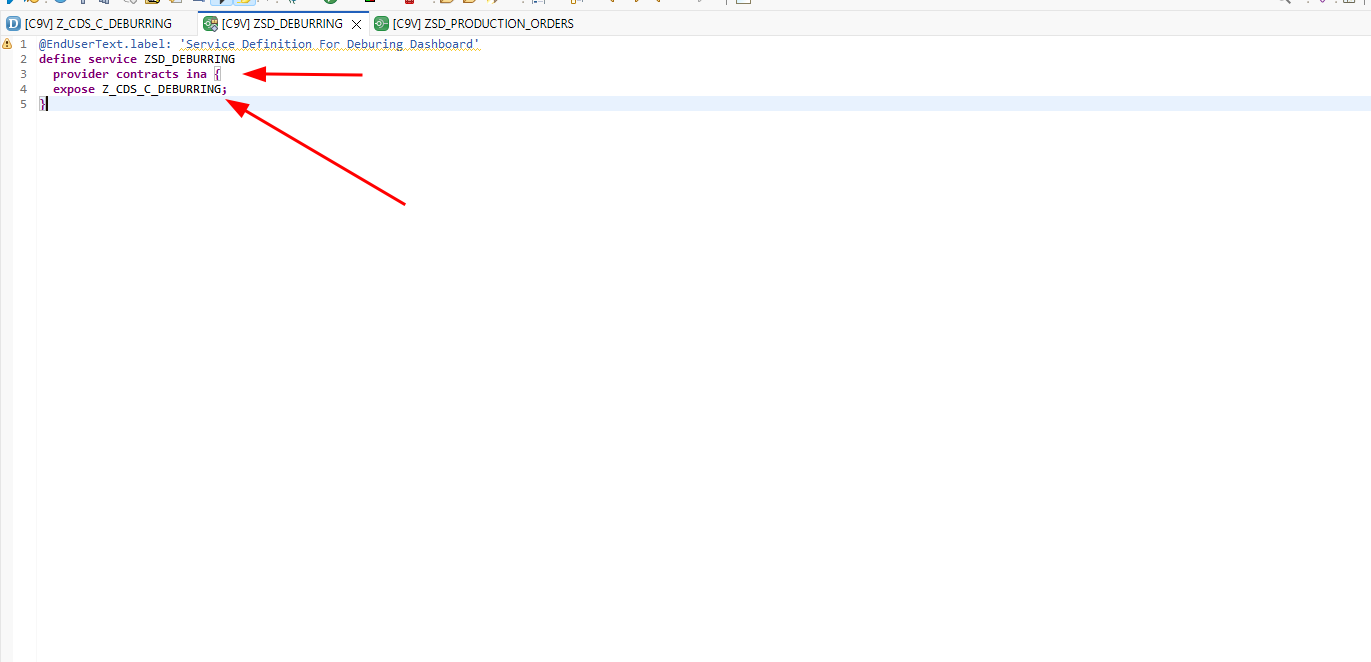
The structure is similar to how you'd expose a CDS view for OData or Fiori Reports, with one key addition: include the keyword provider contract ina in the definition. This tells the system the service is intended for analytical (Information Access) consumption. Then activate the service definition.
Step 2: Create the Service Binding
Right-click on the newly created Service Definition and select New Service Binding.
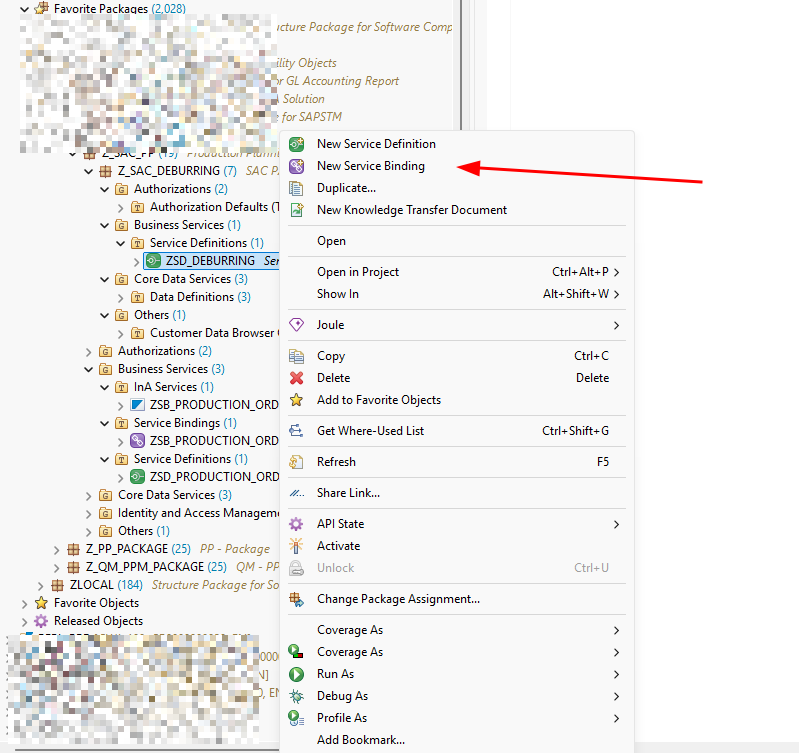
Under Binding Type, select InA - UI. This binding type enables the service to be consumed by SAC through the Information Access protocol.
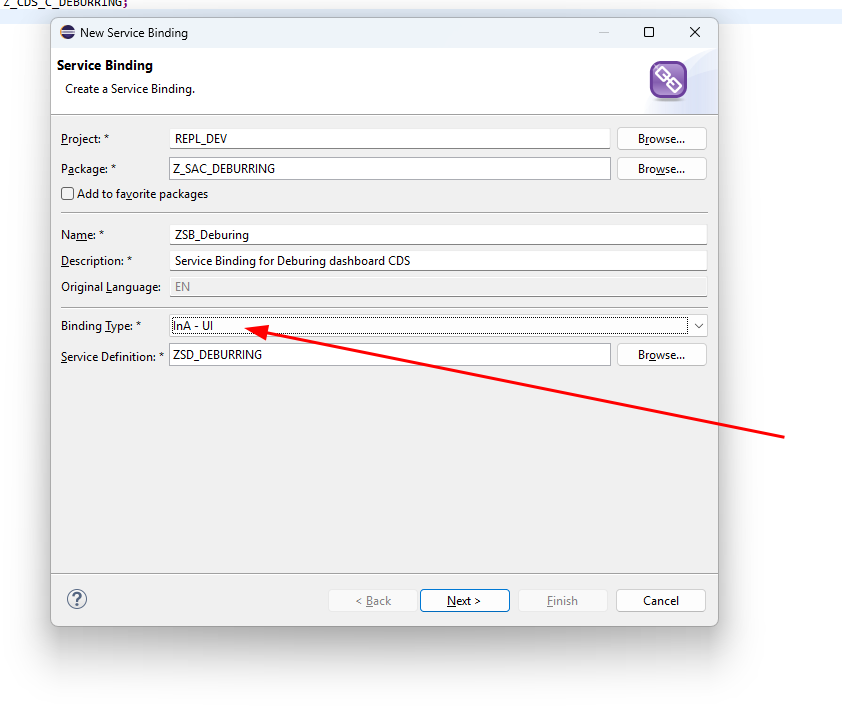
Activate the Service Binding.
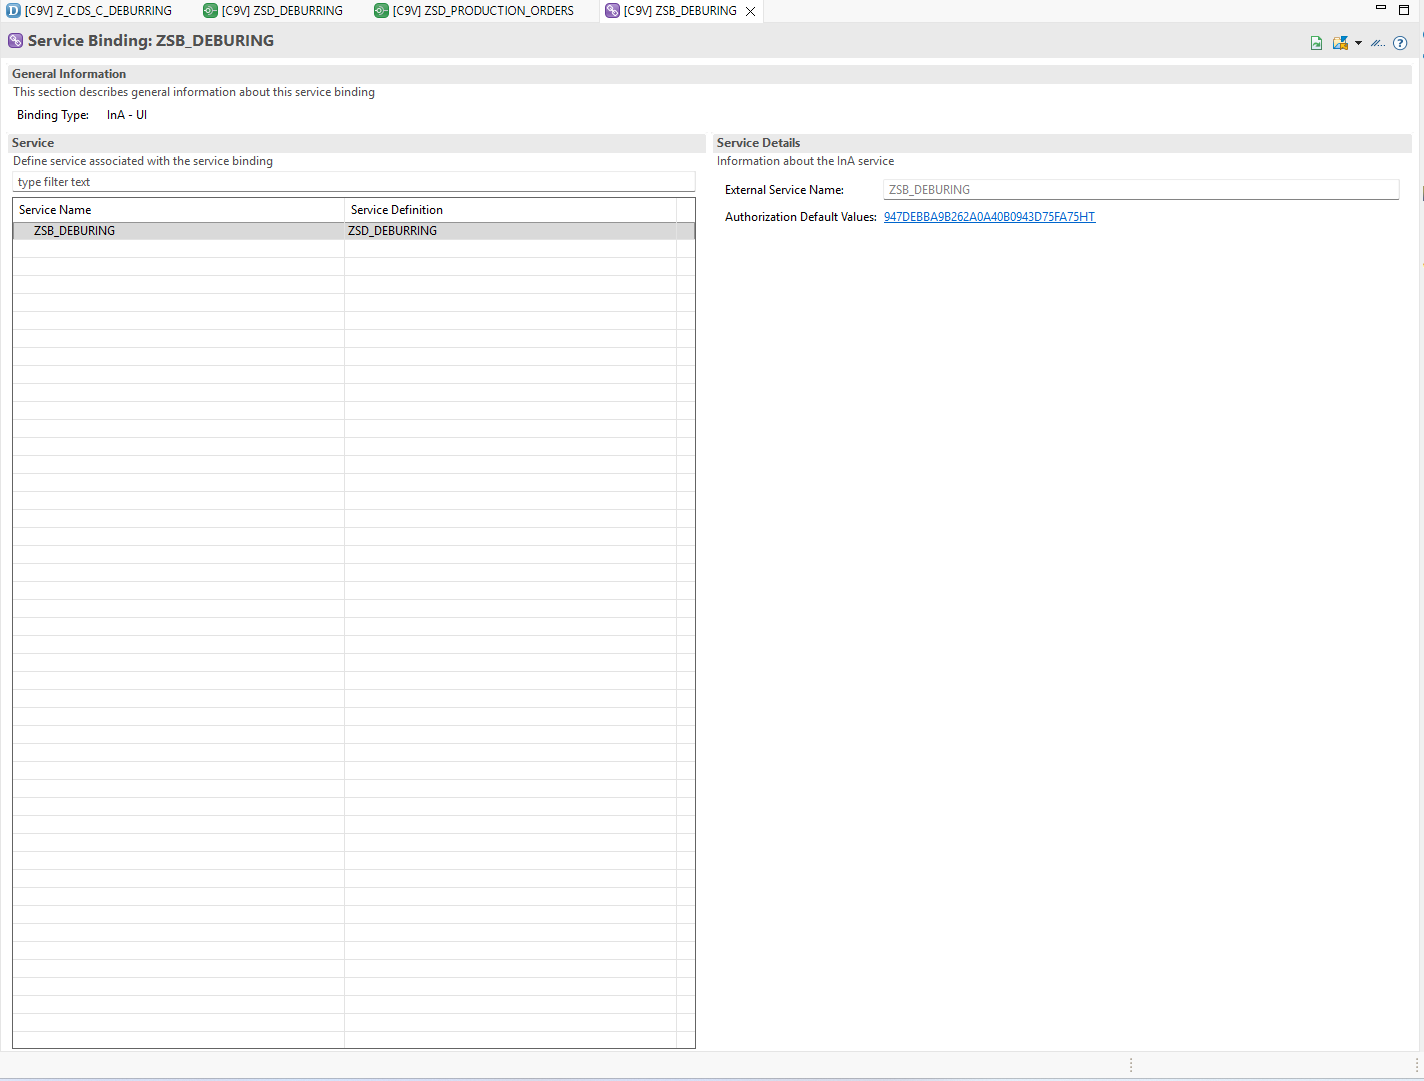
Once activation is complete, refresh your package. You'll notice a new InA Service has been auto-generated. This is the service that SAC will use to connect to the backend.
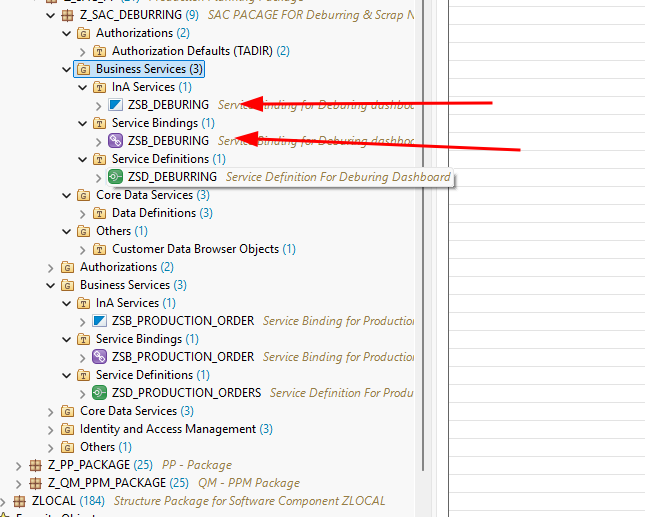
Step 3: Create an IAM App
To control authorization for the exposed service, we need to create an IAM App and link it to a Business Catalog.
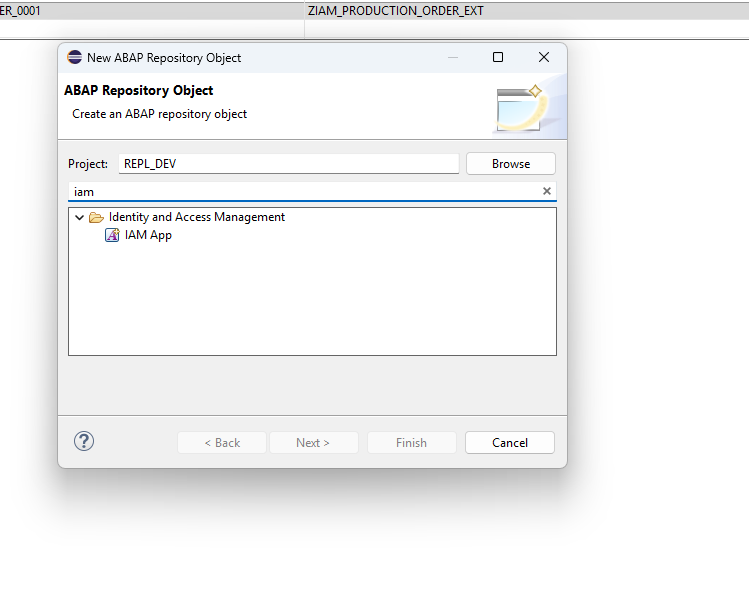
Right-click on your package and select New → ABAP Repository Object.
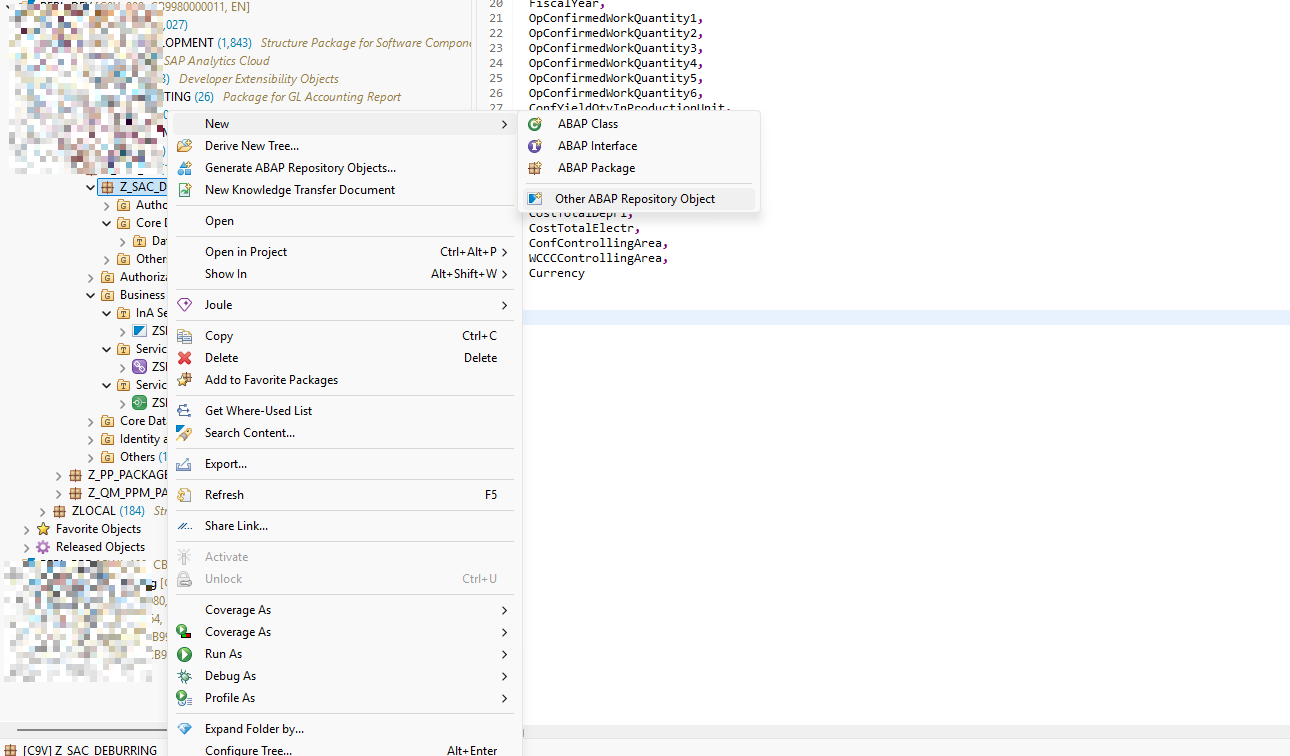
Search for IAM App and select it.
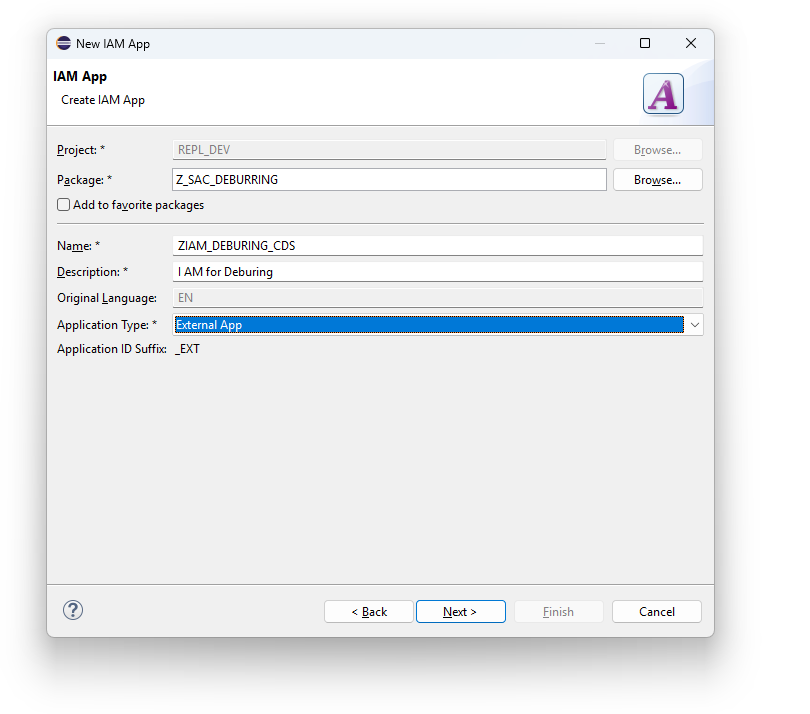
In the Application Type dropdown, select External App. This type is used for applications consumed outside the S/4HANA Fiori Launchpad — in our case, SAC.
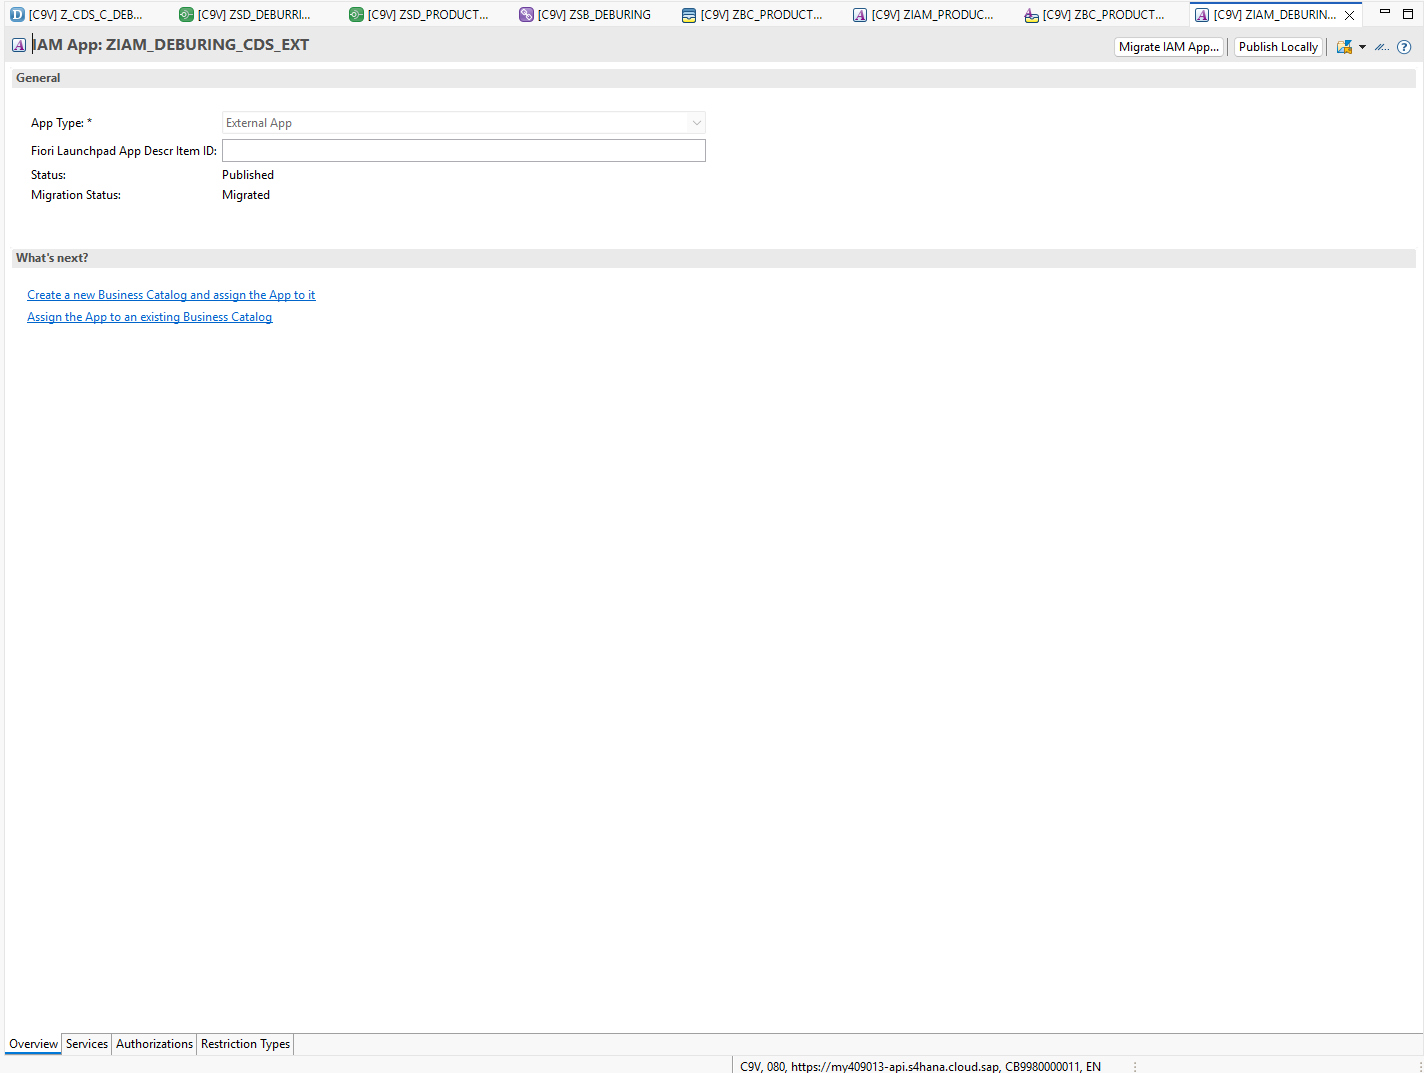
Here's what the IAM App editor looks like once created.
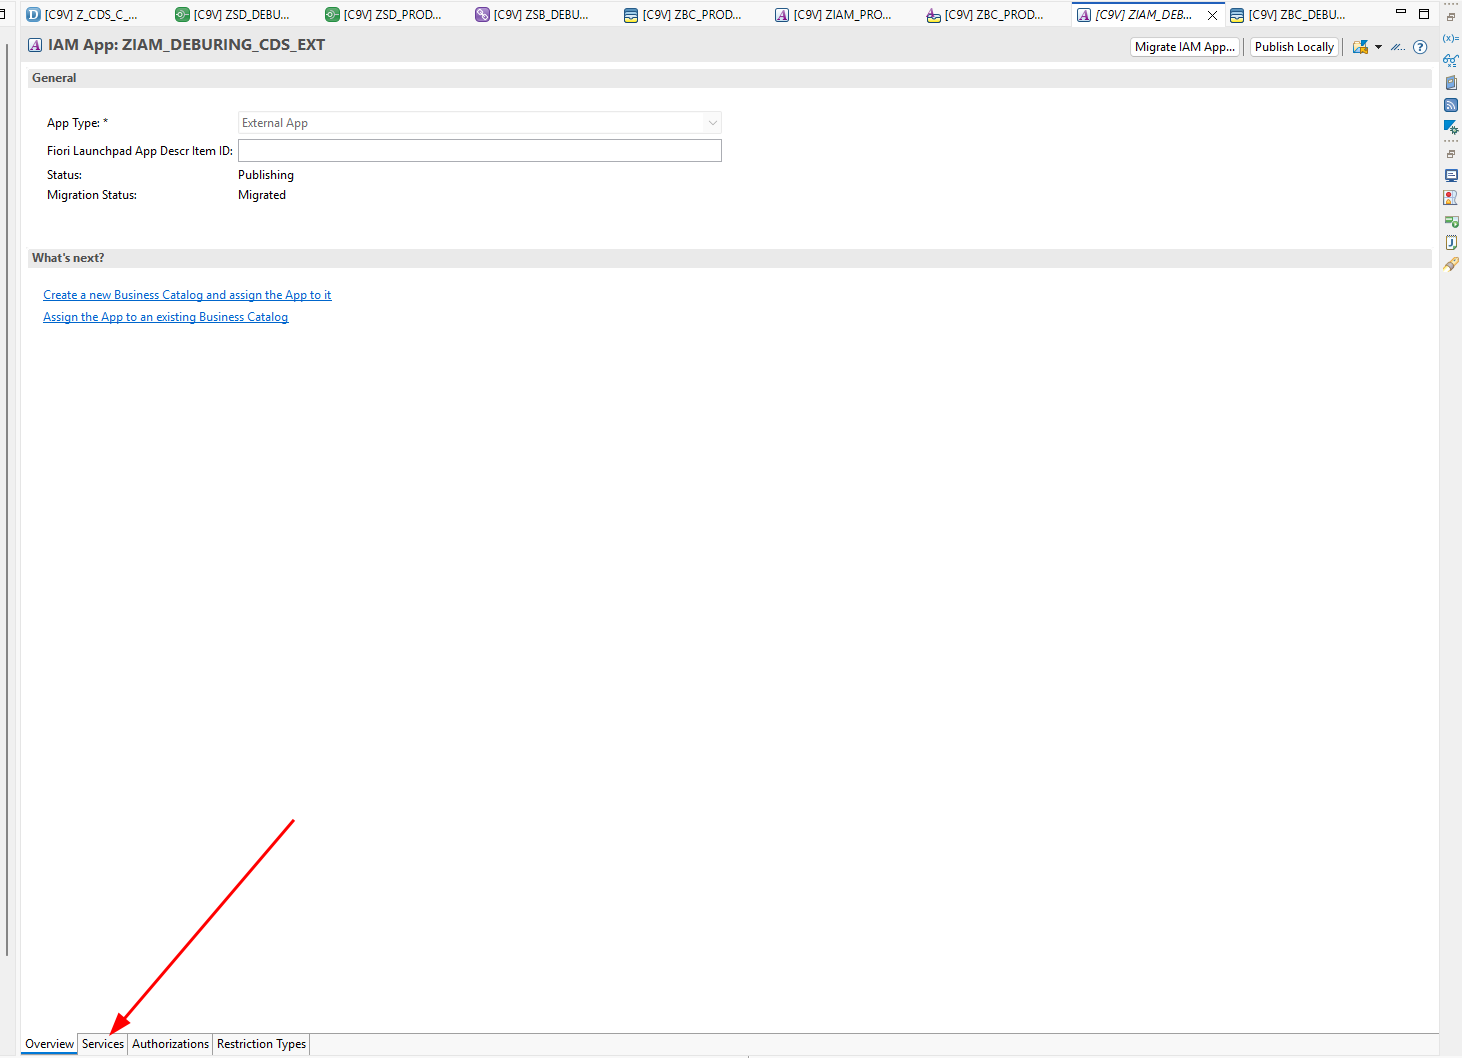
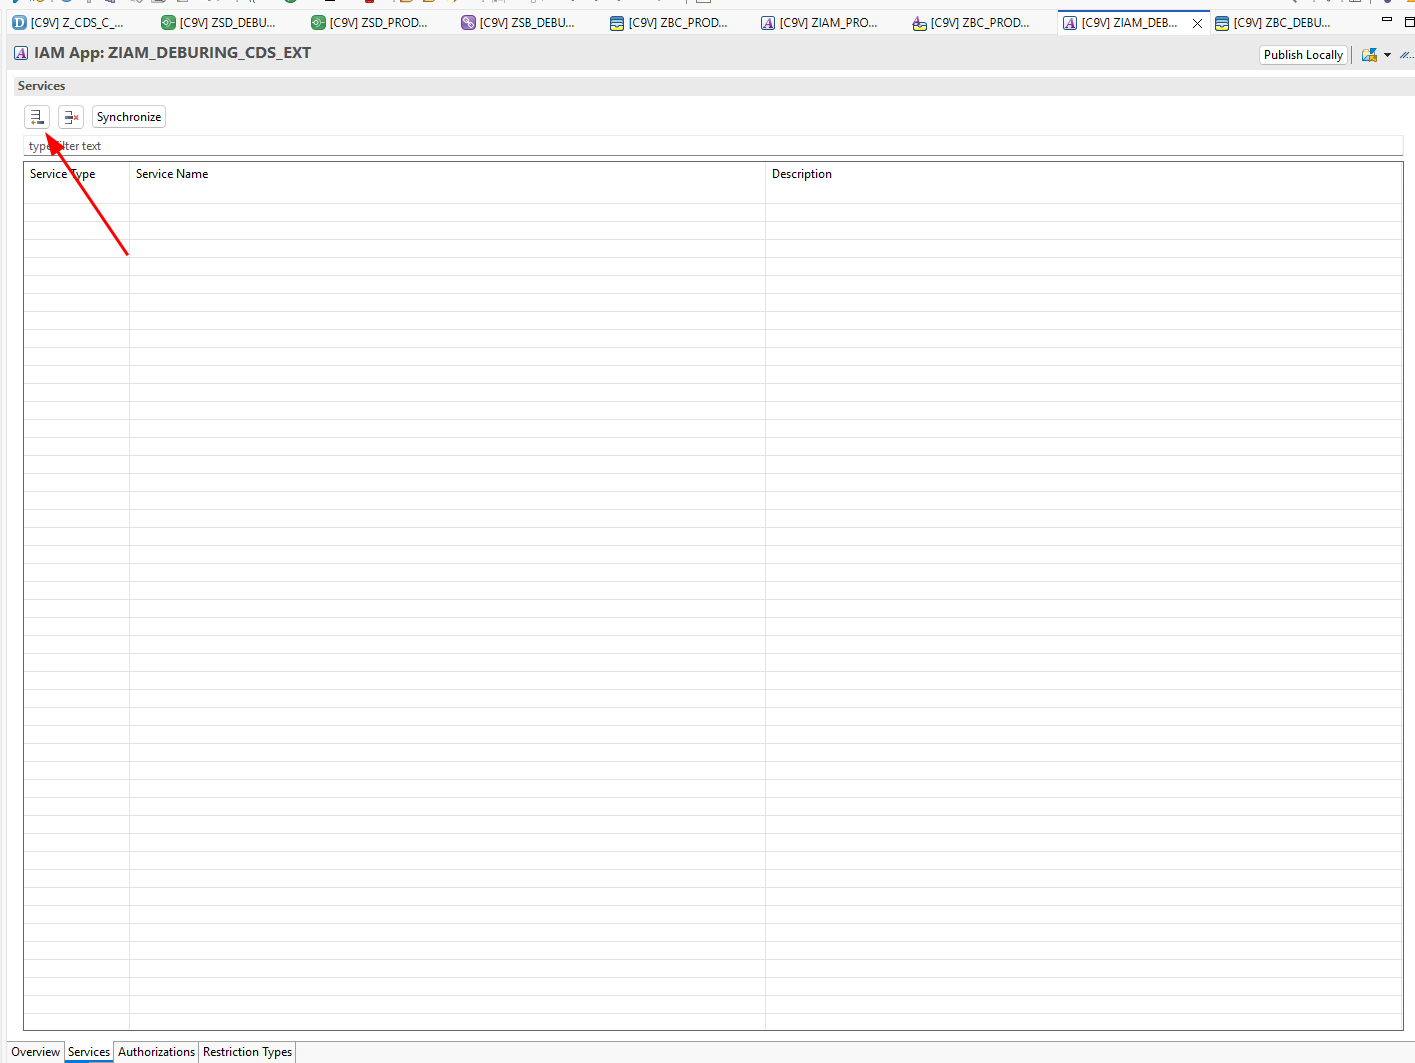
Navigate to the Services tab on the bottom-left of the IAM App editor.
Click Add Service.
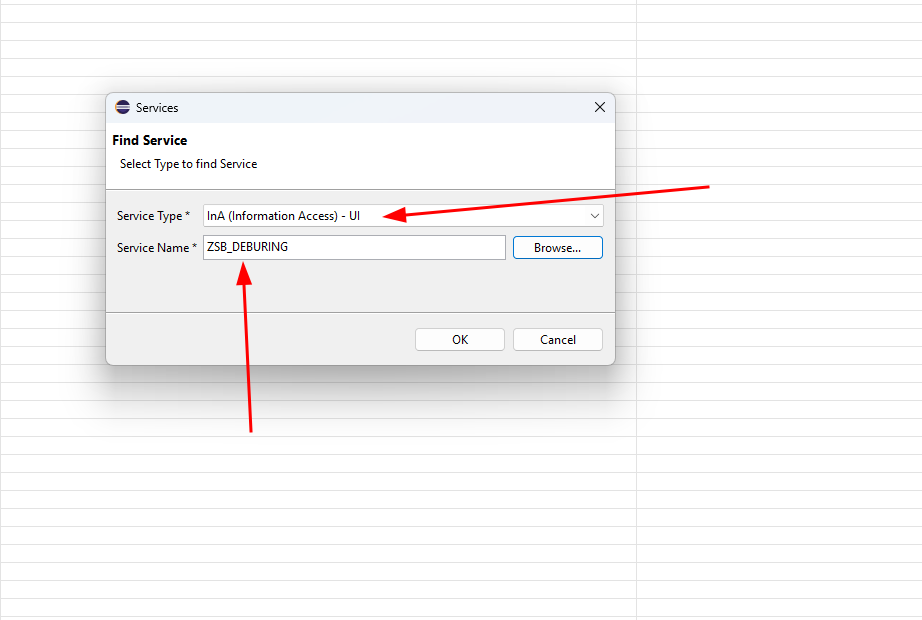
Set the Service Type to (Information Access) - UI and enter the name of the Service Binding created in Step 2. This links the IAM App to the InA service.
Step 4: Create and Assign a Business Catalog
Go back to the Overview tab and click Create a new Business Catalog and assign the App to it.
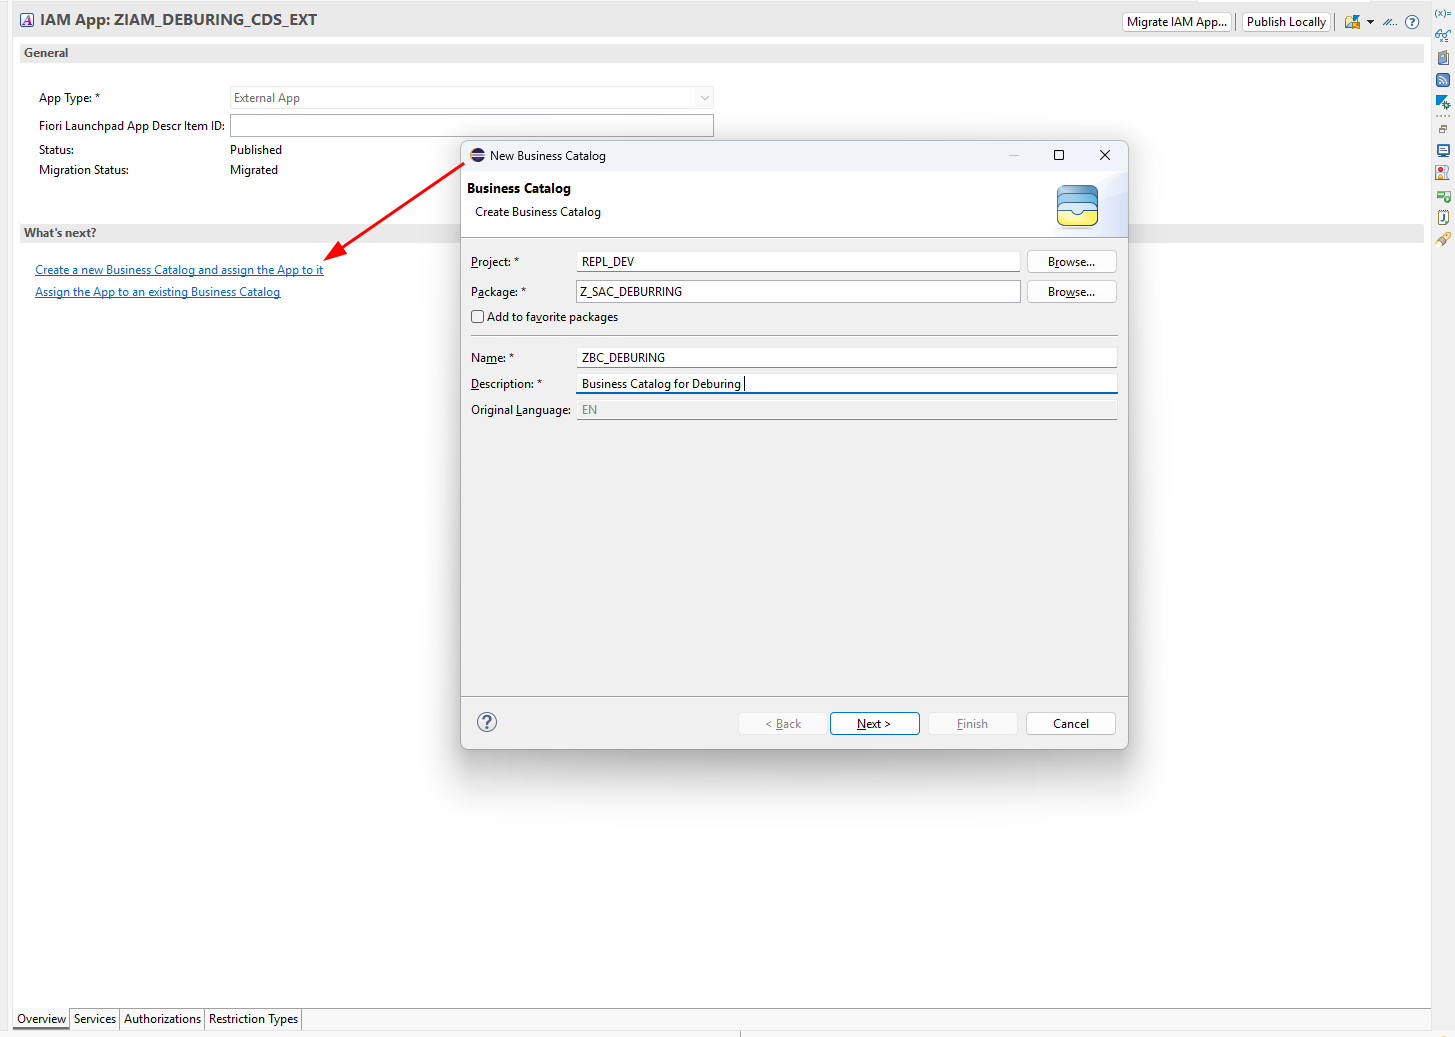
Fill in the required details — ID, Name, and Description.
Once ready, publish the IAM App.
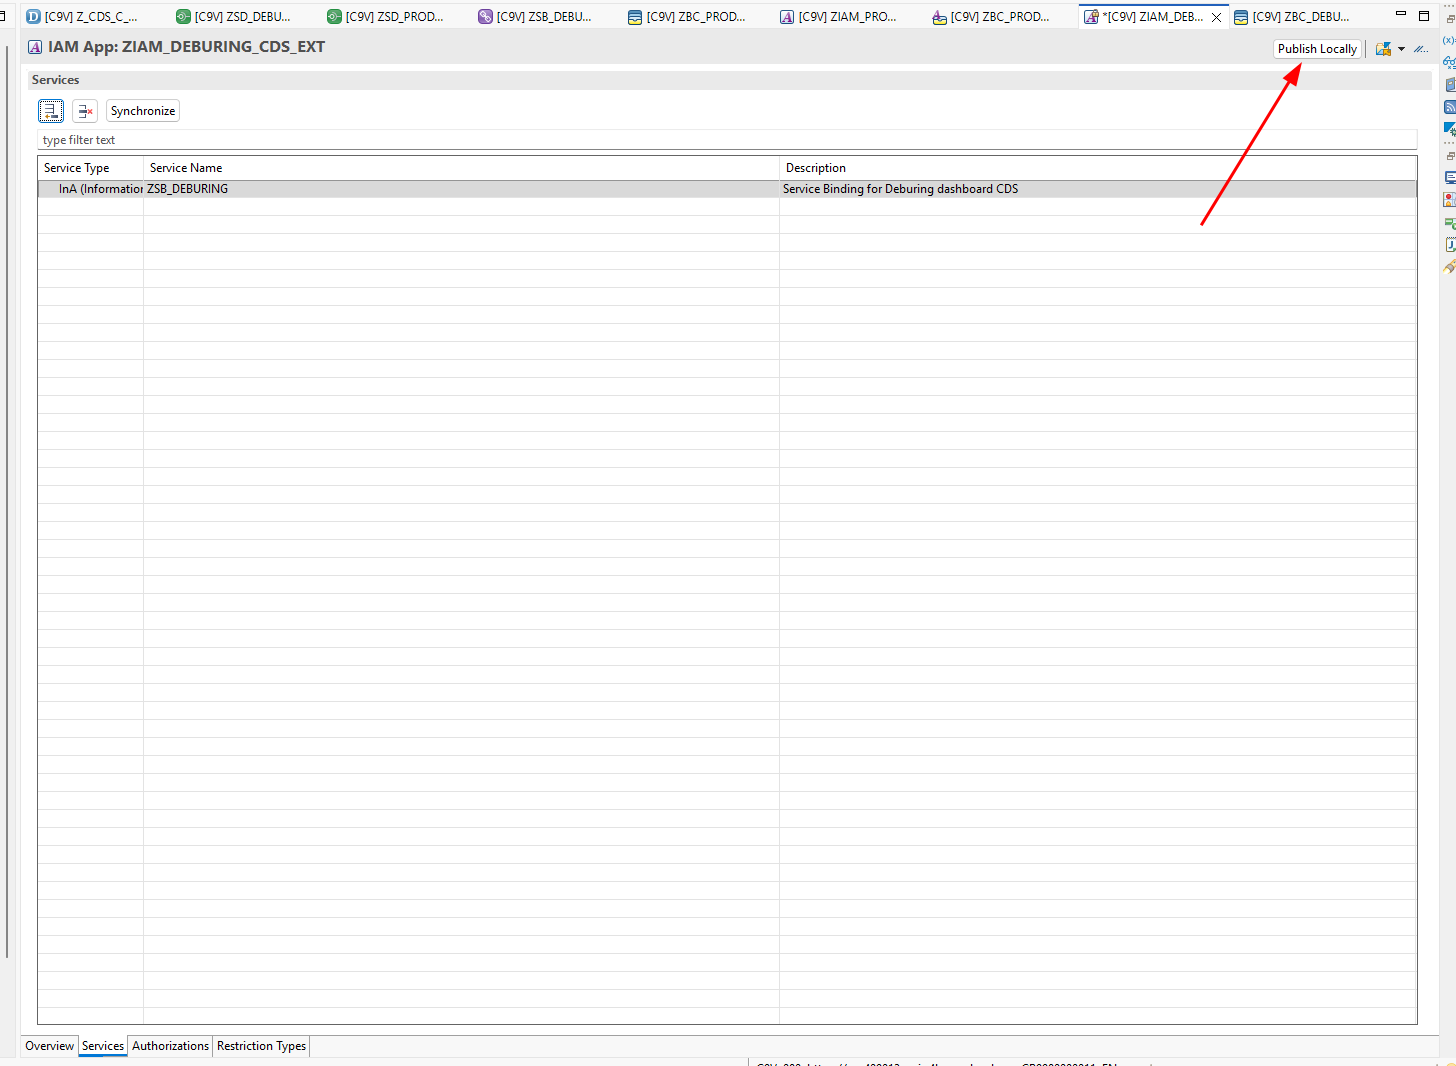
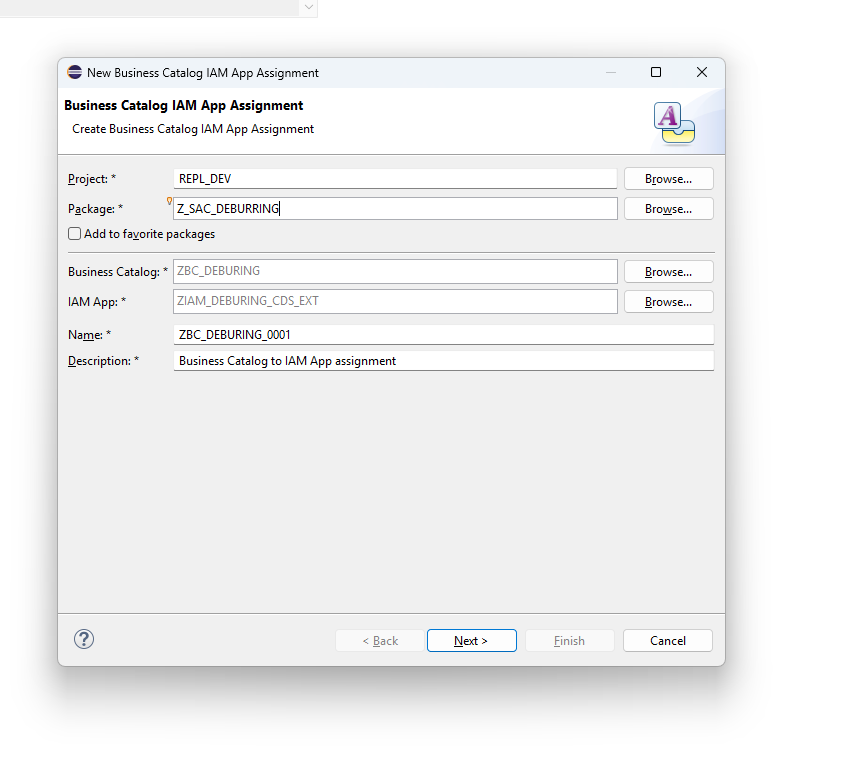
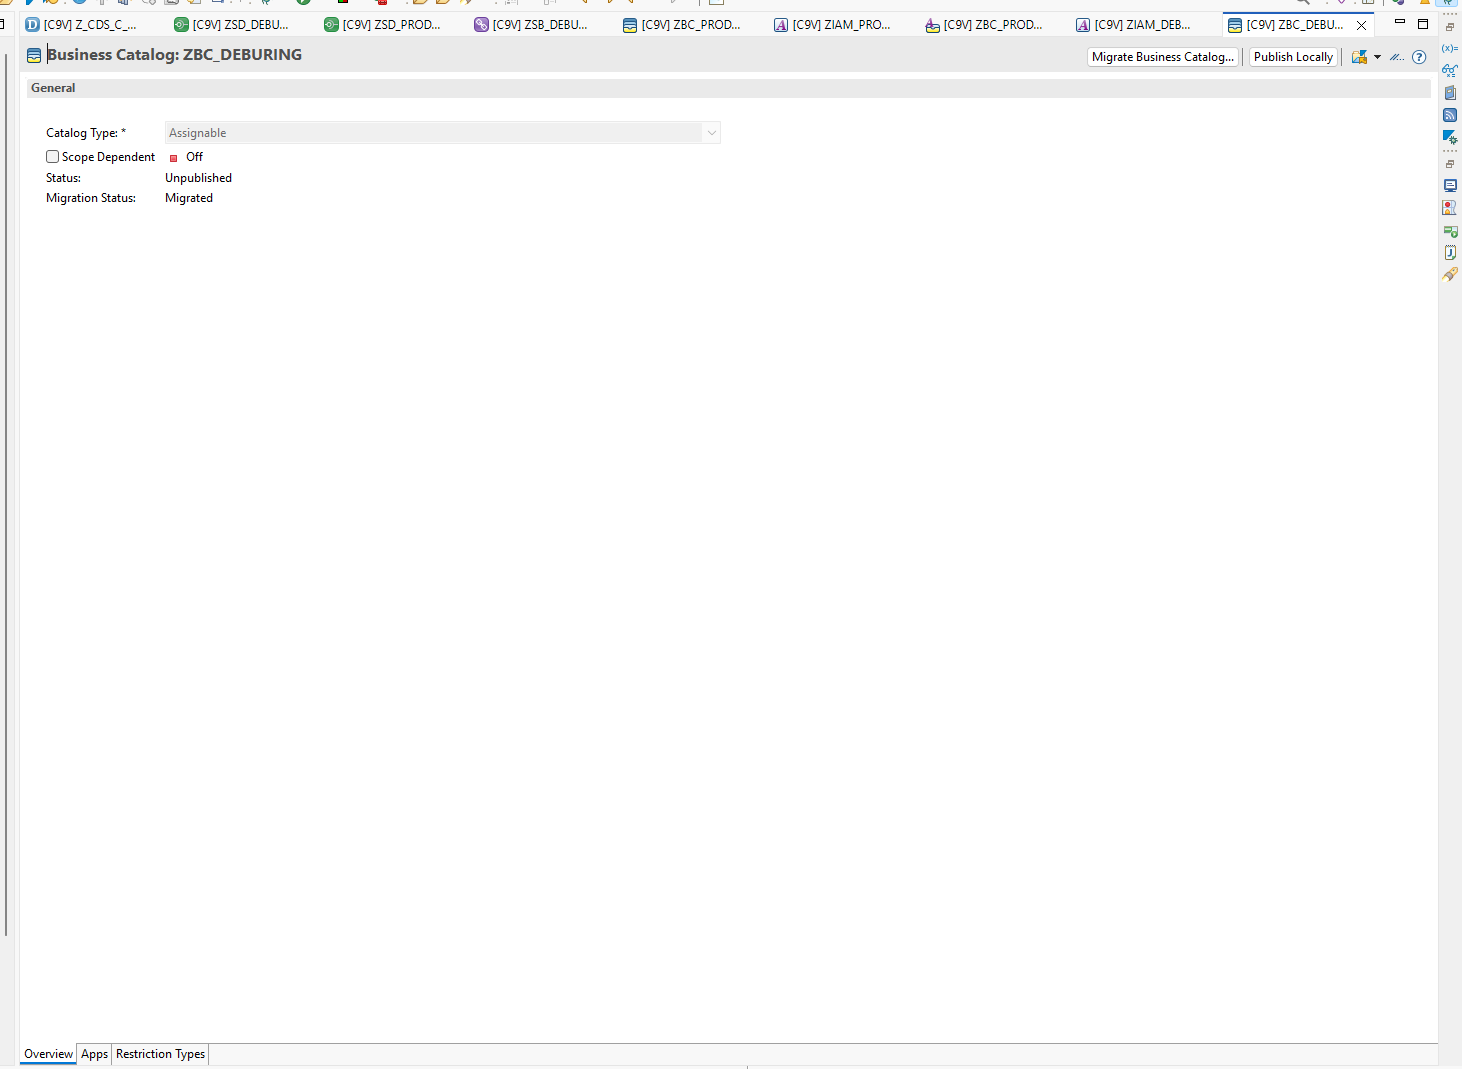
Publishing the IAM App automatically publishes the Business Catalog and generates the Business Catalog IAM App Assignment.
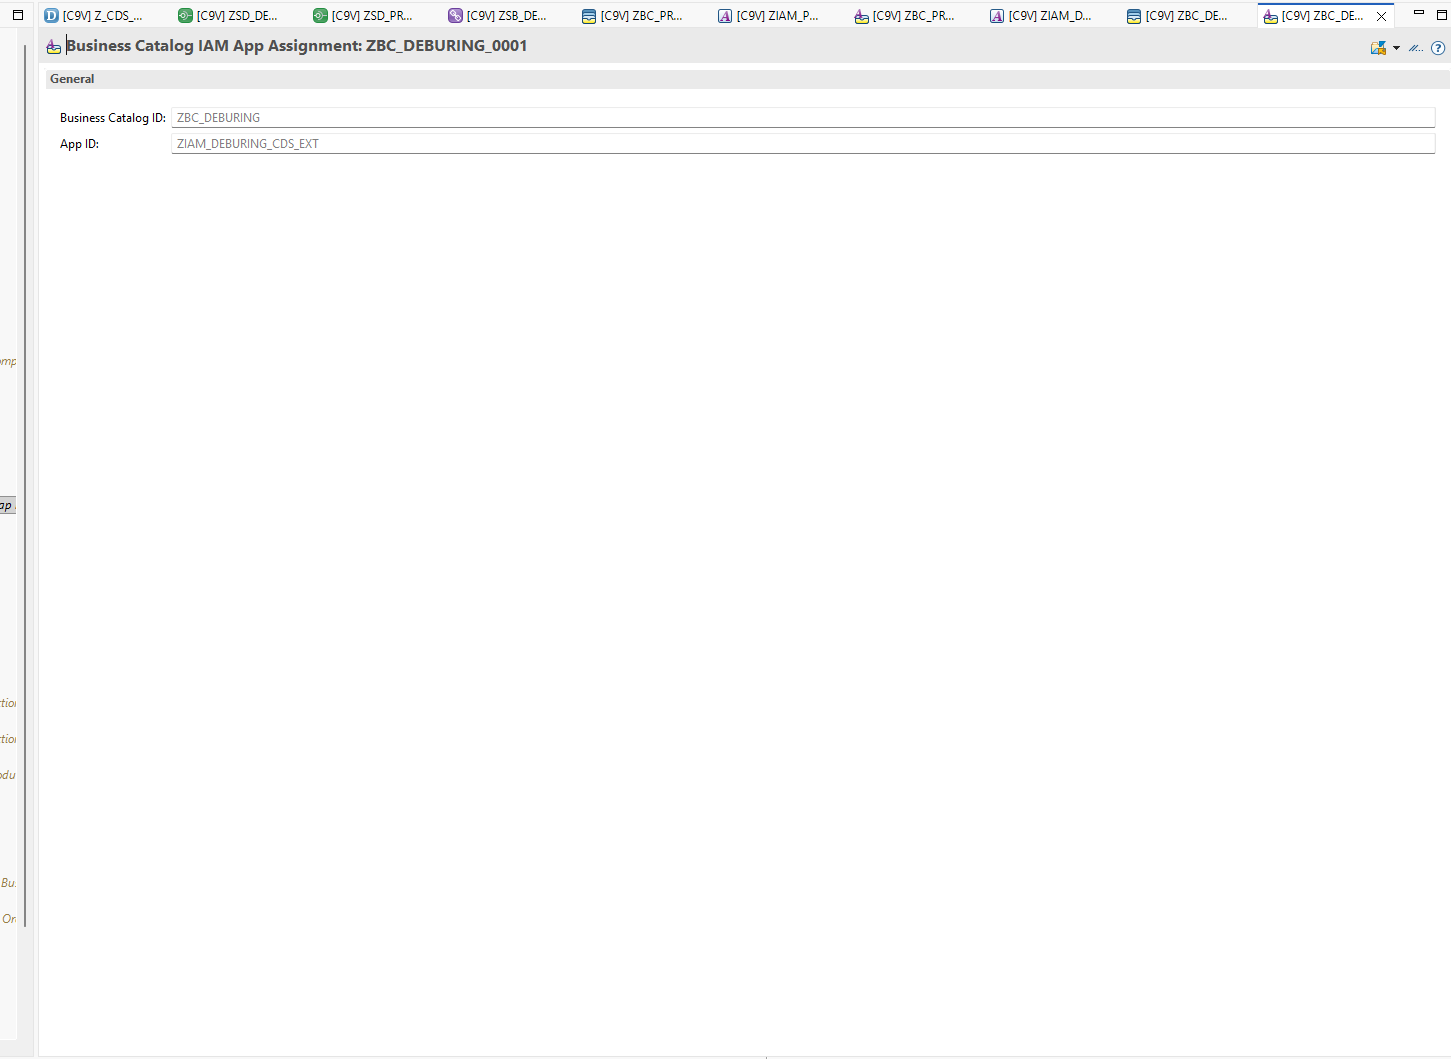
Below is the auto-generated Business Catalog IAM App Assignment object.
This completes all setup in Eclipse. Release the Transport Request and move it to PRD.
Important: Ensure all Developer Extensibility objects are fully released before transporting. The transport must include the CDS view, Service Definition, Service Binding, IAM App, and Business Catalog.
Step 5: Register the Query in the View Browser
The following steps are performed on the Customizing tenant.
Navigate to the View Browser app. Search for your Analytical Query CDS view — it will appear with a Data Category: Query label, confirming it is recognized as an Analytical Query.
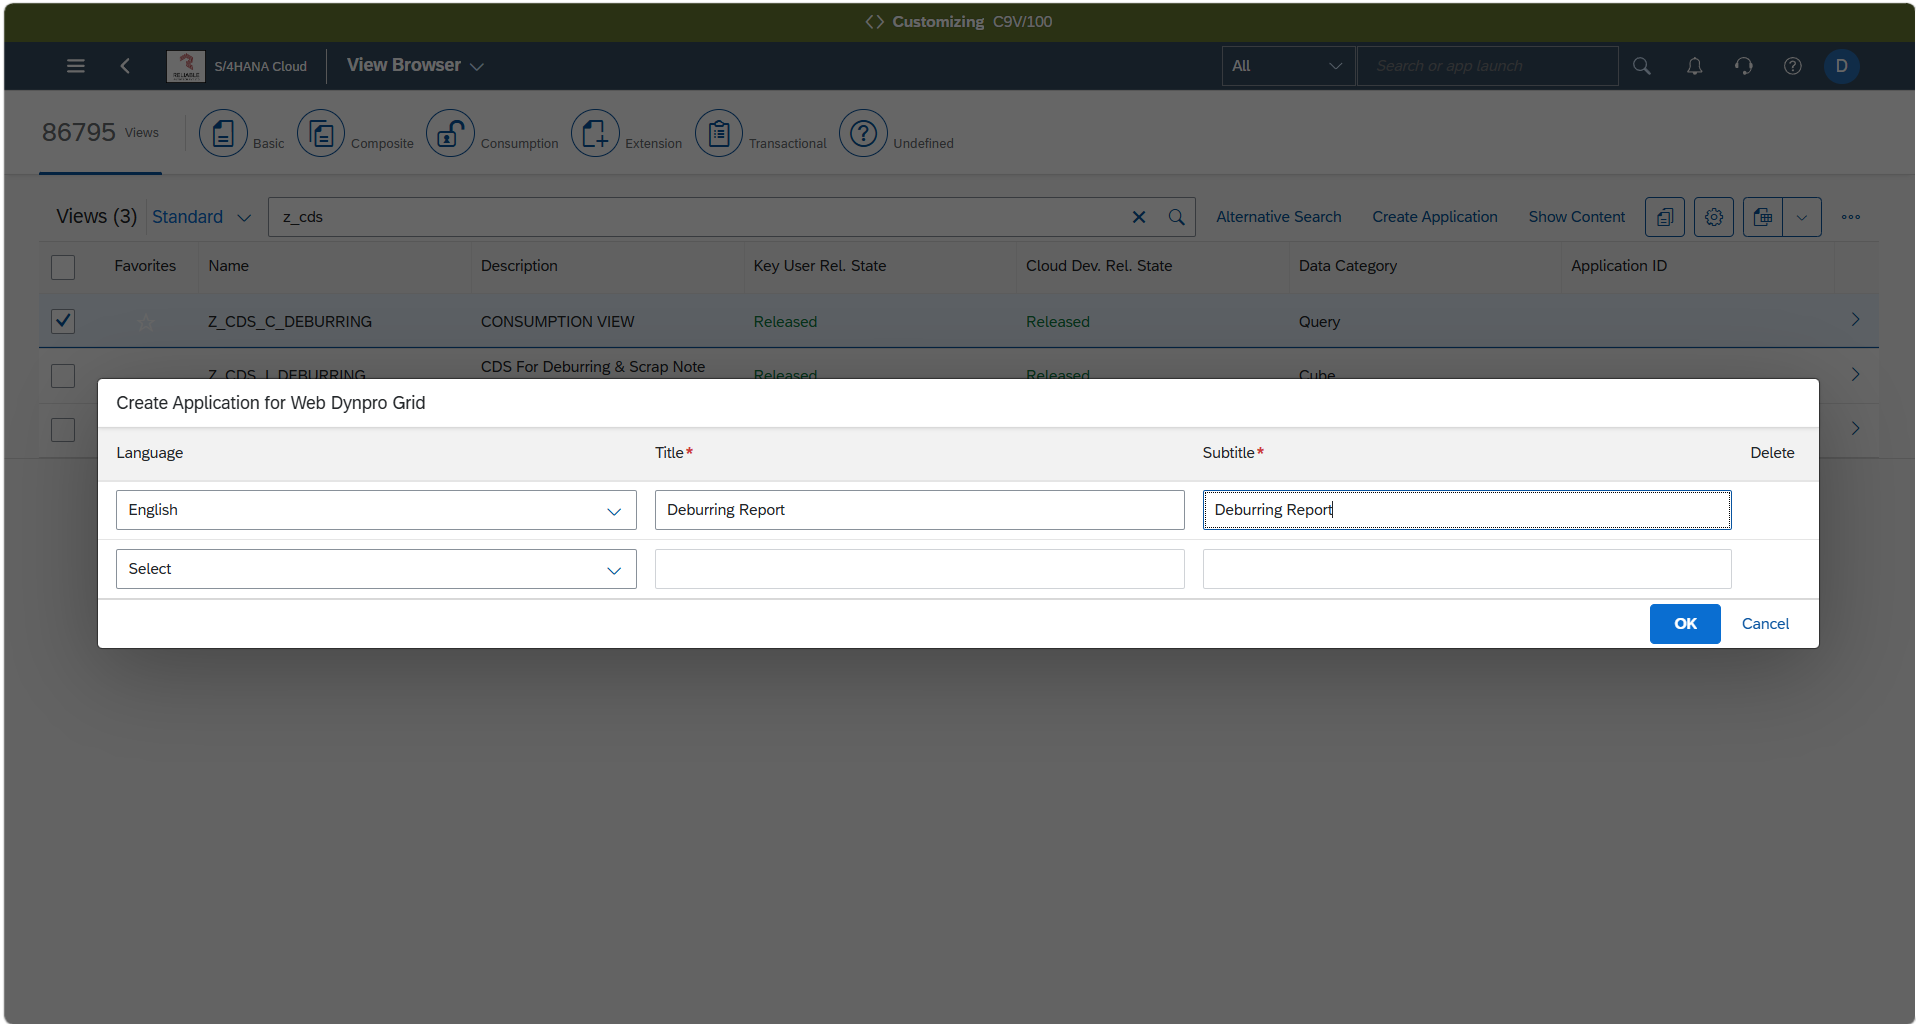
Select the view and click Create Application.
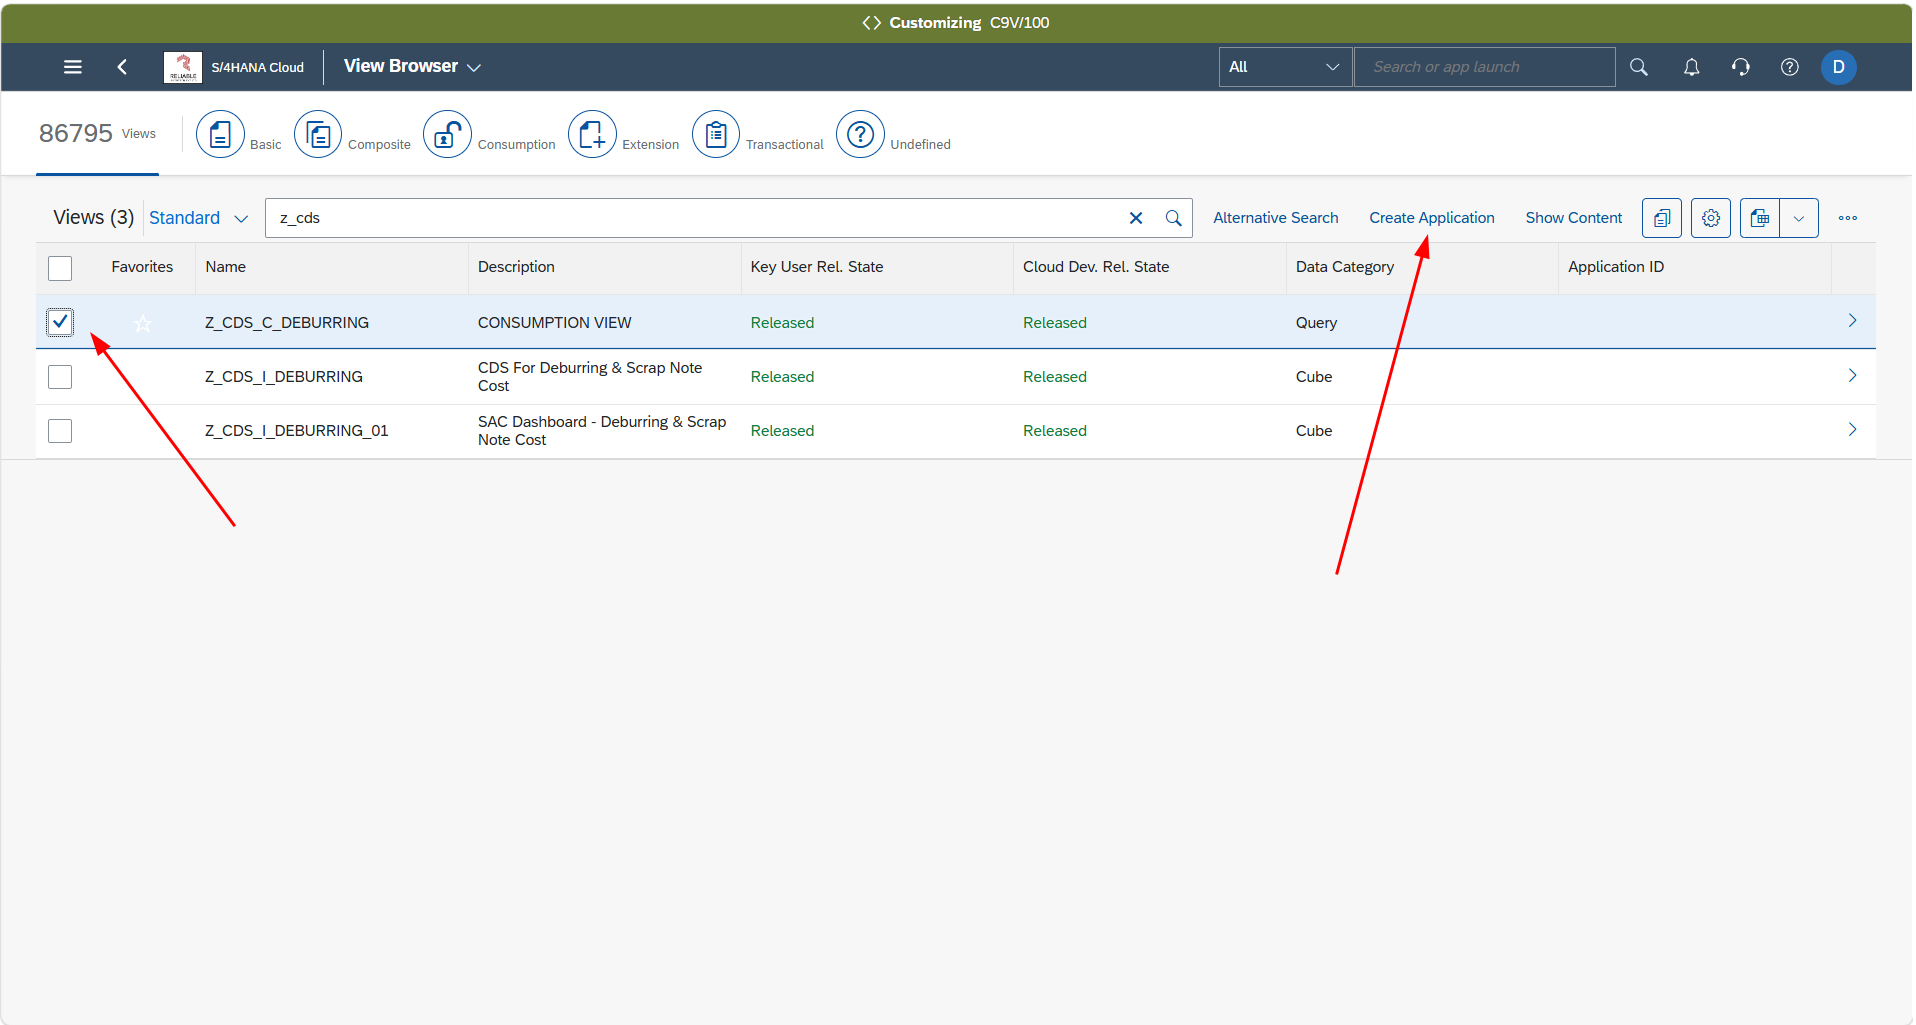
Fill in the Application Name and Subtitle.
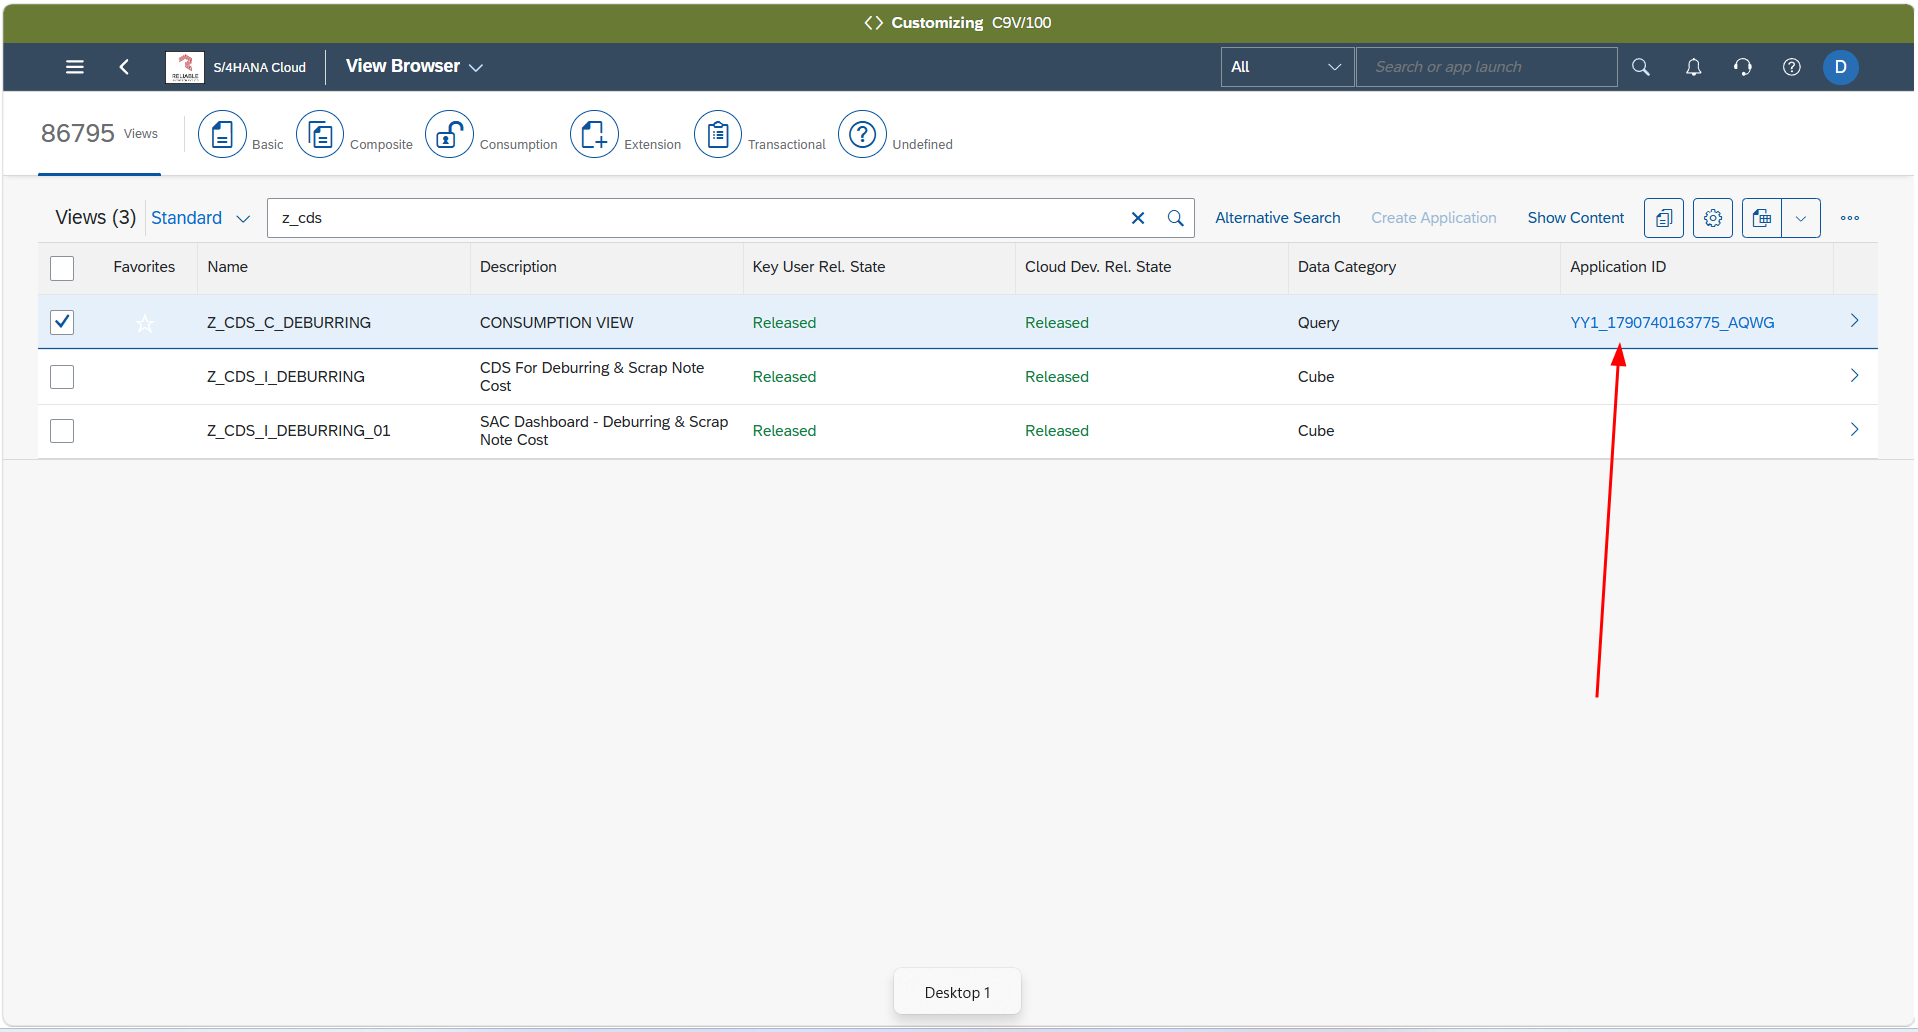
Click on the Application ID that was just generated.
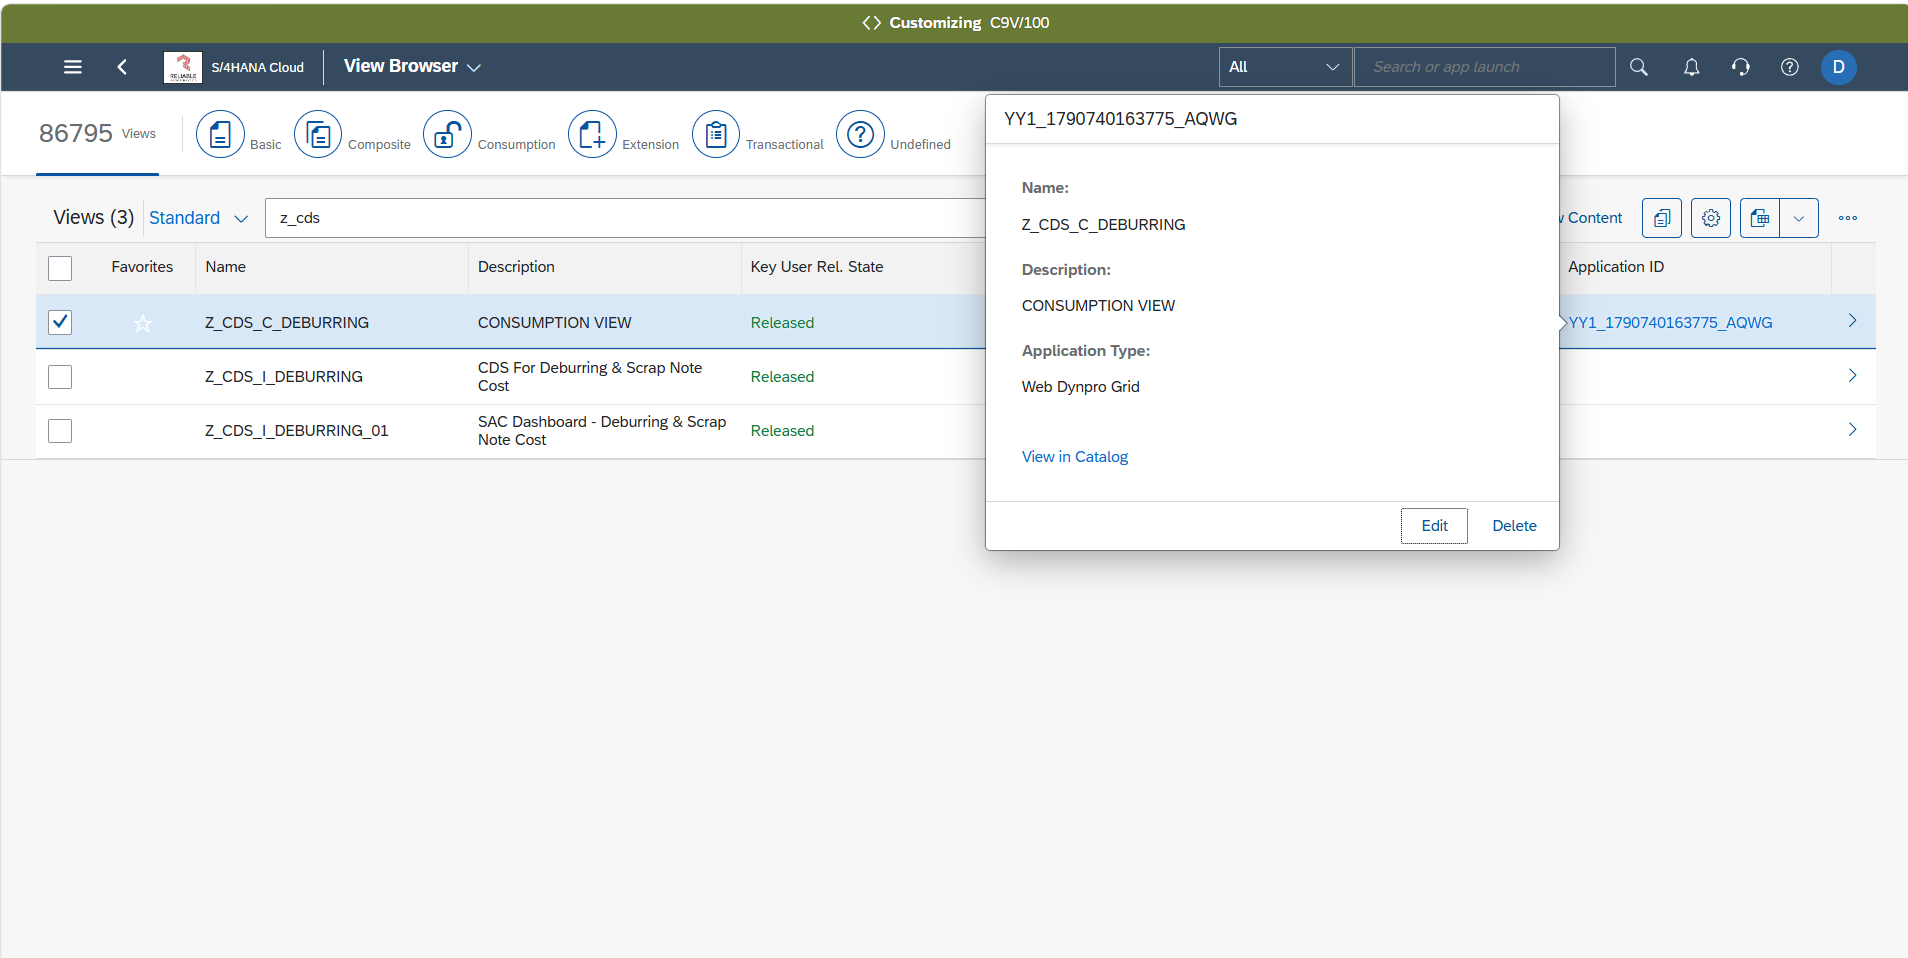
Click View in Catalog.
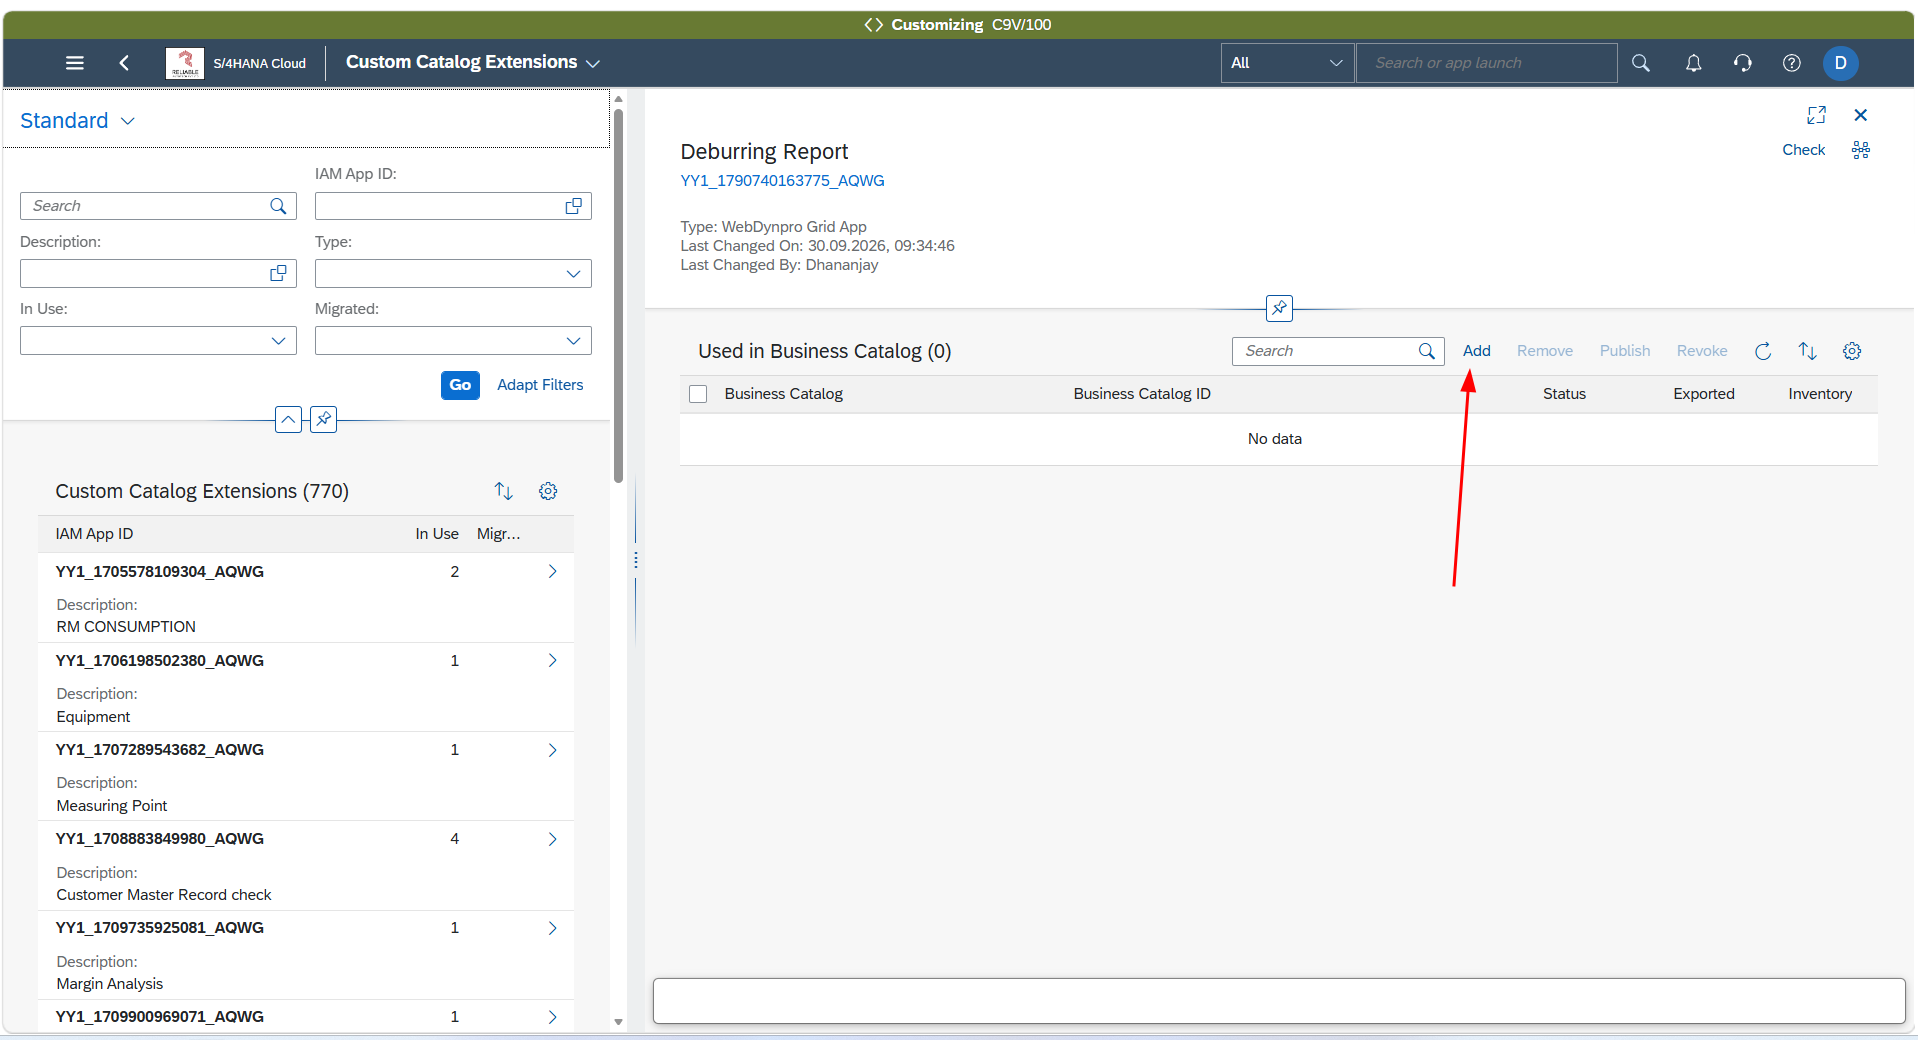
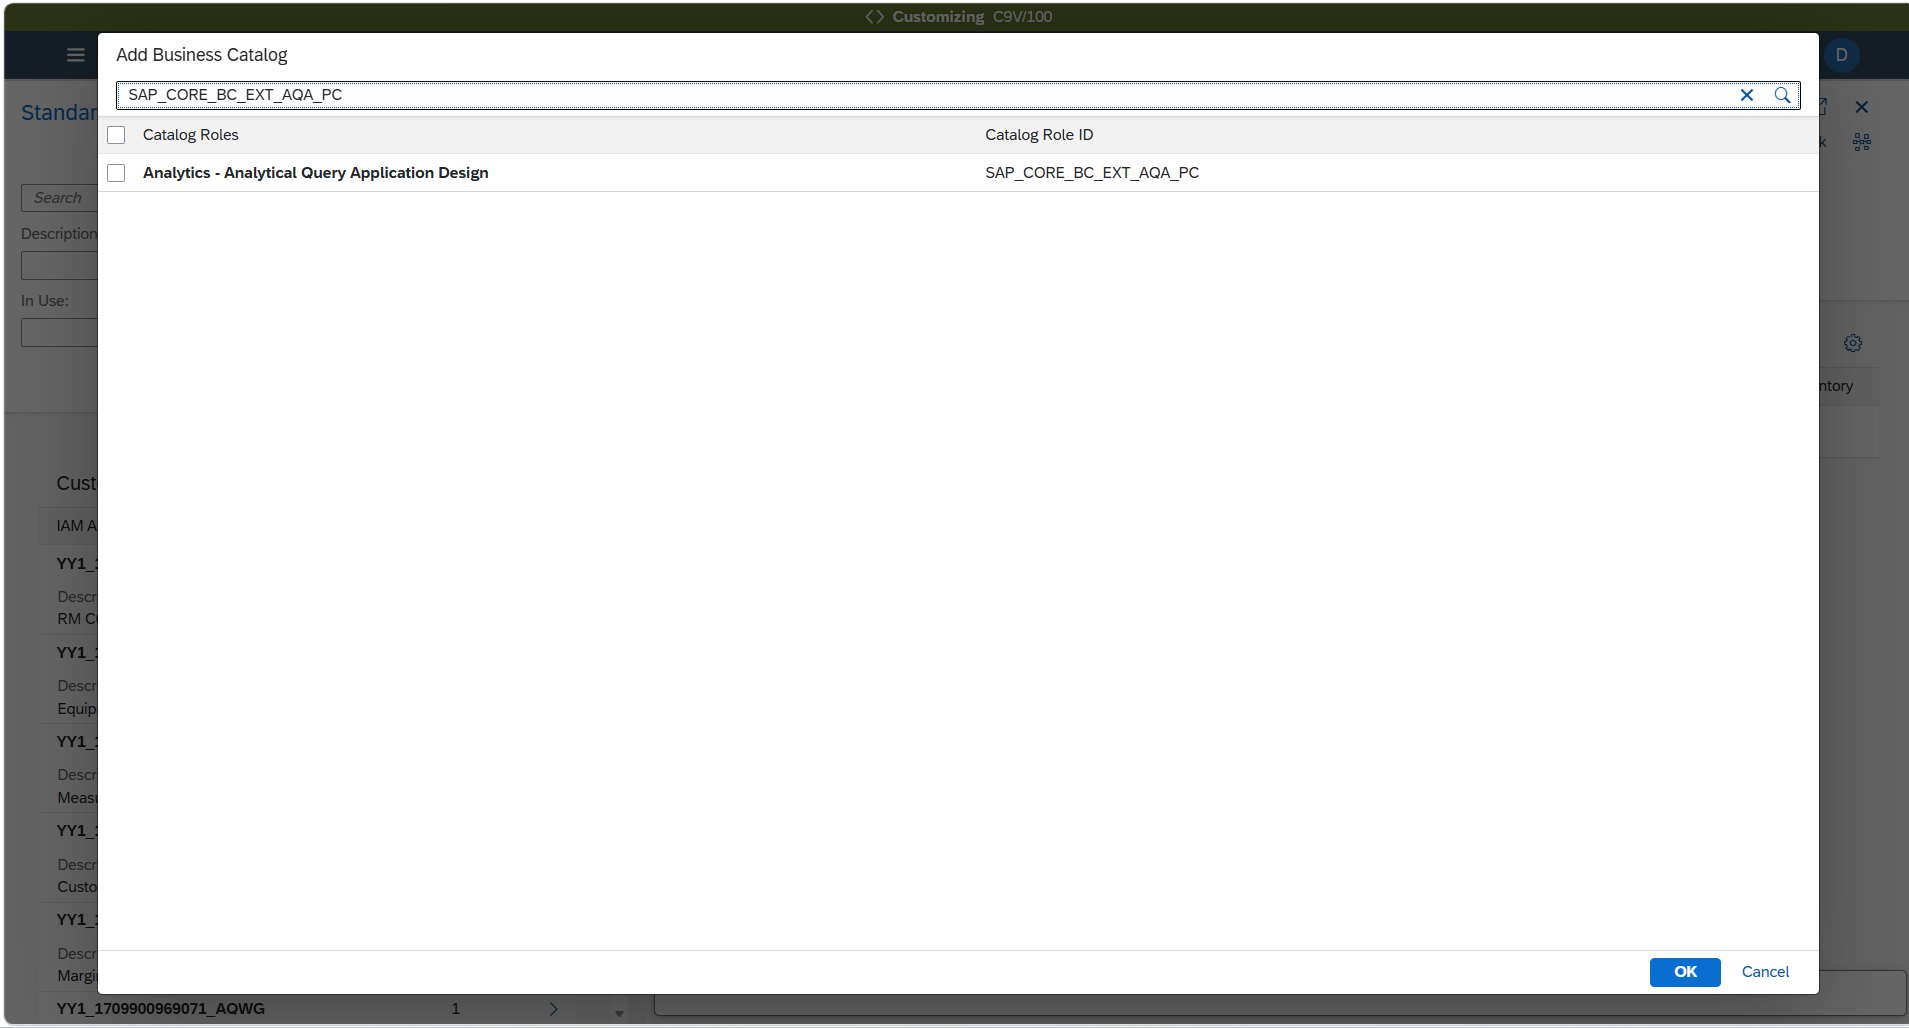
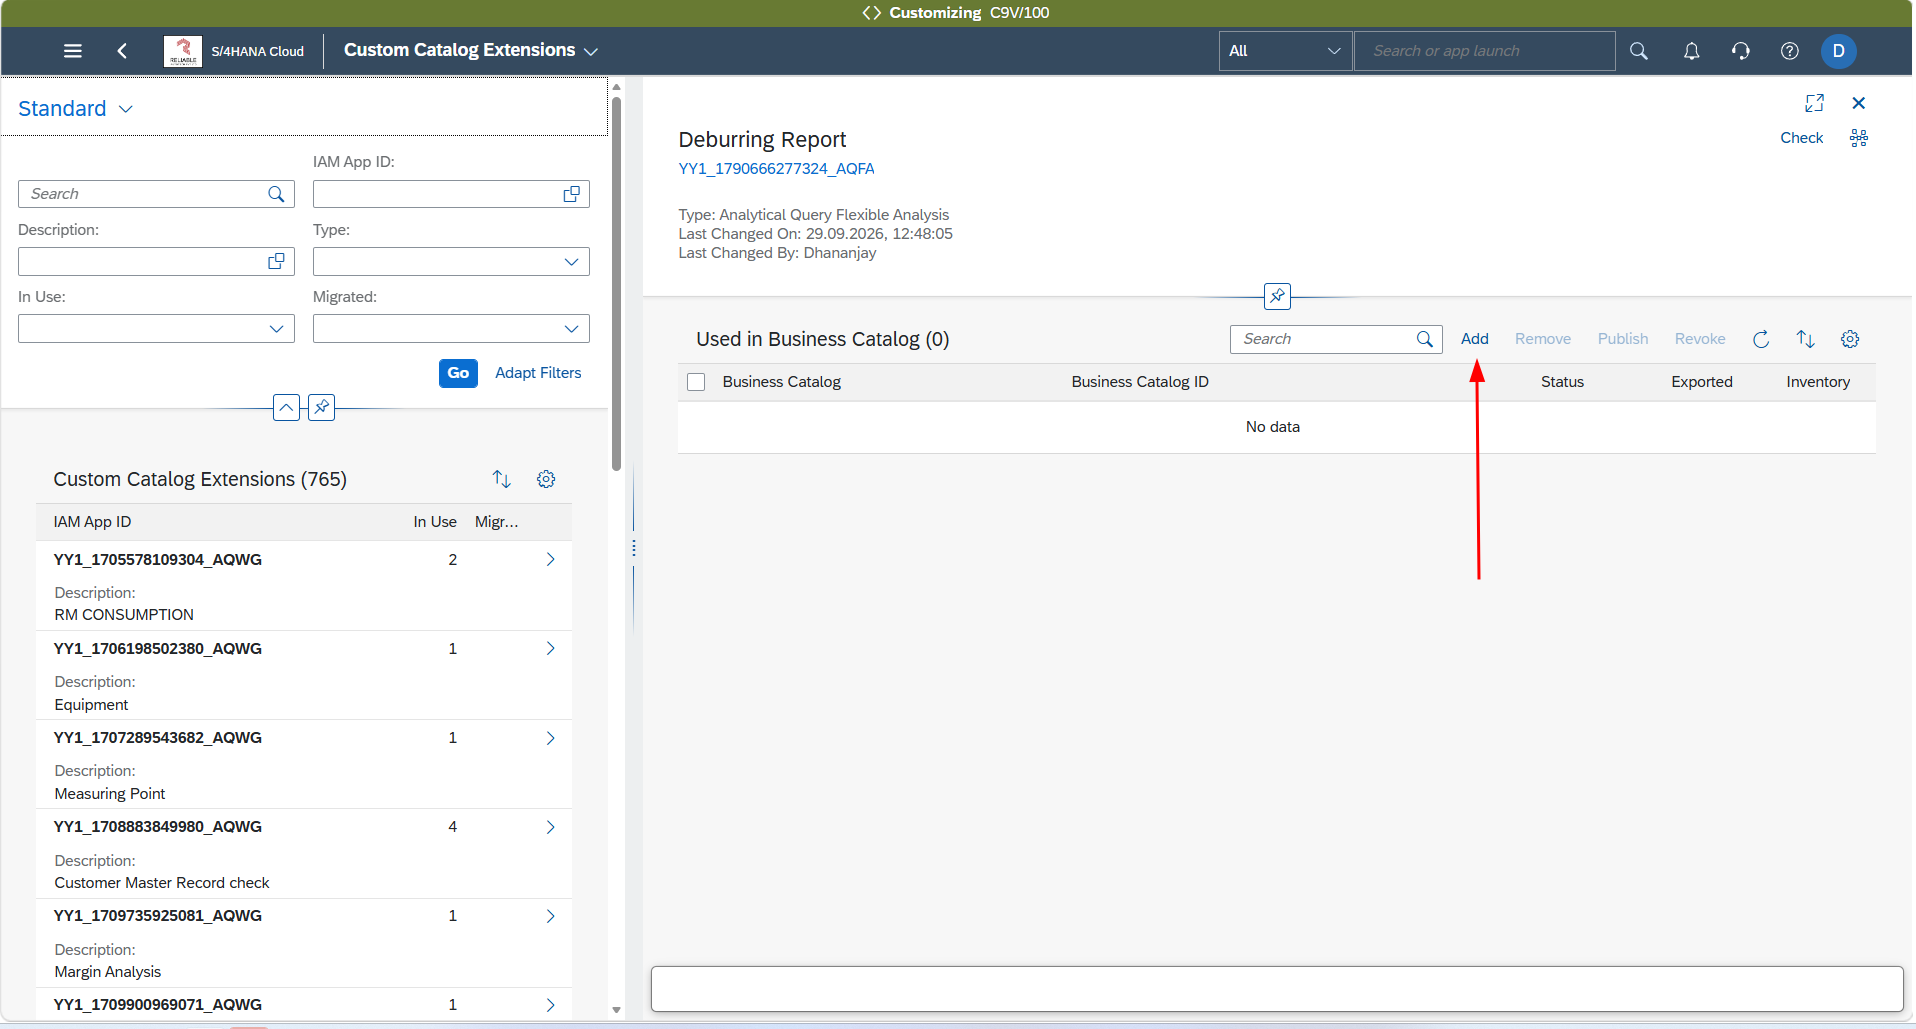
Click Add.
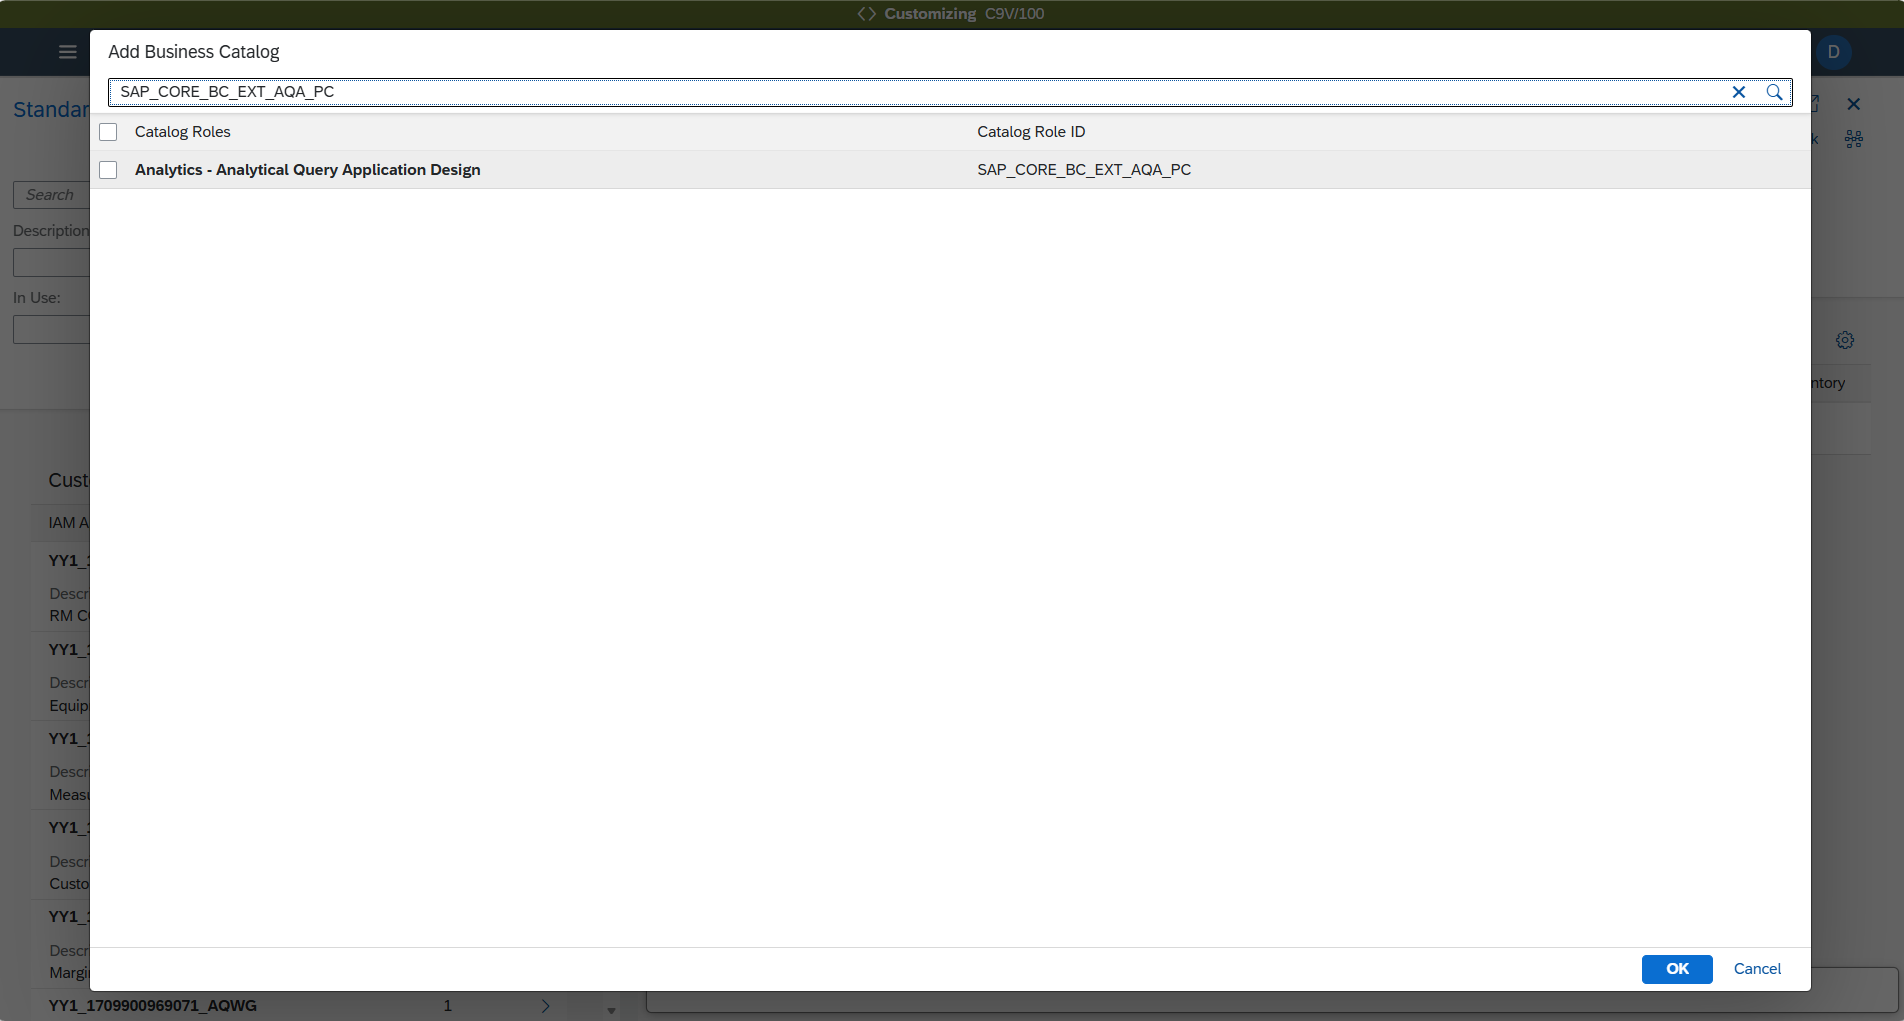
Search for the catalog SAP_CORE_BC_EXT_AQA_PC, select it, and press OK. This is the standard SAP-delivered catalog for Analytical Query apps created via extensibility.
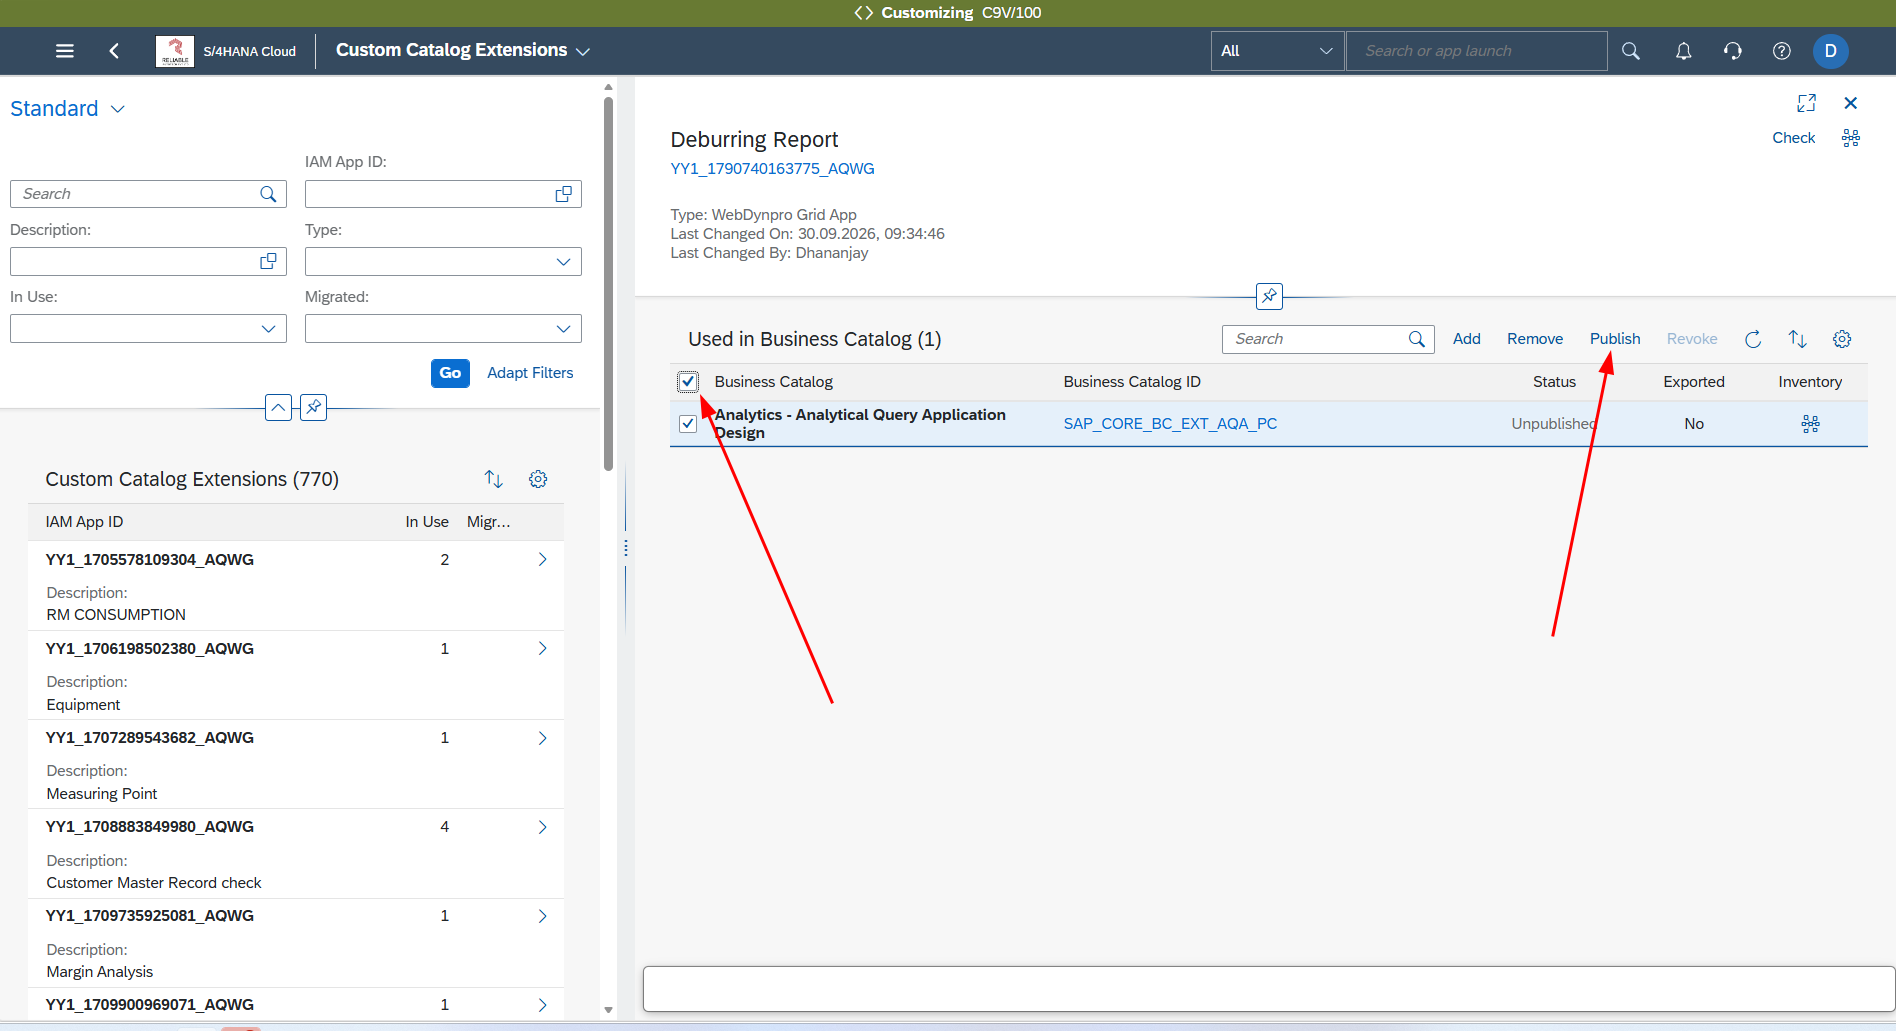
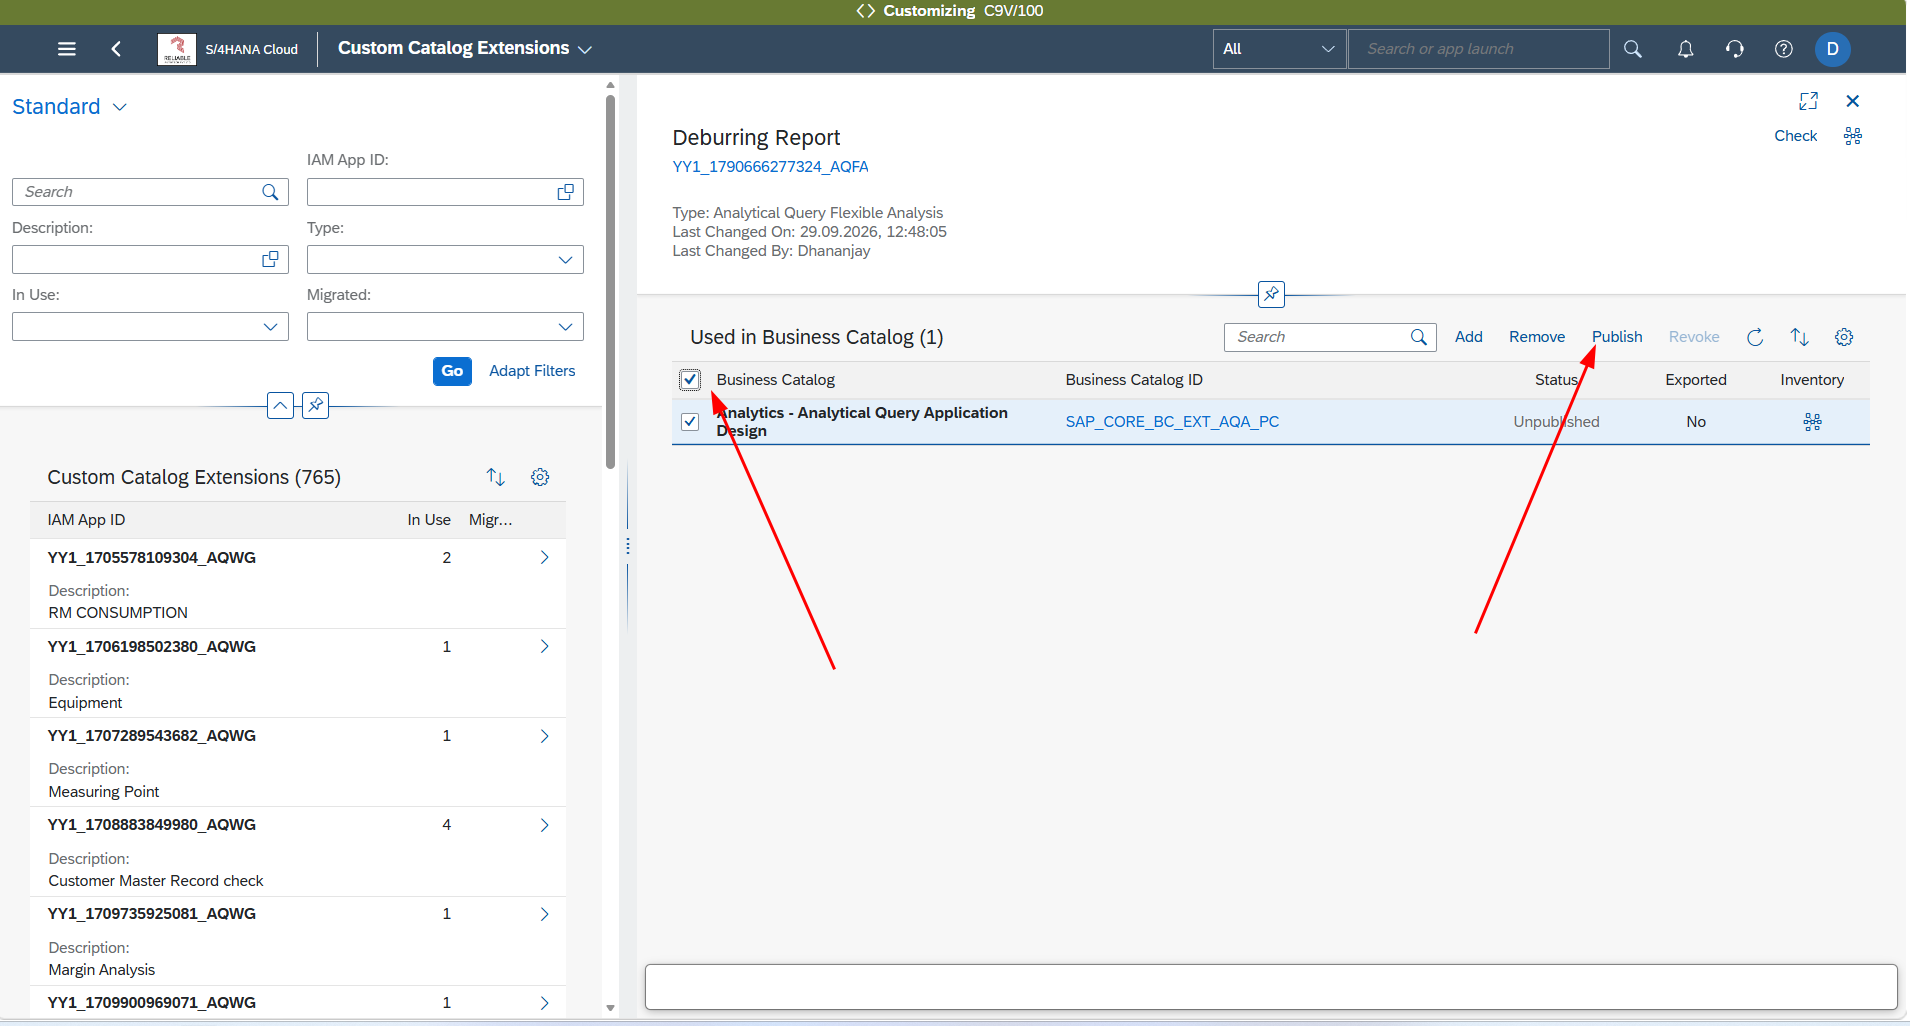
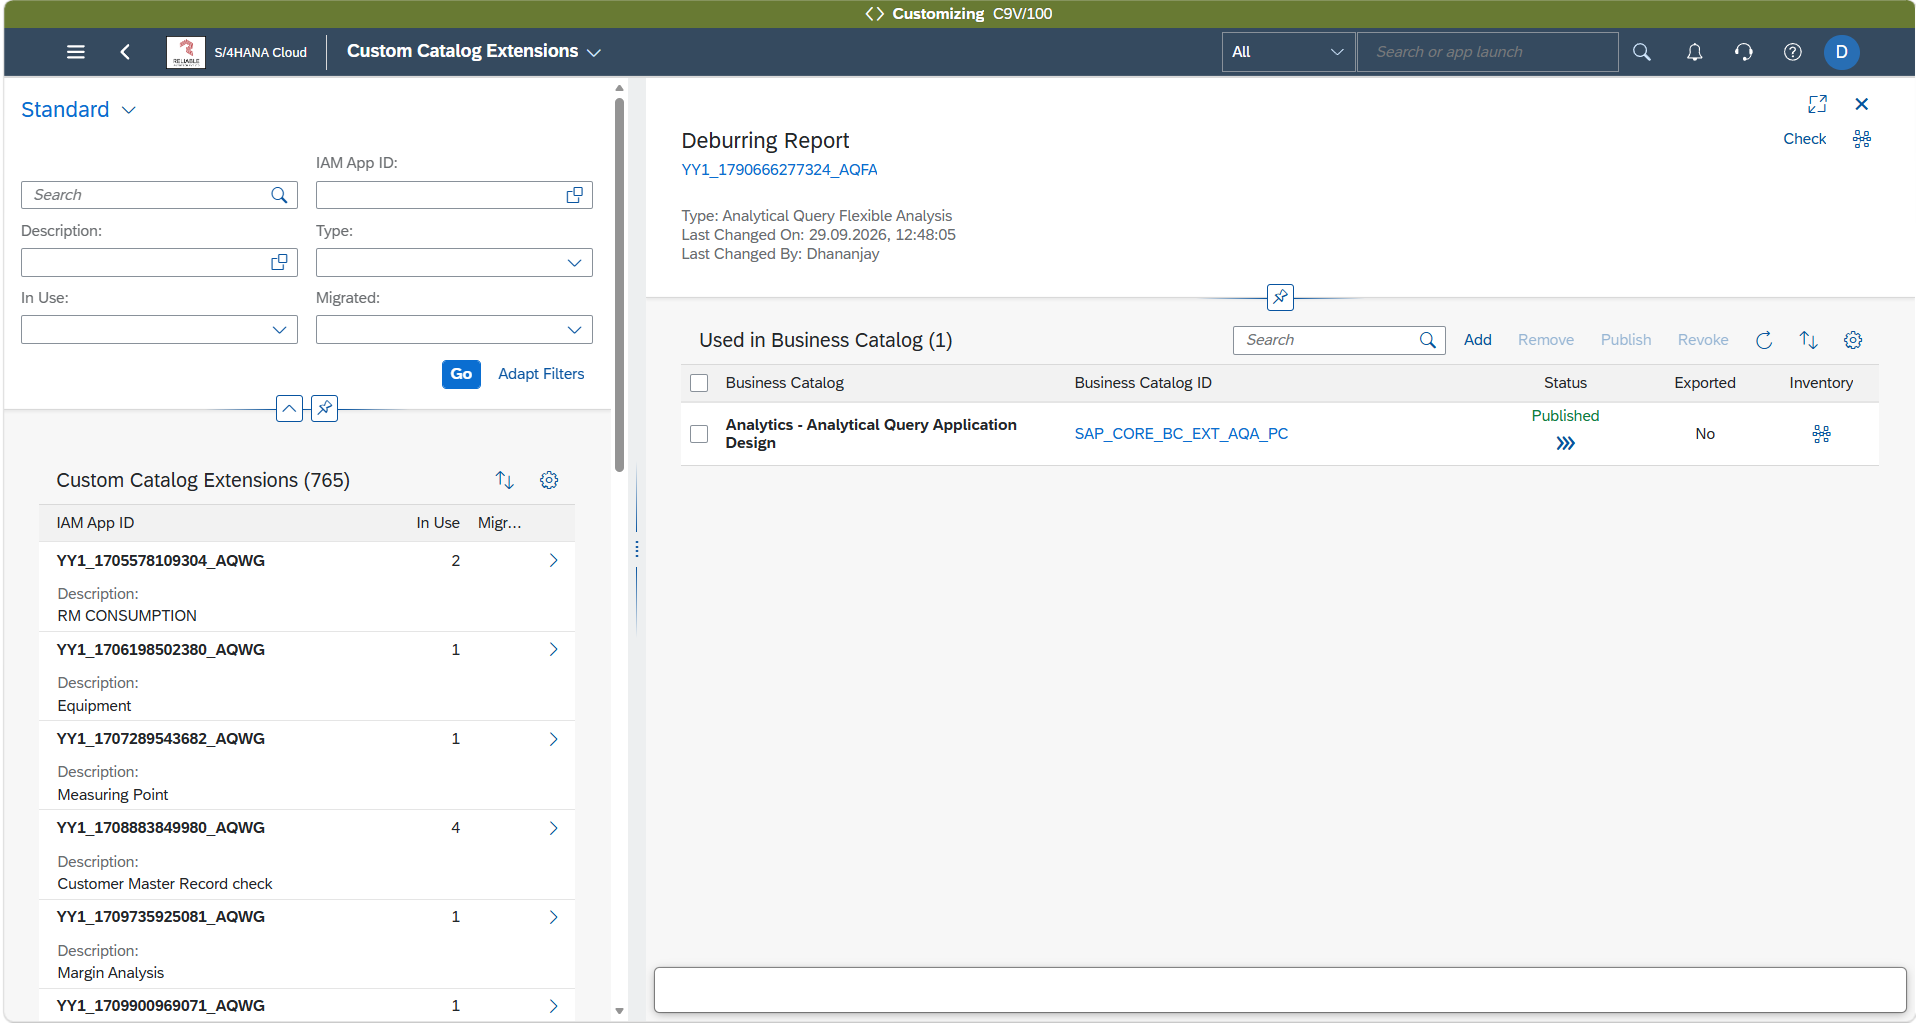
Click Select All and press Publish.
Step 6: Create a KPI / Report
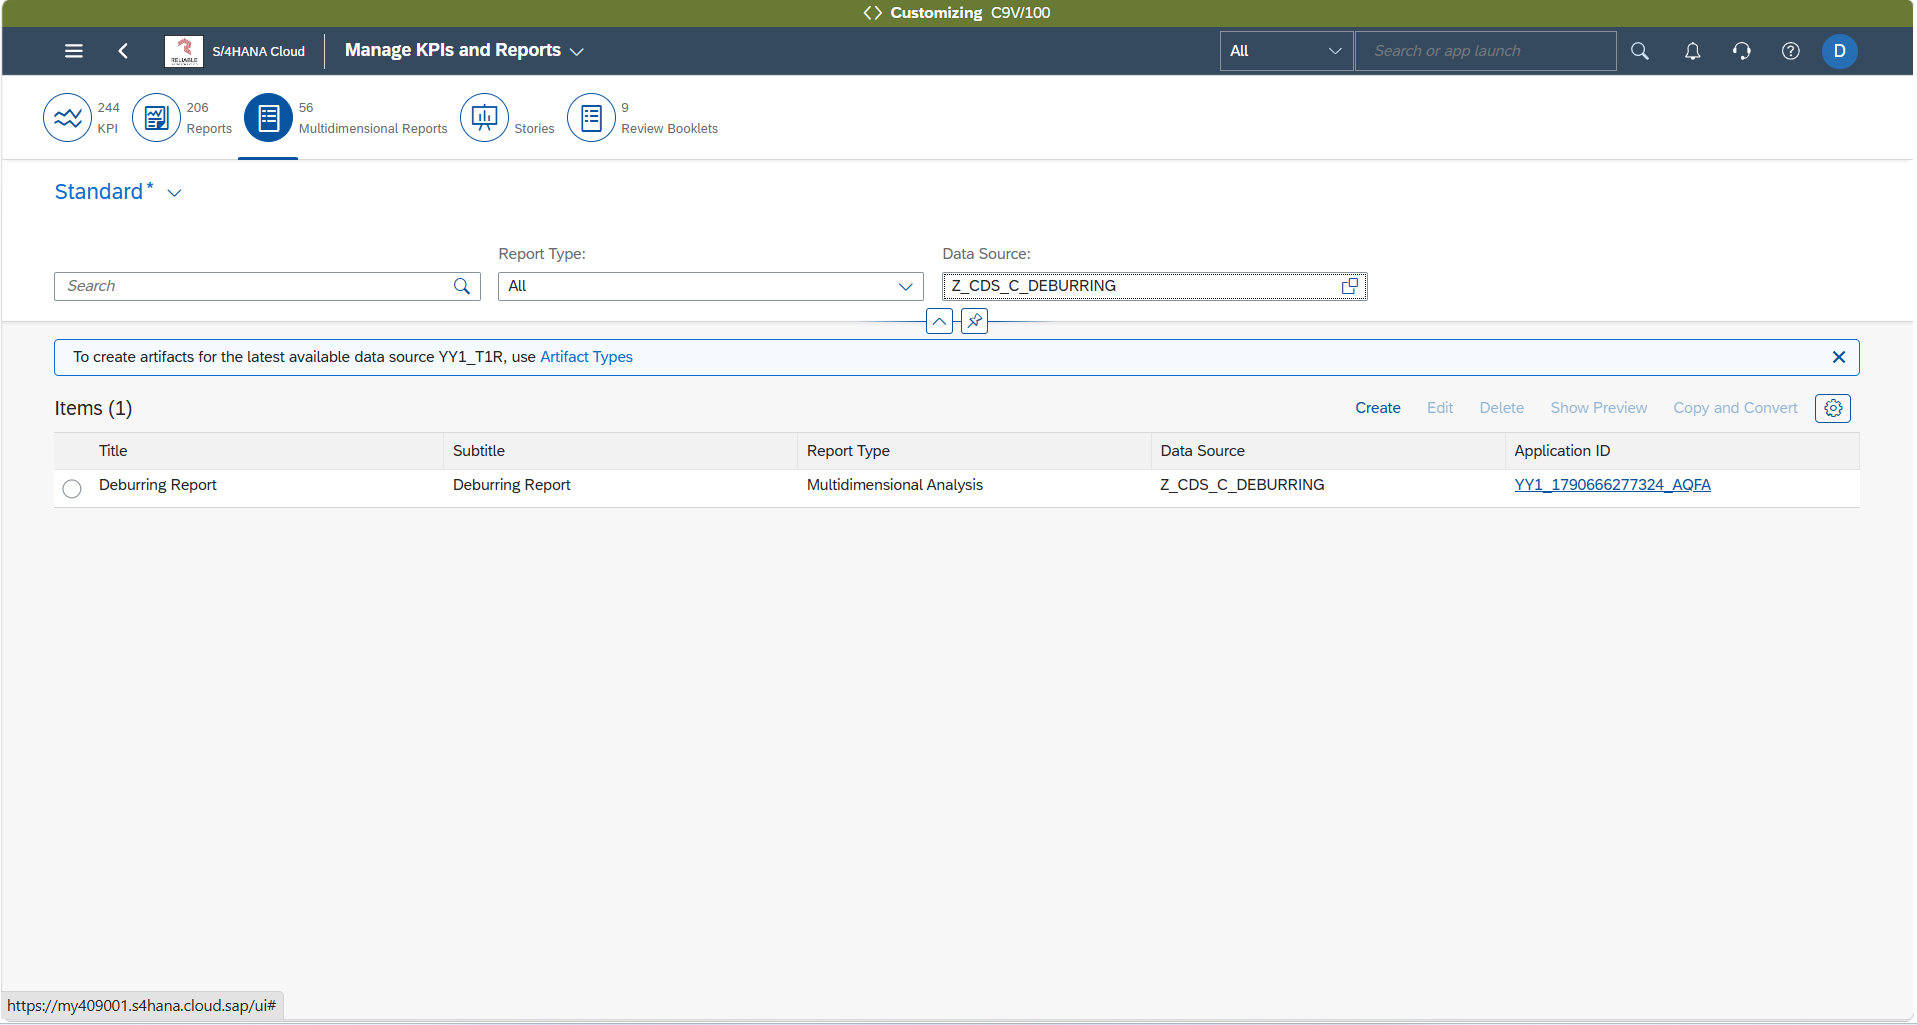
Navigate to the Manage KPIs and Reports app.
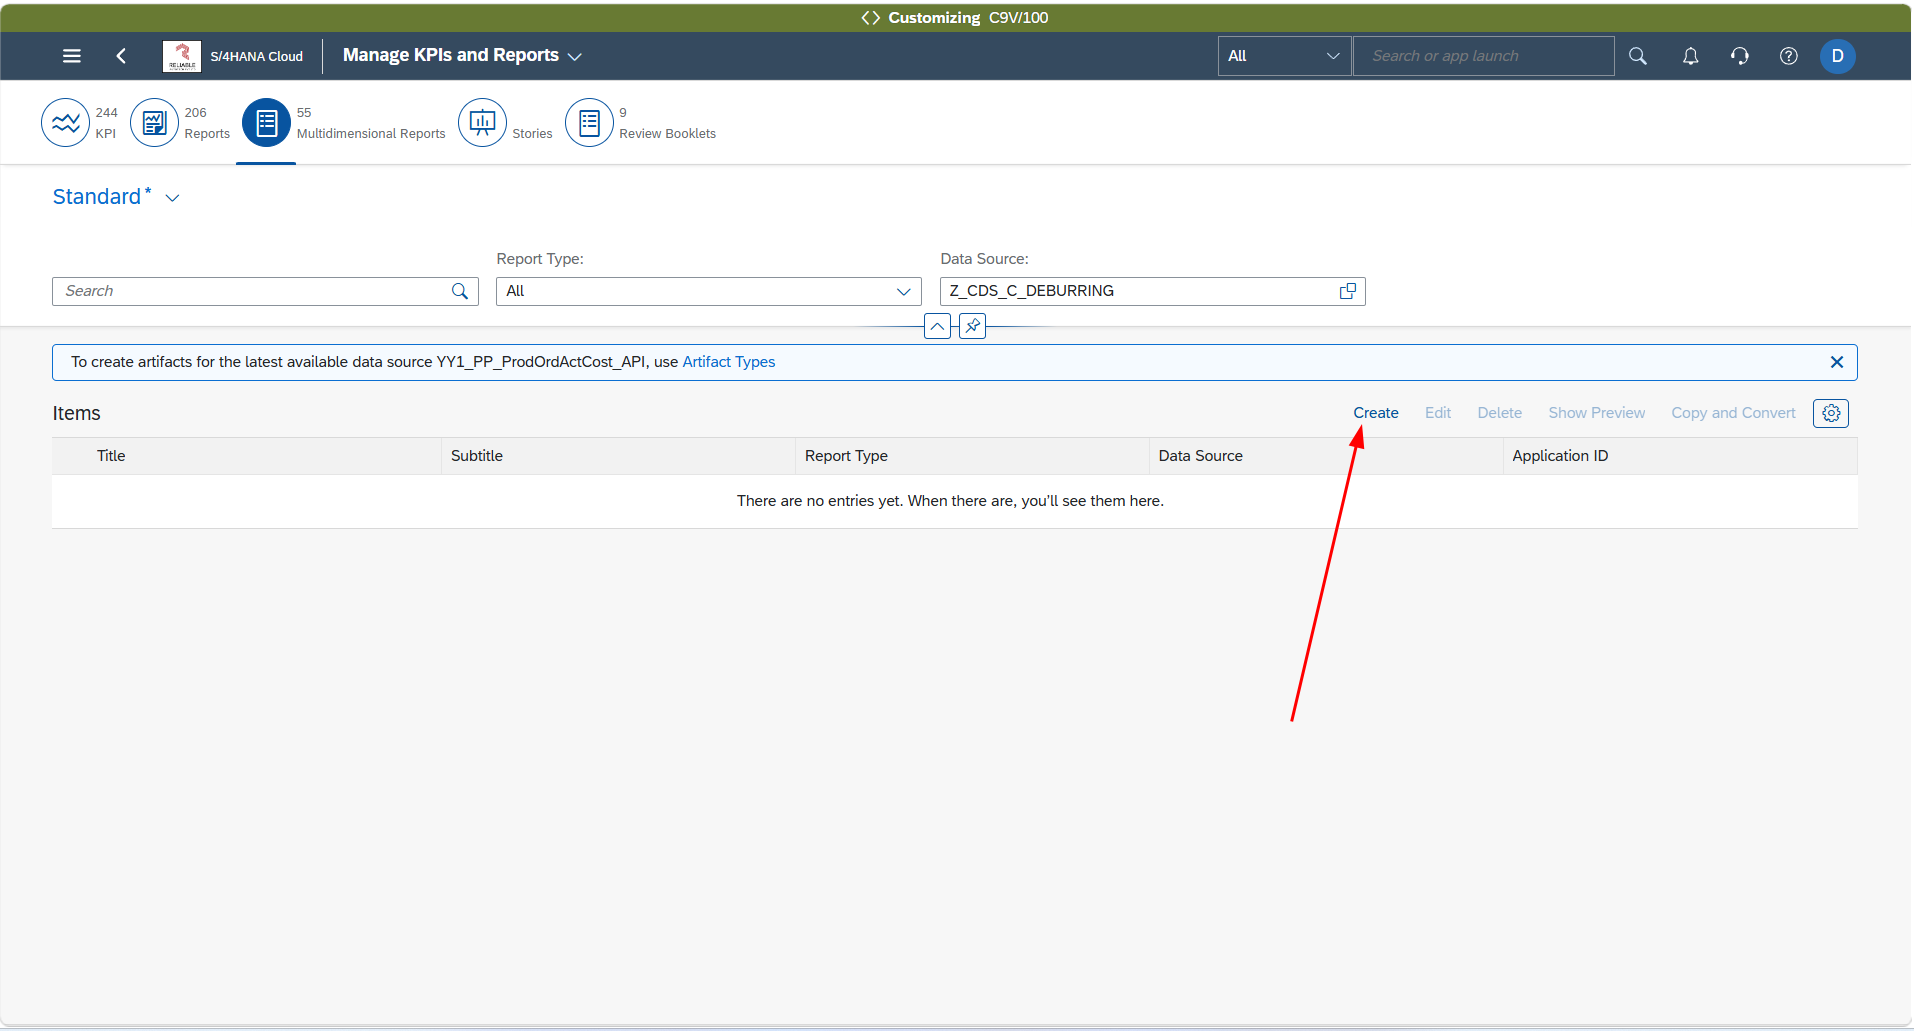
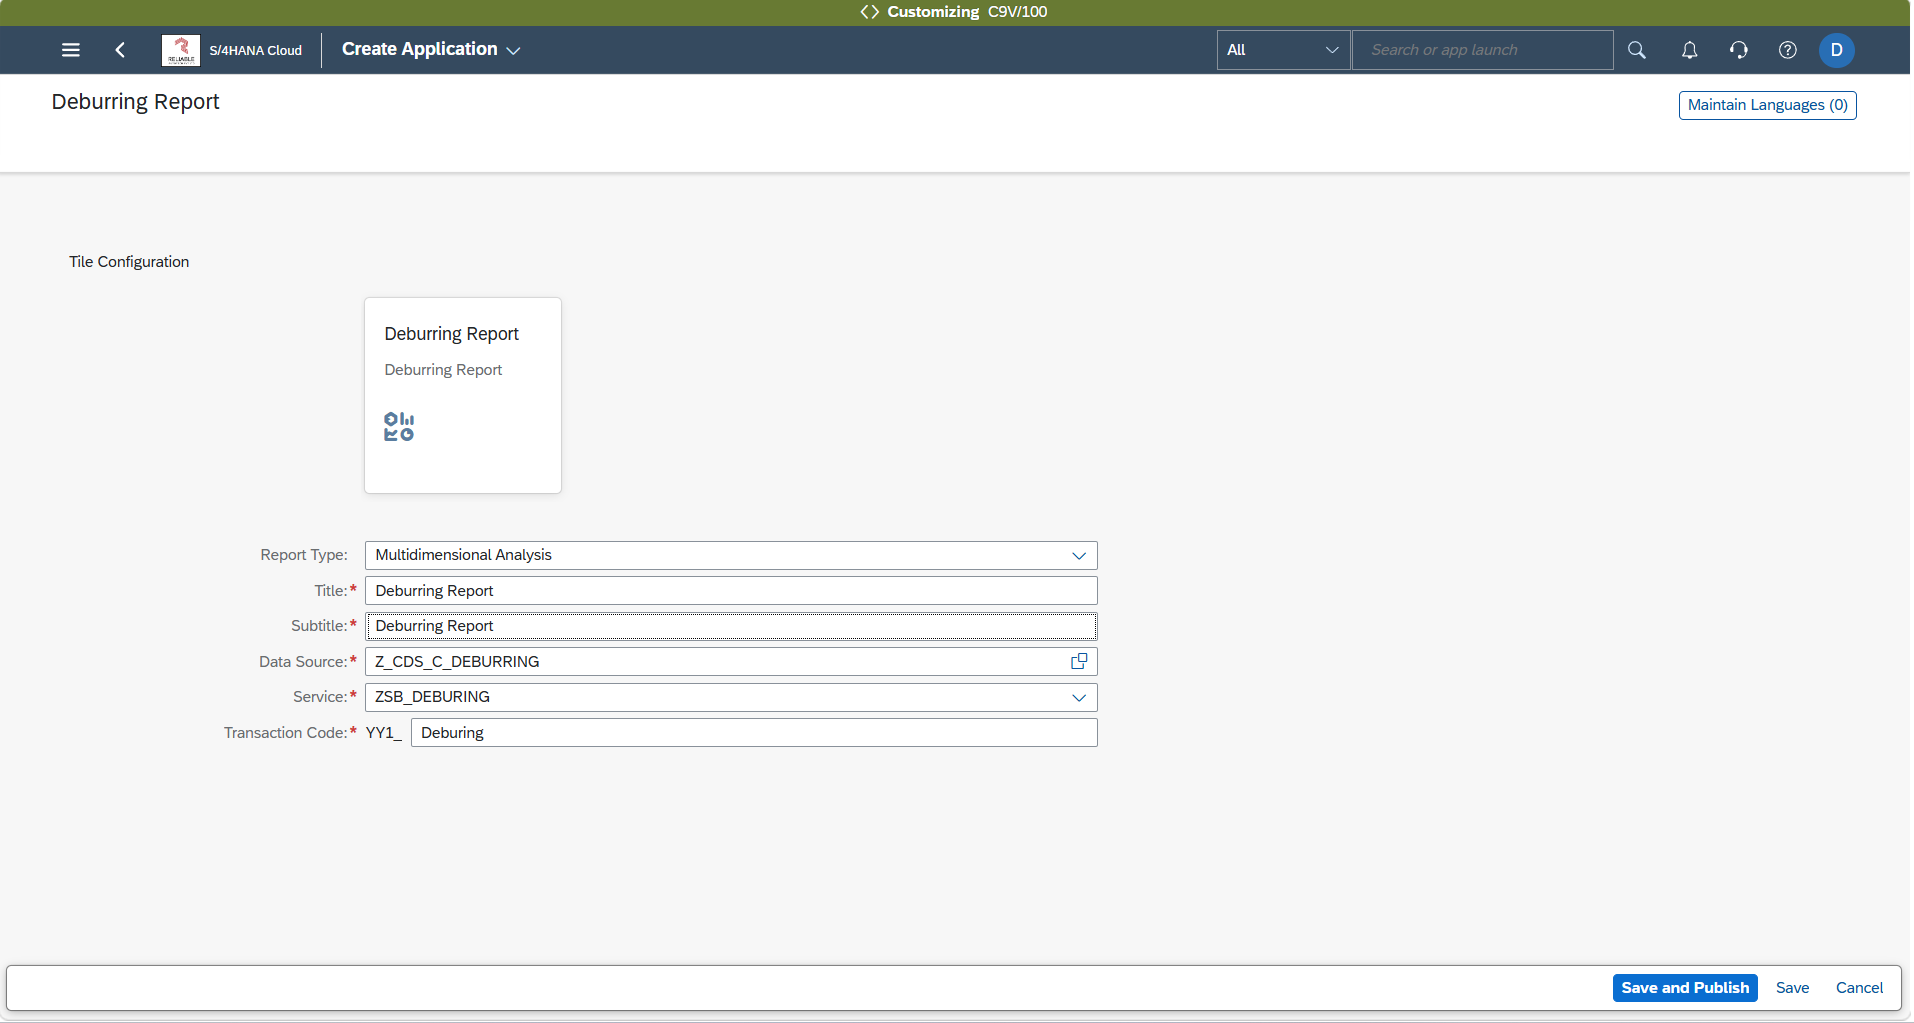
Fill in the data source and other required details, then click Save and Publish.
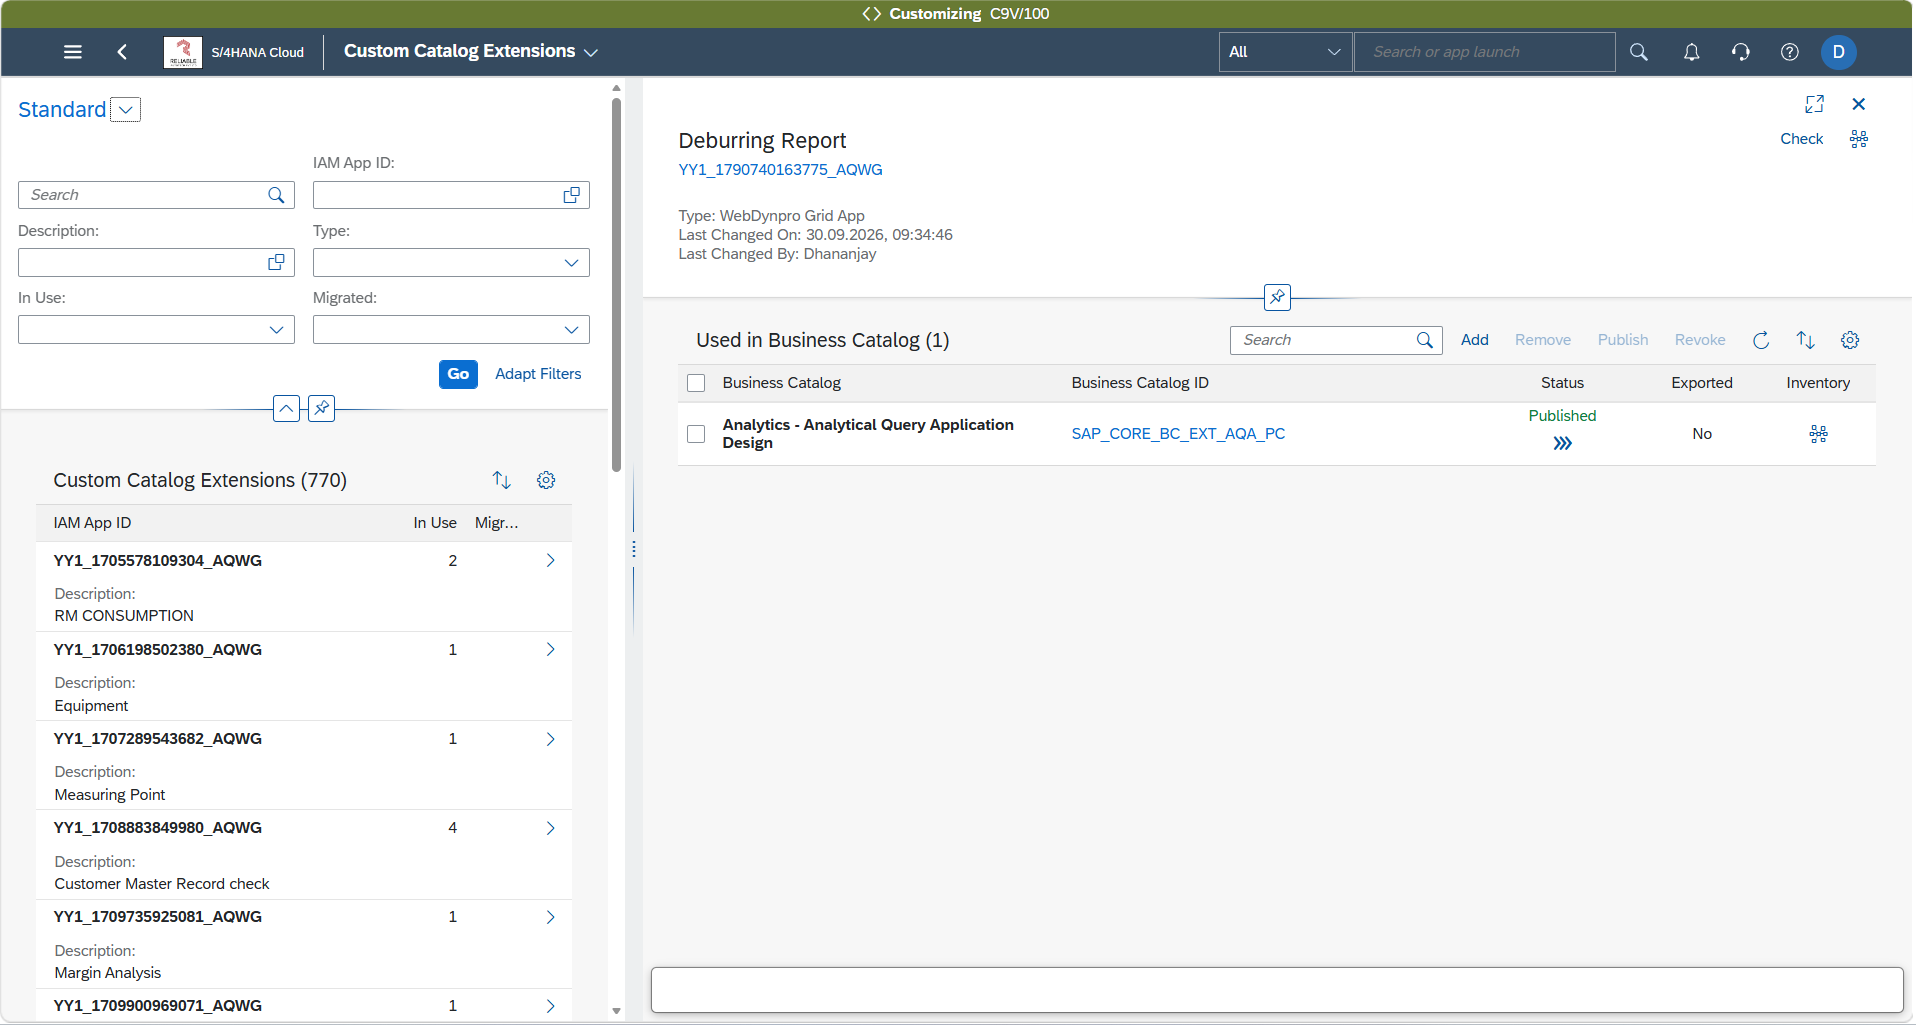
A catalog assignment dialog similar to the previous step will open. Click Add.
Search for and select the same catalog: SAP_CORE_BC_EXT_AQA_PC.
Select all entries and click Publish.
Note: Once all Customizing tenant steps are complete, transport the generated objects to PRD alongside the Developer Extensibility objects. Transport the Developer Extensibility objects first.
Step 7: Assign the Business Catalog to a Business Role in PRD
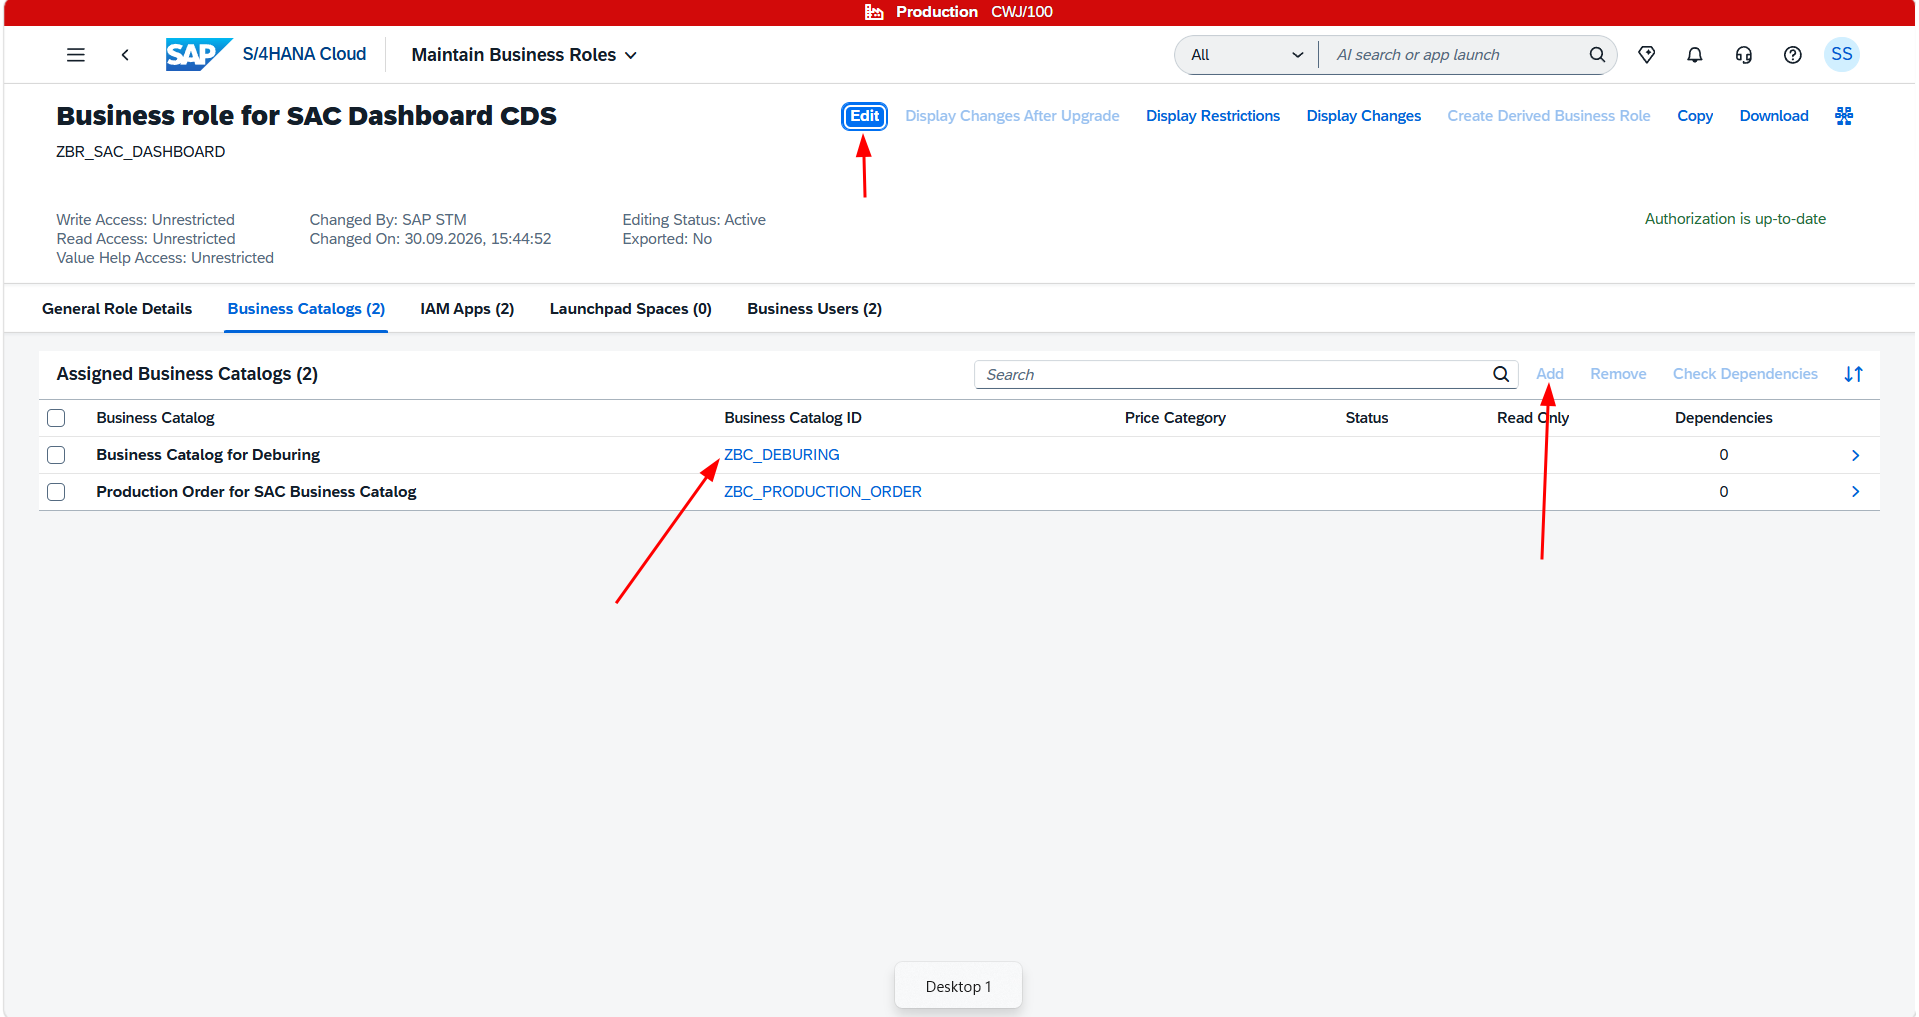
With all objects now in the Production system, navigate to the Maintain Business Roles app in PRD.
You can create a new Business Role or use an existing one. In this example, we'll use an existing role.
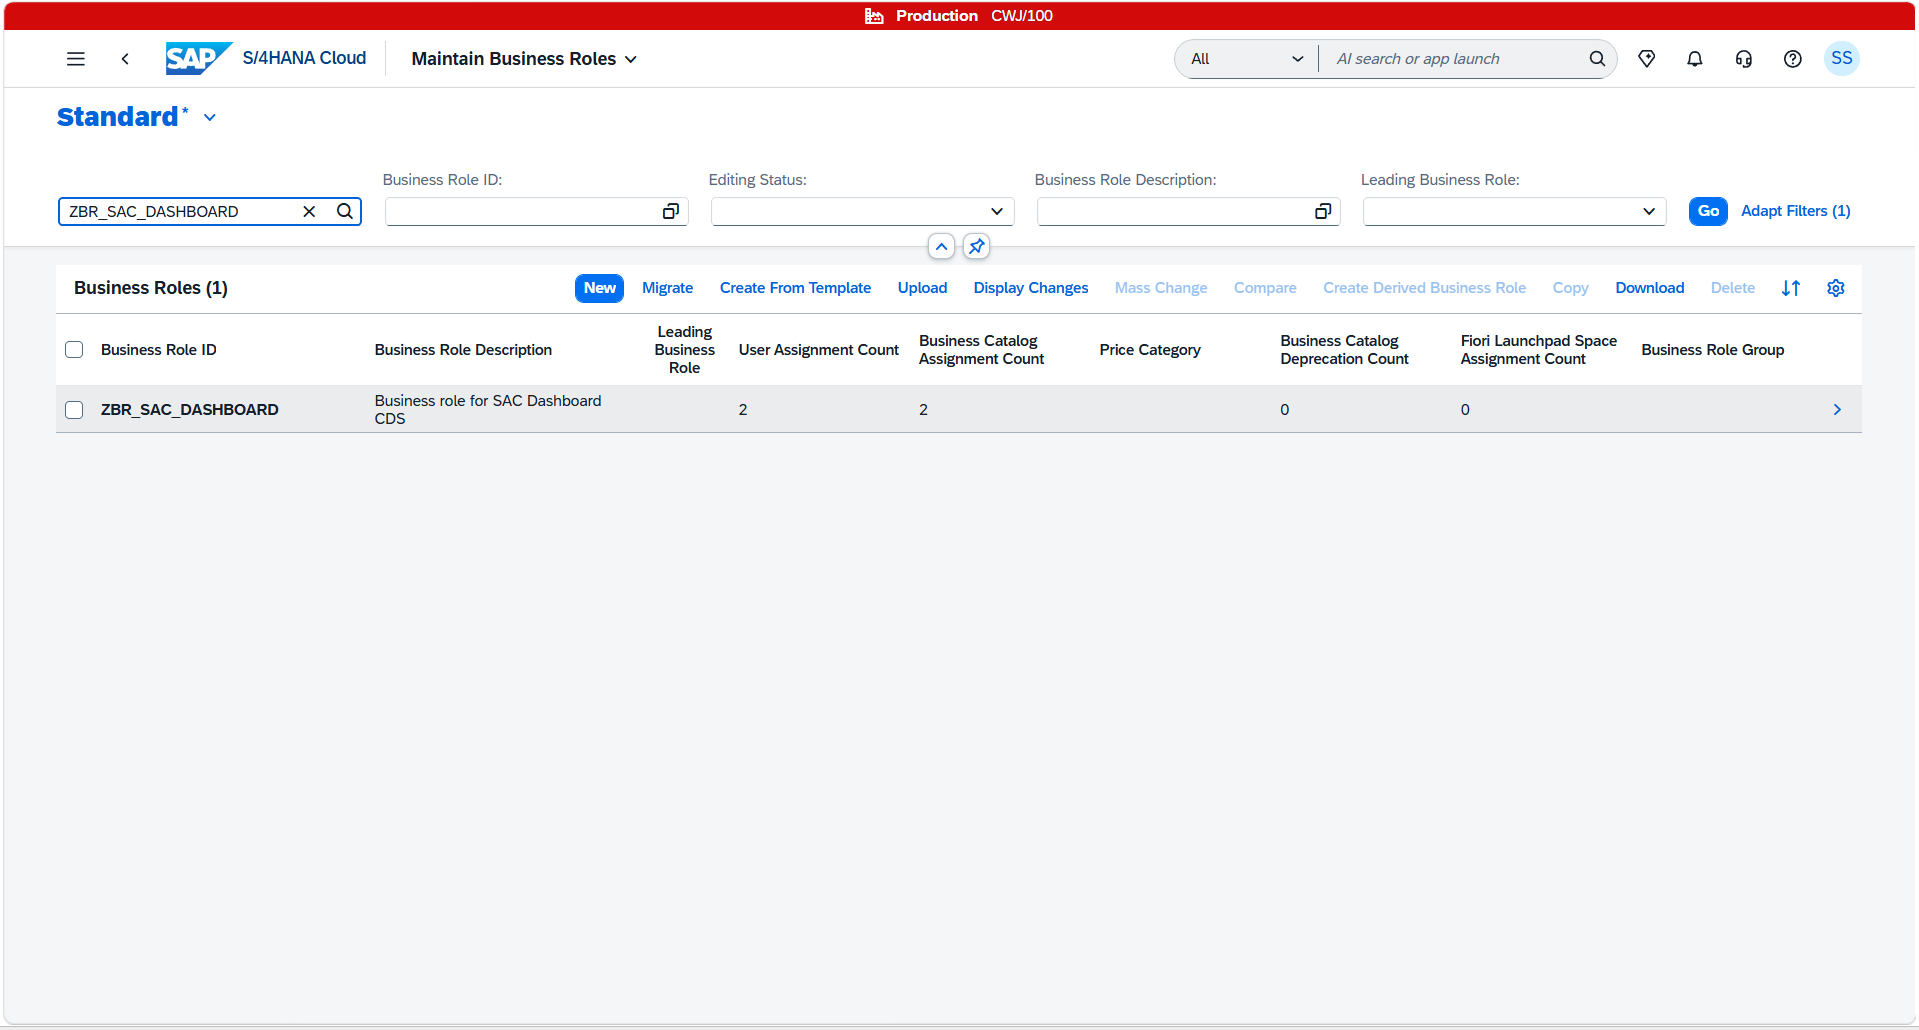
Navigate to the Business Catalogs tab within the role.
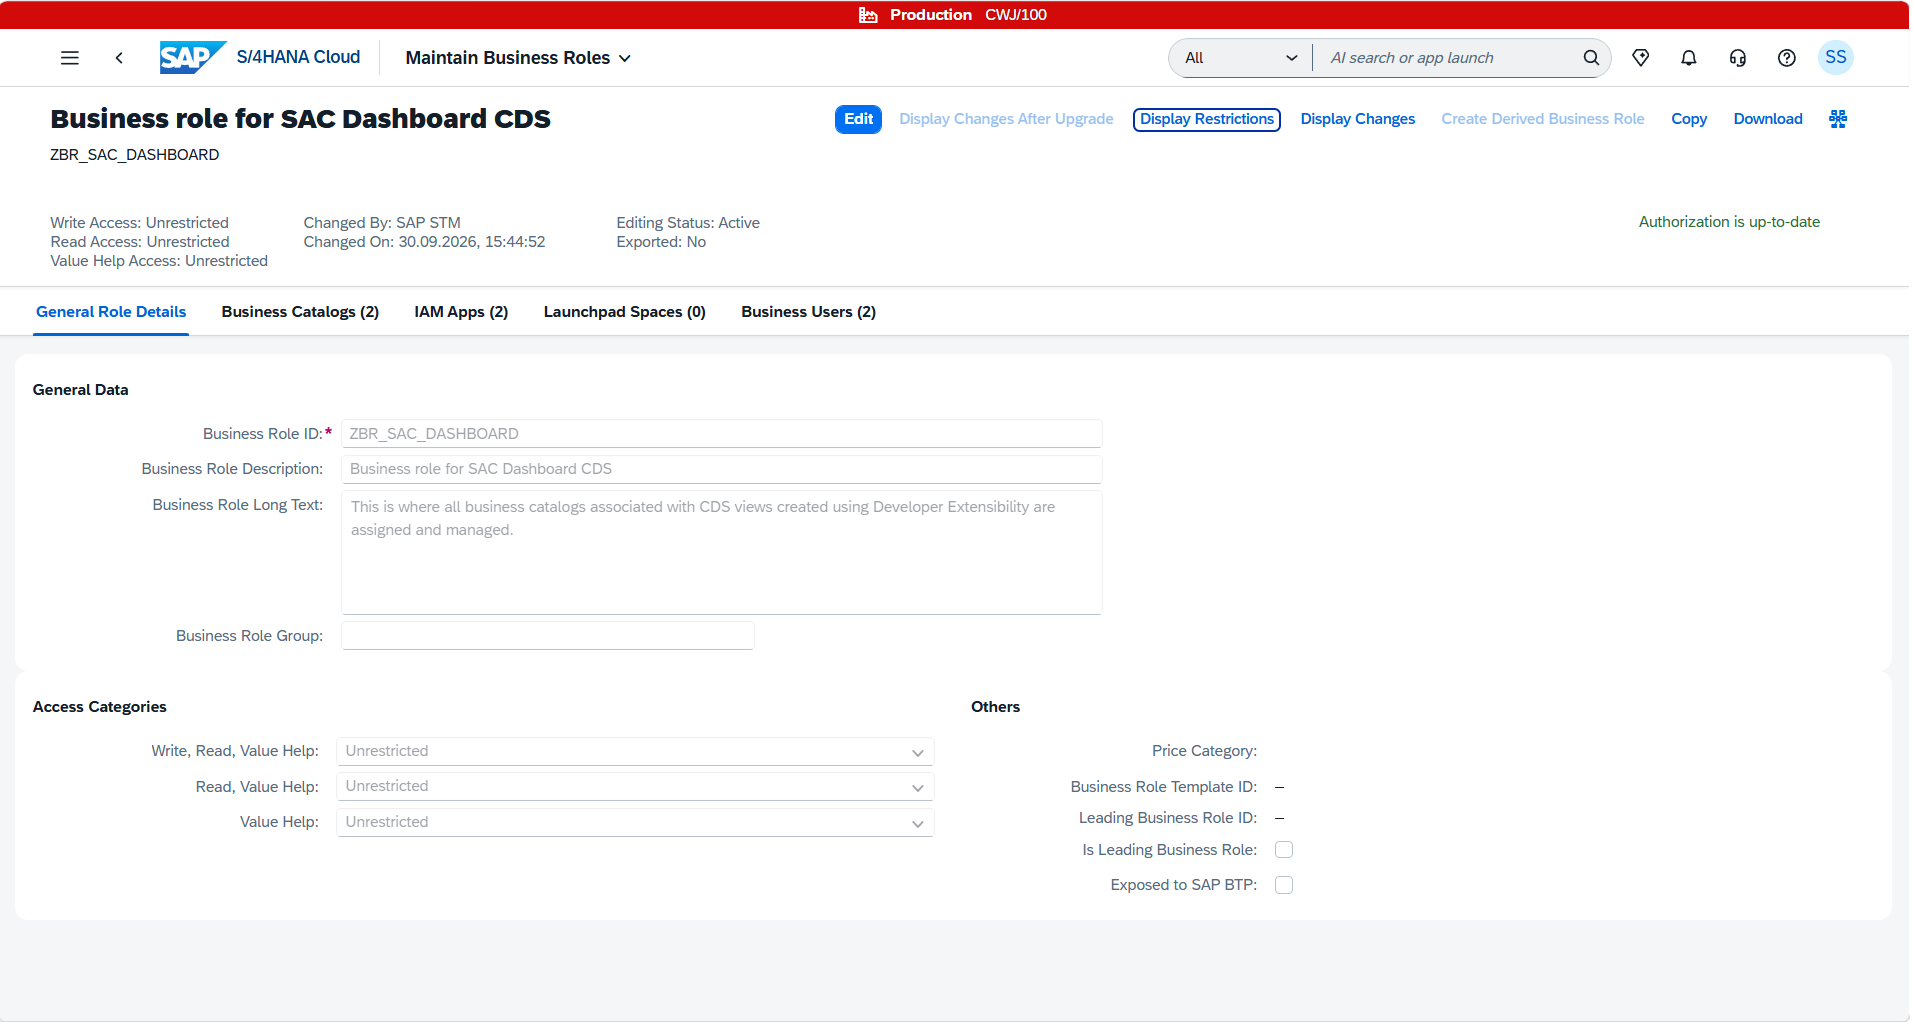
Click Edit, then Add, and search for the Business Catalog created earlier in Eclipse. Select it and save the changes.
Result
With the Business Catalog assigned to the Business Role, users with that role can now find and use the Analytical Query as a Live Data Model in SAP Analytics Cloud.
Wrapping Up
Here's a recap of everything we covered:
- Created a Service Definition with
provider contract inato expose the Analytical Query. - Created a Service Binding using the
InA - UIbinding type, generating an InA Service automatically. - Created an IAM App of type External App and linked it to the InA Service.
- Created a Business Catalog and published the IAM App.
- Released and transported all objects to PRD.
- Registered the query in the View Browser and assigned it to the
SAP_CORE_BC_EXT_AQA_PCcatalog. - Created a KPI / Report in Manage KPIs and Reports and published it to the same catalog.
- Assigned the Business Catalog to a Business Role in PRD.
Once all these steps are complete, the Analytical Query is fully accessible in the SAC Modeler and ready to be used in stories and dashboards.